


From Farm Buildings to Storage Barns: Property Clearance Challenges in Rural Austria

Eurostat reports that agriculture continues to shape large portions of Austria’s land use, making farms, barns, workshops, and storage buildings an important part of the country’s rural landscape. When these properties are inherited, modernized, or prepared for new uses, owners often face a different type of clearance project than those found in city apartments. While residential cleanouts typically involve furniture and household belongings, rural properties may contain decades of farming equipment, construction materials, spare parts, and seasonal storage. Many owners begin by arranging attic clearance services (dachbodenentrümpelung) before extending the work to larger agricultural buildings.
Property Clearance Beyond the Family Home
Urban property clearance often focuses on apartments, small houses, or office spaces where access is relatively straightforward and waste streams are easier to separate. Rural Austrian properties present a much broader scope. A single farm may include multiple barns, workshops, machine sheds, grain storage areas, livestock buildings, and outdoor storage yards accumulated over many decades.
Reviewing rural clearance projects shows that the amount of material can be significantly greater than in residential settings. Agricultural properties frequently contain retired machinery, damaged fencing, irrigation components, timber, scrap metal, old containers, unused furniture, packaging materials, and construction debris. Some buildings have remained untouched for years, requiring careful inspection before items are removed.
Experts at Austria’s Federal Ministry for Climate Action, Environment, Energy, Mobility, Innovation and Technology (BMK) note that proper waste separation improves recycling opportunities while reducing unnecessary disposal. Sorting materials at the beginning of a project often saves time throughout the clearance process.
Why Rural Properties Require Different Planning
Unlike urban homes, agricultural buildings were designed for production rather than easy access. Narrow lofts, uneven floors, large sliding doors, outdoor storage areas, and multiple detached structures create logistical challenges that influence every stage of the project.
Farm buildings may also contain materials stored for future repairs rather than immediate use. Property owners often discover stacks of timber, roofing sheets, unused bricks, wire, pipes, feed containers, or mechanical parts that were saved over many years. Determining what should be reused, recycled, donated, or discarded takes considerably longer than clearing a typical household.
Another important consideration is documentation. Families settling estates often need to identify valuable equipment before disposal. Older tractors, specialized tools, or antique agricultural items may have historical or financial value that should be assessed before clearance begins.
Common Materials Found During Agricultural Clearances
Reviews of rural property cleanouts reveal that every farm is different, yet several categories appear repeatedly.
- Obsolete agricultural machinery and equipment
- Metal parts and scrap steel
- Wooden pallets and timber offcuts
- Unused storage shelving
- Old fencing materials and wire
- Construction debris from previous renovations
- Packaging materials and plastic containers
- Household furniture stored inside barns or lofts
- Seasonal equipment that has reached the end of its useful life
Each material category may require separate handling. Metals can often enter recycling streams, while untreated wood may follow different disposal pathways than treated timber. Separating these materials early helps reduce contamination and improves recovery rates.
Environmental Responsibilities During Clearance
Environmentally responsible disposal has become an increasingly important part of rural property management. Research published by the European Environment Agency shows that improving material recovery and reducing landfill waste support broader circular economy goals across Europe.
For farming communities, this means identifying recyclable materials before transport and ensuring potentially hazardous items receive appropriate handling. Oils, fuels, batteries, chemicals, and certain construction materials require specialized collection rather than disposal with general waste.
Many agricultural buildings contain mixed storage accumulated across several generations. Carefully separating reusable equipment from recyclable materials allows more resources to remain within the production cycle instead of becoming landfill waste.
Balancing Efficiency with Preservation
One interesting difference between urban and rural projects involves preservation. Farm buildings often contain family records, handcrafted tools, vintage machinery, or traditional woodworking equipment that reflects local agricultural history.
Rather than treating every stored item as waste, experienced property reviews recommend evaluating objects for practical, historical, or sentimental value before removal begins. Families may choose to retain selected items while responsibly disposing of materials that no longer serve a purpose.
This balanced approach supports both efficient property clearance and the preservation of rural heritage. Older farming communities frequently value equipment that illustrates changing agricultural practices across generations.
Access and Safety Considerations
Storage barns and agricultural buildings present safety concerns that differ from residential homes. Large structures may have unstable flooring, poor lighting, steep ladders, elevated storage areas, or deteriorated roofing materials.
The European Agency for Safety and Health at Work (EU-OSHA) emphasizes that agricultural workplaces contain numerous physical hazards, including slips, falls, heavy lifting, and machinery-related risks. Although many rural clearance projects occur after farming operations have ended, these structural risks often remain.
Reviewing access routes before work begins helps reduce unnecessary lifting, improves transportation planning, and allows recyclable materials to be separated more efficiently throughout the project.
Supporting Sustainable Farming Communities
Property clearance contributes to more than simply creating empty space. Clearing outdated storage areas can prepare barns for renovation, improve building safety, support equipment upgrades, or allow unused structures to be repurposed for agricultural or community use.
Many Austrian rural properties continue evolving alongside changing farming practices. Buildings originally designed for livestock or traditional storage may later become workshops, machinery shelters, warehouses, or alternative business spaces. Responsible cleanout practices make these transitions easier while reducing environmental impact. Just as maintaining clean farm buildings can contribute to healthier agricultural operations, clearing unused materials and preparing structures for new purposes helps keep rural properties functional and sustainable.
Using careful sorting methods, recycling whenever practical, and following established disposal regulations benefits both individual property owners and the wider farming community. These practices encourage better resource management while helping maintain cleaner and safer rural environments.
Conclusion
Property clearance in rural Austria involves far more than removing unwanted belongings. Agricultural buildings present unique challenges because of their size, stored materials, specialized equipment, and long history of continuous use. Compared with urban homes, farm properties demand additional planning, careful evaluation, responsible waste separation, and attention to environmental regulations.
Reviewing current practices shows that successful agricultural clearances depend on thoughtful organization rather than speed alone. Whether clearing barns, workshops, lofts, or storage buildings, environmentally responsible disposal and effective material recovery help preserve valuable resources while preparing rural properties for their next chapter.
From Soil to Social: How Farmers Are Marketing Produce in Online Communities

Small-scale farms produce nearly one-third of the world’s food supply, yet many struggle to reach buyers beyond their local markets, data indicates from the Food and Agriculture Organization (FAO). This gap between production and visibility has pushed many farmers to explore digital spaces that were once considered unrelated to agriculture. As traditional channels become less predictable, online communities are emerging as new marketplaces.
Turning to Online Communities for Growth
During slow harvest seasons or periods of low demand, many farmers begin searching for ways to expand their reach. Platforms like Reddit, known for niche communities and active discussions, have become an unexpected option. Some farmers discover resources that explain how visibility works on the platform, including strategies such as how to buy upvotes for Reddit posts. While this approach raises questions, it also highlights a key reality, gaining attention online often requires more than simply posting content.
Early Challenges in Digital Marketing
Initial efforts to market produce online often face low engagement. Farmers may share photos of fresh vegetables or describe their harvest process, yet receive little response. This reflects a broader pattern. Research from the Pew Research Center shows that online content exists in highly competitive environments, where algorithms and user interaction heavily influence visibility. As a result, even high-quality posts can go unnoticed.
Learning the Language of Online Platforms
Over time, farmers who persist begin to understand how these communities operate. Timing, storytelling, and authenticity play a significant role. Instead of simply showcasing produce, they start sharing stories about their daily routines, weather challenges, and the realities of farm life. These personal insights resonate more strongly with audiences and help build connections.
However, visibility remains a hurdle. To address this, some farmers explore ways to increase engagement, including tools or services designed to boost post performance. While these methods can provide initial exposure, experts from the Digital Marketing Institute note that artificial engagement should be used carefully, as it may affect credibility if audiences perceive it as inauthentic.
Balancing Organic Growth and Promotion
Successful farmers often find a middle ground between organic growth and strategic promotion. By focusing on genuine storytelling while occasionally using methods that enhance reach, they can gradually build an audience. Increased engagement, whether through higher upvote counts or broader sharing, often leads to more inquiries and direct customer interactions.
This balance is important. Online communities reward authenticity, yet they also rely on visibility signals. Without some level of exposure, even meaningful content can struggle to gain traction. Farmers who understand this dynamic are better positioned to navigate digital platforms effectively. At the same time, broader movements such as regenerative micro-farm networks for urban food hubs show how digital connection and local production can work together to expand reach and strengthen community-based food systems.
Ethical Considerations in Digital Farming Spaces
The use of engagement-boosting strategies raises important ethical questions. Agriculture relies heavily on trust, as consumers expect honesty about food sourcing and production. Techniques that artificially inflate engagement can blur the line between marketing and misrepresentation. The American Marketing Association emphasizes that ethical marketing should prioritize transparency and avoid misleading practices.
For farmers, maintaining credibility is essential. Many choose to focus on honest communication, ensuring that their online presence reflects real experiences. By doing so, they protect their reputation while still adapting to modern marketing challenges.
From Local Markets to Digital Communities
As more farmers adopt online strategies, a hybrid model is emerging. Traditional farmers’ markets remain important, but digital platforms are becoming a significant source of demand. Online communities allow farmers to connect directly with consumers, build relationships, and even secure repeat buyers.
This shift also encourages knowledge sharing. Farmers exchange tips on improving visibility, increasing engagement, and reaching wider audiences. Some discuss ways to amplify their posts or gain traction, while others focus on refining their storytelling approach.
A New Path Forward for Farmers
The intersection of agriculture and social platforms continues to grow. For small-scale producers, success now depends on both cultivating crops and building an online presence. Strategies that improve Reddit engagement, enhance post visibility, or expand audience reach can support this transition, but they must be used thoughtfully.
Ultimately, the move from soil to social represents more than a marketing shift. It reflects a broader change in how farmers connect with the world. While promotional tools and exposure strategies can offer advantages, long-term success still relies on trust, consistency, and genuine interaction. In this evolving landscape, farmers are not just producers, they are storytellers, community builders, and digital entrepreneurs.
PRO House Washing Helps in Planting Seeds for Farming Success
Farming is not a one-time act of planting seeds and waiting for results. It is a disciplined cycle of preparation, maintenance, and protection. Fields must be cleared, soil turned, weeds removed, and tools maintained long before harvest becomes possible. PRO house washing follows the same philosophy. A healthy home environment, like fertile farmland, depends on consistent cultivation.
Laying the Groundwork for Order
Before crops can grow, farmers prepare the soil. They remove debris, test nutrients, and ensure the ground is ready to support healthy roots. Skipping this step weakens the entire season’s yield.
Professional house cleaners begin with similar groundwork. Initial deep cleaning services often involve clearing accumulated clutter, removing built-up dust, scrubbing neglected surfaces, and restoring order to overlooked areas. This foundational effort resets the home environment, much like turning the soil prepares land for planting.
Preparation matters because it determines what follows. A well-prepared home allows routines to take hold and maintenance to become manageable. Without this first phase, everyday cleaning efforts may feel ineffective, just as planting seeds in unprepared soil leads to poor harvests.
Preventing Small Problems from Spreading

Farmers understand that weeds compete with crops for nutrients, sunlight, and water. Left unchecked, they can overtake entire fields. The same principle applies inside the home. Clutter, dust buildup, and grime act like weeds, gradually spreading and disrupting the balance of the environment.
Professional cleaners remove these “weeds” before they take root. Regular vacuuming, sanitizing, and organizing prevent small messes from becoming larger, more time-consuming problems.
Tools and Technique Matter
In agriculture, maintaining equipment is critical. Tractors, irrigation systems, and harvesting tools must function properly to support productivity. Neglected equipment slows operations and increases costs.
Professional house cleaners rely on their own tools, commercial-grade vacuums, eco-friendly solutions, microfiber systems, and structured checklists. Their expertise lies not only in labor but in technique and consistency. They know which methods work best for different surfaces, how to sanitize effectively, and how to protect materials from long-term damage.
This technical knowledge mirrors a farmer’s understanding of machinery and soil management. Proper tools, when used skillfully, increase efficiency and ensure reliable outcomes.
Seasonal Deep Cleaning is Equivalent to Crop Rotation
Farmers adjust their routines with the seasons. They rotate crops, replenish nutrients, and prepare fields for changing weather conditions. This cyclical attention sustains long-term fertility. Homes also benefit from seasonal deep cleaning. These periodic resets function like crop rotation, restoring balance and preventing deterioration.
Seasonal care addresses hidden buildup that everyday cleaning may not fully resolve. By planning deeper interventions at strategic intervals, homeowners protect the integrity of their living space, much like farmers safeguard the long-term productivity of their land.
Harvesting the Results: Sustainable Growth at Home
The reward of farming is visible in the harvest, healthy crops that reflect months of preparation and maintenance. In the home, clean, organized environments support better focus, healthier routines, and improved well-being.
Professional house cleaners contribute to this outcome by cultivating order consistently. Their work reduces stress, prevents costly repairs caused by neglect, and creates spaces where families can thrive. Like farming, cleaning is an investment. The results may not appear overnight, but steady care yields sustainable and visible benefits over time.
Court Systems Become More Inclusive As ABC Translation Supports Equal Access To Justice

A fair legal system depends on more than laws and procedures. Even the strongest protections can lose their value when people cannot understand their rights, responsibilities, or the process they are facing.
As communities become more culturally diverse, services that make legal information accessible have become increasingly important. ABC Translation strives to support that need.
Walking into a courtroom where everyone speaks an unfamiliar language can be intimidating. The situation becomes even harder when legal terminology, official forms, and complicated procedures are involved.
Even fluent speakers sometimes struggle with legal documents, so the challenge can be much greater for people dealing with a second language.
Many court accessibility advocates believe that justice should never depend only on someone’s ability to speak a particular language.
This applies to migrants attending hearings, families preparing documents, and individuals trying to understand important legal decisions that may affect their future.
The Human Side Of Legal Translation
Behind every legal document is a real person with a story. A translated certificate, contract, or court record may represent someone’s family, livelihood, safety, or future plans.
This is why legal translation requires more than simply replacing words from one language with another. Accuracy, context, and cultural understanding all matter.
Community workers often notice the difference that language support creates. One worker shared that people appear more comfortable once important information is explained in a language they fully understand.
“You can see the stress leave their face when they finally understand what is being discussed,” she said.
Every profession has its own vocabulary, but legal language carries a unique responsibility. A small mistake in translation can create confusion, delay important decisions, or affect someone’s ability to properly participate in a legal process.
Creating Justice Systems That Are More Inclusive
Courts around the world are recognizing how translation services contribute to fairer access to justice. Professional translators help preserve the meaning of legal documents, conversations, and statements while reducing misunderstandings between different parties.
When people clearly understand what is happening, they are more prepared to ask questions, provide accurate information, and follow legal requirements. Better communication helps build trust between communities and legal institutions.
Technology has also improved the way people communicate across languages. Digital tools can now translate basic sentences almost instantly. However, legal matters often require judgment, experience, and careful interpretation that automated systems cannot fully provide.
A Future Of Inclusive Courts
Language services are becoming an important part of building justice systems where more people feel represented and respected. As societies continue to include individuals from different backgrounds and cultures, professional translators will remain valuable partners in keeping legal services fair.
The goal is not only to translate words but also to protect understanding. Similar to how communities share some great ideas about farming practices to help more people succeed, accessible legal communication creates opportunities for everyone to participate with confidence.
Building Strong Agricultural Communities Online
 Farming has always been built on community. Long before the internet existed, farmers depended on neighbors, local markets, and shared knowledge to survive difficult seasons. People exchanged advice about crops, weather, irrigation, livestock, and equipment. Farming was never just about growing food. It was also about cooperation, trust, and learning from one another.
Today, technology has changed the way farmers communicate. Online communities now allow people from different regions and countries to connect instantly. Farmers can discuss crop problems, share business strategies, compare equipment, and learn modern agricultural techniques without leaving their homes. Platforms like Discord have become useful spaces for these conversations because they allow organized discussions and real-time communication.
As farming communities move online, many people want to grow their servers quickly. Some search for services that claim to help them buy Discord members online to create the appearance of popularity and fast growth. Others believe that larger numbers automatically create credibility. However, just like farming itself, strong online communities cannot be built through shortcuts alone. Real growth depends on trust, consistency, and meaningful participation.
The agricultural industry teaches an important lesson about patience. Crops take time to grow. Soil must be prepared carefully. Farmers cannot rush seasons or force healthy harvests overnight. The same idea applies to online communities. Sustainable growth happens gradually through genuine interaction and shared value.
How Online Communities Help Modern Farmers
Agriculture today faces many challenges. Farmers deal with changing weather patterns, rising costs, market competition, labor shortages, and unpredictable supply chains. Technology has become an important tool for solving many of these problems.
Online farming communities allow people to exchange practical advice quickly. A farmer dealing with crop disease can ask questions and receive suggestions from others who experienced similar problems. Livestock owners can discuss animal health and feeding strategies. Equipment operators can share maintenance tips and recommendations.
These digital spaces are especially valuable for younger farmers who are comfortable using technology. Many new agricultural entrepreneurs use Discord, Facebook groups, forums, and online communities to learn business strategies and modern farming methods.
Educational content is one of the biggest advantages of online farming communities. Experienced farmers often share lessons that would normally take years to learn through trial and error. Topics may include irrigation systems, greenhouse management, organic farming, hydroponics, sustainable agriculture, or digital marketing for farm businesses.
Networking opportunities also help small farmers expand their businesses. Some communities connect farmers directly with buyers, suppliers, and agricultural consultants. Others focus on financial advice, government programs, or farming technology.
Because these communities provide real value, many server owners want to increase visibility quickly. This is why some people search for ways to buy Discord members online. They believe that larger member counts may attract more attention and encourage faster growth.
However, numbers alone do not create a healthy farming community. A server filled with inactive or fake members cannot provide useful advice or meaningful discussions. Real agricultural communities depend heavily on trust because members often exchange business information, financial advice, and practical farming techniques.
Discord also explains in its platform manipulation policies that artificially inflating engagement or membership can violate community guidelines. This means artificial growth methods may create long-term risks instead of sustainable success.
Real farmers usually recognize authenticity quickly. Agricultural discussions are practical and experience-based. People can often tell whether advice comes from genuine knowledge or shallow information. Communities built around real expertise tend to grow naturally because members find actual value in participating.
Why Authentic Growth Matters More Than Appearance
The farming industry depends on reputation. A farmer who sells poor-quality produce or dishonest products will quickly lose customer trust. Relationships matter greatly in agriculture because businesses often rely on repeat buyers, supplier partnerships, and local support.
Online communities follow the same principle. People stay active in communities where they feel respected, supported, and informed. Artificial numbers may create a temporary impression of popularity, but they rarely create meaningful participation.
A farming Discord server should focus on engagement rather than appearance. Members should feel encouraged to ask questions, share experiences, and participate in discussions. This creates stronger relationships and more valuable conversations.
Strong moderation also helps maintain quality. Agricultural discussions can sometimes involve disagreements about methods, equipment, pricing, or environmental practices. Moderators help ensure that conversations remain respectful and productive.
Clear organization improves the user experience as well. Farming communities often work best when channels are divided into useful categories such as crop farming, livestock, irrigation, machinery, sustainability, weather updates, and agricultural business advice. Organized spaces make it easier for members to find relevant information quickly.
Consistency is another important factor in organic growth. Communities become stronger when administrators regularly share updates, educational content, and discussion topics. Hosting question-and-answer sessions or live discussions can also increase engagement.
Visual content works especially well in agricultural communities. Farmers often enjoy sharing crop progress, greenhouse setups, equipment upgrades, and harvest results. Photos and videos create stronger interaction because members can learn visually from real examples.
Authenticity matters because agriculture itself is rooted in reality. Farming is practical work. Crops either grow or they do not. Livestock either remain healthy or they do not. People in agricultural communities usually value honest experience more than polished appearances.
This is why genuine participation creates stronger long-term growth than artificial methods. Members who actively contribute useful advice help communities become more trusted over time. New users stay because they see real conversations happening consistently.
Creating a Farming Community That Provides Real Value
A successful agricultural Discord server should focus on helping people solve problems and share knowledge. Communities become valuable when members leave discussions feeling more informed and supported than before.
One effective approach is creating educational resources that simplify farming topics for beginners. Many younger people are becoming interested in agriculture, especially sustainable farming and urban gardening. However, farming can feel overwhelming for newcomers because there is so much technical information to learn.
Simple explanations make communities more welcoming. Instead of using highly technical agricultural language all the time, experienced members can explain concepts using practical examples and everyday terms. This encourages participation from people with different experience levels.
Communities can also support mental health among farmers. Agriculture is physically and emotionally demanding work. Financial pressure, weather uncertainty, and isolation often create stress for farmers. Online communities give people a place to discuss challenges and support each other emotionally.
Collaboration opportunities are another major advantage. Farmers in different regions can compare techniques and discover new methods that improve productivity. Some may even develop business partnerships or supplier relationships through online networking.
A good farming community should encourage respect for different approaches. Agriculture varies greatly depending on climate, location, resources, and market conditions. Organic farmers, traditional farmers, and technology-driven farmers may all have different perspectives. Healthy discussion allows members to learn from these differences instead of creating unnecessary conflict.
Server owners should also prioritize transparency. Members should understand the purpose of the community and how discussions are moderated. Honest leadership builds stronger trust over time.
Most importantly, farming communities should focus on long-term value rather than short-term appearance. Trying to buy Discord members online may increase visible numbers quickly, but it does not create meaningful interaction or useful discussions. Real growth comes from helping people consistently.
Agriculture itself teaches patience better than almost any industry. Farmers understand that strong harvests require preparation, care, and time. Online communities grow the same way. Relationships develop gradually through trust and repeated positive interaction.
Technology continues changing the future of farming. Smart agriculture, automation, digital marketplaces, and online networking are becoming more common every year. Discord servers and online communities will likely continue playing an important role in helping farmers connect and adapt to these changes.
However, no amount of technology can replace authenticity. Farmers still value honesty, reliability, and practical experience above everything else. The strongest communities are built by people who genuinely care about sharing knowledge and helping others succeed.
The Farmer’s Guide to Truck & Tractor Windshield Replacement: Avoiding Downtime During Peak Seasons
According to agricultural safety studies, reduced visibility is a leading factor in equipment-related incidents on farms. A cracked or clouded windshield may seem minor, but during planting or harvest, it can quickly become a costly problem.
Modern farms rely on trucks, tractors, and utility vehicles that work long hours on rough terrain. When glass damage appears, delays add up fast. Professional windshield replacement services show how precision installation and vehicle-specific knowledge can help farmers restore visibility quickly and keep equipment moving when timing matters most.
Why Windshields Matter More on the Farm

Farm vehicles face conditions that city drivers rarely experience. Dust clouds, flying gravel, low branches, and constant vibration all take a toll on auto glass. Over time, small chips can spread into cracks that distort vision, especially in bright sunlight or heavy rain.
Clear visibility is essential when maneuvering large equipment near workers, animals, and crops. A damaged windshield can create glare, hide obstacles, and increase fatigue. During peak seasons, when long days are common, even minor visibility issues can raise the risk of mistakes.
Repair or Replace, Knowing the Difference
One of the most common questions farmers face is whether a windshield can be repaired or if full replacement is the better option. Small chips away from the driver’s line of sight can sometimes be fixed quickly. This approach saves money and gets vehicles back to work faster.
However, long cracks, damage near the edges, or glass that affects visibility usually require full windshield replacement. On tractors and trucks, the windshield often adds structural support to the cab. Ignoring serious damage can weaken that structure and reduce protection in the event of a rollover or collision.
Precision Installation Reduces Downtime
Professional auto glass technicians are trained to match glass to specific makes and models. This same attention to detail matters for farm vehicles. A poorly fitted windshield may leak, vibrate, or fail under stress, leading to repeat repairs and more downtime.
Quality installation includes proper sealing, correct curing time, and secure placement. On dusty roads and open fields, a tight seal keeps dirt and moisture out of the cab. Farmers benefit from the same standards used in professional auto services, applied to the realities of agricultural work.
Timing Is Everything During Peak Seasons
Planting and harvest windows are short. Equipment breakdowns during these periods can affect yields and delivery schedules. Fast response matters, especially when multiple vehicles are part of daily operations.
Many professional glass services offer same-day or mobile options when conditions allow. For farmers, this approach reduces travel time and keeps machinery close to the field. Addressing glass damage early prevents small issues from becoming major interruptions later in the season.
Safety and Confidence Behind the Wheel
A clear windshield improves confidence for anyone operating heavy equipment. Drivers can better judge distances, spot hazards, and work efficiently in changing weather. This confidence reduces stress during long shifts and helps crews stay focused on the job.
Using certified materials and proper installation methods ensures that trucks and tractors perform safely on rural roads and uneven ground. These standards protect both operators and the equipment they rely on every day.
Planning Ahead Pays Off
Preventive checks can save time and money. Regularly inspecting windshields before peak seasons allows farmers to schedule repairs or windshield replacement at a convenient time. Pairing this with microclimate crop planning tools, like diversified small farm calendars and crop maps, helps you coordinate maintenance with field work so both machinery and planting schedules stay aligned. Planning ahead avoids emergency fixes when workloads are highest.
Farms that treat glass maintenance as part of routine equipment care often see fewer delays. Clear visibility, proper fit, and dependable materials all contribute to smoother operations from field to road.
Conclusion
Farming depends on efficiency, safety, and timing. A well-installed windshield supports all three by protecting drivers and keeping equipment operational. Knowing when to repair and when to choose windshield replacement helps farmers avoid unnecessary downtime and stay productive during the seasons that matter most.
Mapping Microclimates for Precise Succession Planting
Mapping microclimates enables precise succession planting by locating where and when crops will thrive across a field, allowing growers to shift planting dates, varieties, and management to extend harvests and increase yield stability.
What is succession planting and why map microclimates?
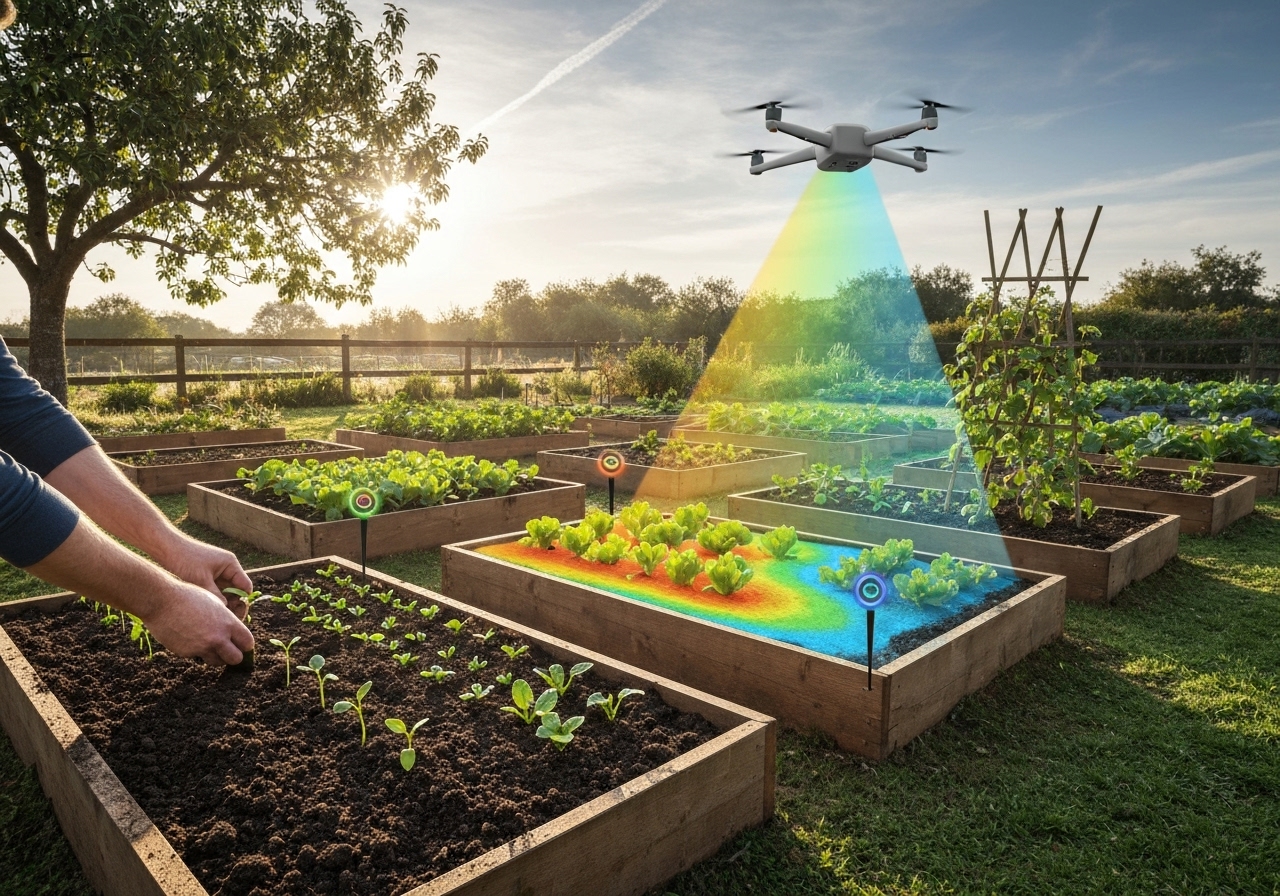
Succession planting is planting the same crop or complementary crops in sequence to provide continuous harvests; mapping microclimates refines succession planting by locating pockets of heat, cold, wind, slope, and soil moisture so you plant each succession where it will succeed.
How does mapping change simple succession plans?
Mapping converts blanket planting windows into site-specific windows that extend harvests by 2 to 8 weeks in many systems. Extension programs such as university cooperative extensions and USDA guides document consistent gains from microclimate-aware planting.
How do you identify microclimates on a farm?
Identify microclimates by combining observation, simple sensors, and mapping. Walk fields at multiple times, note frost pockets, hot ridges, wind corridors, water seepage and shade. Install temperature loggers and soil moisture probes in representative spots for at least one season.
What low-cost sensors measure useful variables?
Use temperature loggers (e.g., USB thermometers), soil moisture sensors (capacitance or TDR), and leaf wetness sensors. Add light meters for shaded niches. Use smartphone-connected sensors to reduce labor and collect time-stamped data.
How do you convert observations into a microclimate map?
Digitize observation points using a smartphone GPS or a handheld GPS, then plot points in a simple GIS or even Google My Maps. Interpolate zones by comparing elevations, proximity to windbreaks, and recorded extremes to draw microclimate polygons.
What are the common microclimate zones to map?
Map these functional zones: frost-prone hollows, early-warm south-facing slopes, late-warm north-facing cold pockets, high-wind corridors, irrigated moist strips, and shaded understory edges. Each zone requires different crop timing and variety choices.
Which microclimate attributes most affect planting date?
Temperature extremes, soil moisture, frost dates, and cumulative heat (growing degree days) most affect planting date. Use growing degree day calculations by zone to refine sowing and transplant dates.
How do you build a succession calendar from microclimate maps?
Build a succession calendar by assigning crops and cultivar maturities to each microclimate polygon, then stagger plantings by germination and maturity requirements so harvests overlap and supply remains steady.
What are the steps to create a microclimate-based succession calendar?
Follow these steps: 1) Map microclimate polygons, 2) Record local last and first frost dates by zone, 3) Calculate GDD (growing degree days) per zone, 4) List crop windows and maturity days, 5) Assign successive planting dates and areas, 6) Schedule season extension actions where needed.
How to calculate planting dates using GDD and maturity days?

Calculate cumulative GDD from your zone data and match cultivar heat requirements. Subtract seed-to-harvest days from target harvest windows to find planting windows. Use zone-specific GDD rates to adjust planting by microclimate.
Which crops and sequences work best for succession planting?
Use short-season crops and multiple cultivars for continuous supply. Typical sequences: early salad greens -> mid-summer brassicas -> late-season root crops; early baby greens -> second sowing for full-size greens; spring brassicas -> fall brassicas in cooler pockets.
What crop families and maturities should be prioritized?
Prioritize families with varied maturities and temperature responses: Brassicaceae (quick to cool), Asteraceae (lettuce series), Chenopodiaceae (beets, chard), Cucurbitaceae (summer crops in warm zones), and Fabaceae (successional peas/beans). Use early, mid, and late-maturing cultivars to extend harvests.
How do you integrate crop rotation with succession planting?
Integrate rotation by mapping both microclimates and rotation blocks so successions do not repeat the same family on the same soil within the rotation interval. Use rotation to manage pests, diseases, and soil fertility while maintaining succession timing.
Where to find rotation frameworks that work with succession planning?
Use adaptive rotation frameworks that group by functional roles: cash crops, legumes, deep-rooted restorative crops, and cover crops. Plans like adaptive low-input rotation plans help align rotation blocks with succession timing.
What season-extension tools help extend successions by microclimate?
Use row covers, low tunnels, high tunnels, windbreaks, and mulches to shift microclimate windows. Row covers can advance harvest by 2 to 3 weeks; tunnels can extend production 4 to 12 weeks depending on local conditions.
How to choose season-extension by microclimate zone?
Place cold-sensitive crops in warm polygons or under tunnels; place frost-tolerant late crops in frost pockets if harvest is after entry into hard frost. Use mulches in hot, dry zones to preserve soil moisture for late successions.
How do soil health and microbial management affect succession planting?
Soil health determines crop resilience across successions. Improve structure, organic matter, and microbiome to reduce transplant shock, speed germination, and increase nutrient turnover between successions.
Which soil microbial strategies help quick successions?
Use cover crops for quick nutrient cycling, targeted compost teas for microbial inoculation, and seed or transplant microbial coatings to accelerate establishment. See research on microbial consortia for targeted soil enrichment in successive plantings and designing on-farm microbial consortia for practical methods.
How to set up irrigation and fertility for staggered plantings?
Set irrigation zones to match microclimate polygons so differing moisture needs are met. Use fertigation or side-dress schedules keyed to each succession batch. Install moisture sensors across zones to avoid over- or under-watering.
How to schedule fertilizer for successive crops?
Apply baseline fertility based on soil tests, then apply targeted side-dress for nitrogen-hungry successions. Use legume successions to biologically fix N between heavy feeders.
How much labor and cost does microclimate mapping add?
Labor investment is front-loaded: mapping takes 1 to 2 seasons of observation and sensor logging. Costs can be as low as a few hundred dollars for basic sensors or several thousand for automated sensor networks; savings come from reduced crop loss and higher marketable yields.
What are recommended low-cost starting steps?
Begin with walking maps, 4-6 temperature loggers, and 2-4 soil moisture probes. Use free mapping tools and spreadsheets to create a succession calendar. Expand sensors only after you see actionable variation between zones.
What tools and templates help implement microclimate succession plans?
Use a calendar-based spreadsheet that lists microclimate zones, crop, variety, planting date, expected harvest, and required interventions. Add a field map layer to your farm plan and update each year using recorded GDD and frost data.
Can farm management software help?
Yes. Use basic tools (Google Sheets) for initial plans and scale to farm management software for automated reminders, sensor integration, and record-keeping when operations grow.
How to test and iterate your succession plan?
Test by running parallel plantings across two distinct microclimate polygons for the same crop. Record emergence, maturity, pest pressure, and yields. Adjust planting dates, varieties, and inputs based on measured differences.
What metrics matter most for iterative improvement?
Track emergence percentage, days to maturity, marketable yield, pest/disease incidents, and labor per harvest. Use those metrics to decide whether a zone should host an earlier or later succession next year.
What common mistakes reduce success of microclimate succession planting?
Common mistakes include mapping only once, ignoring soil variability, forcing a single calendar across the farm, and failing to adapt to year-to-year climate shifts. Avoid these by collecting multi-season data and incorporating rotation constraints.
How to avoid overcomplicating maps?
Keep maps functional. Limit polygons to 6 to 12 meaningful zones. Use zones that change management (planting date, variety, or protective structure) rather than overly granular divisions that add no action.
How have other farms applied microclimate mapping to succession planning?
Case examples show small farms extending salad green production by 6 weeks and doubling market supply in shoulder seasons by moving late-sown crops to warm microclimate ridges and using low tunnels in cool pockets. Practical guides and calendars such as the diversified small-farm calendar model document stepwise implementation.
What research supports microclimate-based successions?
Extension programs and USDA resources show predictable frost and GDD differences across short distances. University trials consistently report yield and harvest-window extensions from site-specific planting adjustments.
What is a sample microclimate succession calendar for temperate small farms?
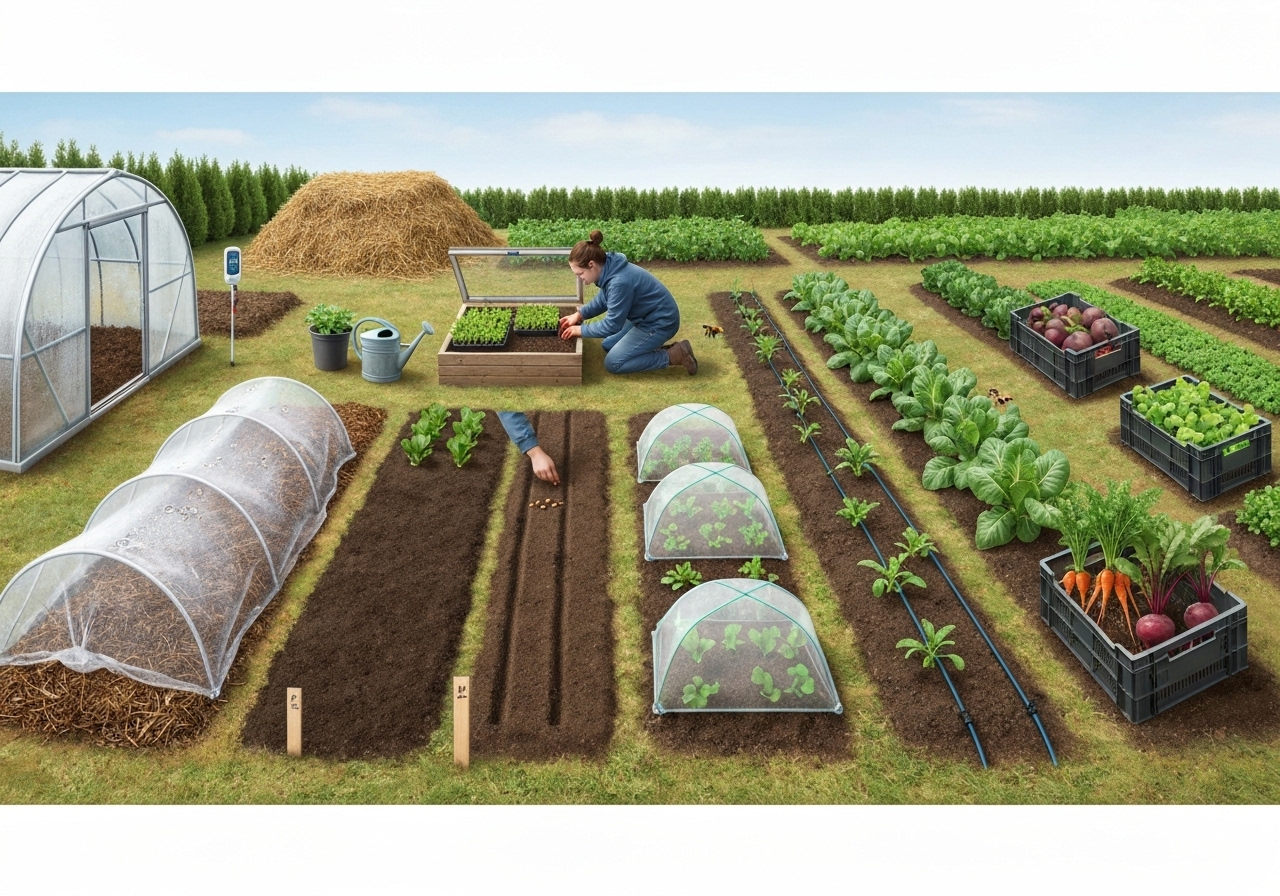
Sample calendar: early-spring (warm ridge): sow spinach and early lettuce in late March; mid-spring (benchland): direct-sow carrots mid-April; summer (lowland irrigated zones): transplant tomatoes late May; late-summer (shaded east edge): sow fall brassicas late July for fall harvest in September; fall (warm south slope): seed quick-maturing salad greens in August for fall supply.
How to translate sample calendar to your farm?
Translate the sample by substituting local last frost, local GDD rates by zone, and cultivar days-to-harvest. Use trial blocks each year to validate and refine dates.
How to combine microclimate mapping with other farm innovations?
Combine mapping with regenerative practices such as targeted cover cropping, microbial seed or soil amendments, and irrigation zoning. Integrate mapping outcomes into broader climate resilience strategies and market planning.
Which integrated practices add the most value?
Integrate mapping with microbial enrichment and cover crops to speed succession transitions. For design examples and microbial mapping strategies see posts on on-farm microbial consortia and field-scale microbial mapping.
What are quick-start checklists for the first year?
Quick-start checklist: 1) Walk the farm and mark frost pockets, hot spots and shade, 2) Deploy 4-6 sensors across distinct spots, 3) Collect data through key transition months, 4) Create 6 microclimate polygons, 5) Draft a succession calendar assigning varieties and planting dates by polygon, 6) Run 2 pilot successions and record outcomes.
When should you re-map?
Re-map after major changes: new windbreaks, irrigation shifts, terracing, or after two seasons of different weather trends. Update annually for small adjustments based on last season’s data.
What final practices ensure long-term success of microclimate-informed succession planting?
Adopt continuous monitoring, keep short feedback loops, and align market windows with mapped production capacity. Train staff to recognize microclimate signals, and maintain records to convert site knowledge into reliable, scaled succession systems.
Relevant further reading: microclimate zoning approaches to boost yields on small farms and microclimate mapping for urban regenerative farming provide complementary mapping methods and scaling strategies.
Compact Harvest Kits: Tools & Tricks for Micro-Farms
Compact Harvest Kits: Tools & Tricks for Micro-Farms
Compact harvest kits give micro-farms the tools and protocols to harvest quickly, protect crop quality, and reduce labor costs. This article explains how to build, use, and maintain compact kits tailored to specific crops and micro-farm workflows, with practical checklists, cost guidance, and adoption tips backed by extension and industry sources.
What is a compact harvest kit and why should a micro-farm use one?
A compact harvest kit is a portable, organized set of harvesting tools and post-harvest supplies sized for plots under 5 acres. Kits increase speed, consistency, and product quality.
Kits reduce walking time, protect crops from damage, and standardize sorting and cooling at harvest. Extension publications from USDA and ATTRA report yield and quality benefits when small-scale operators standardize harvest equipment and handling (USDA 2019; ATTRA 202).
Which tools are essential in every compact harvest kit?
Essential tools give a crew the ability to cut, collect, transport, and protect crops immediately after harvest.
Core cutting and shearing tools
Core cutting tools allow precise harvest and minimize plant damage.
- Harvest knives: one 6-8 inch serrated and one straight blade for different crops.
- Pruning shears: bypass pruners (for stems) and anvil pruners (for woody stems).
- Harvest snips or herb scissors for small-stemmed greens and herbs.
Containers and collection aids
Containers protect product and make transport efficient.
- Foldable harvest bins: 18-24 liter collapsible crates for field collection.
- Mesh or ventilated totes for greens to avoid sweating.
- Pallet-sized stackable bins for transfers to packing areas.
Transport and ergonomics
Transport items reduce back strain and speed movement from field to pack shed.
- Two-wheel harvest cart or lightweight dolly sized for rows.
- Shoulder straps or padded harnesses for carrying heavier bins.
- Rolling harvest sled for dense crops like root vegetables.
Post-harvest quality tools
Post-harvest tools preserve quality during the critical first hour after cutting.
- Insulated cooler boxes with ice packs for cool-chain starts.
- Small hand sprayers for pre-cool misting of delicate crops.
- Sanitizer wipes and food-grade wash tubs for immediate cleaning.
How should tools be chosen for different crop types?
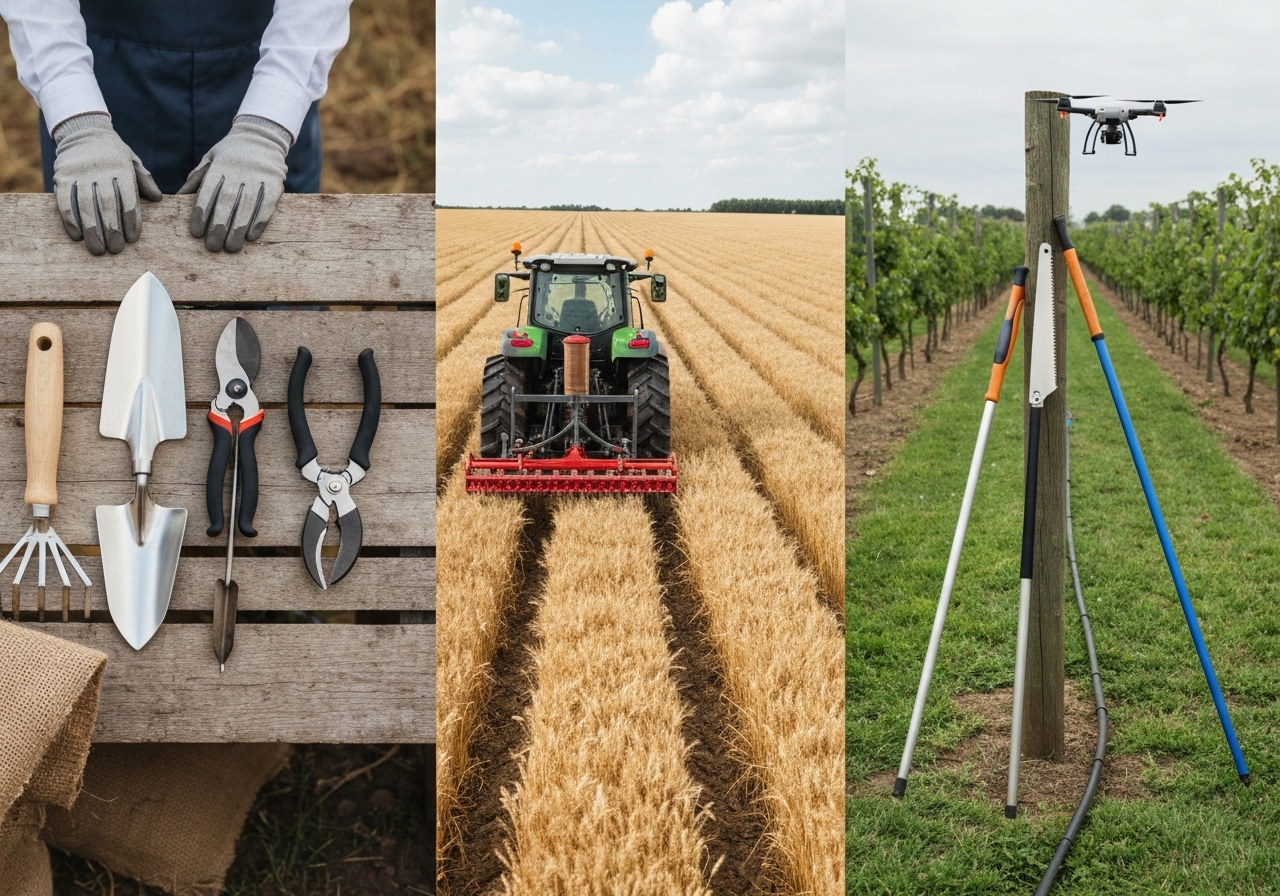
Choose tools based on crop structure, harvest frequency, and desired pack condition.
Leafy greens and herbs
Select snips and shallow bins to avoid crushing leaves. Use ventilated totes and immediate shade or cooling. Cornell and UC Davis extension recommend harvest within 1-2 hours of cooling for salad greens to retain shelf-life (Cornell 2018; UC Davis 2017).
Root vegetables
Choose knives and root lifters that minimize skin breaks. Use rigid crates with padding and avoid stacking more than two high to reduce bruising.
Fruits and soft-skinned produce
Equip kits with clippers and padded picking bags. Use small lidded boxes to prevent fruit abrasion and protect from sun. Field shade cloth over harvested fruit extends quality until cooling.
Herbs and cut flowers
Prioritize sharp sterilized snips, pre-cooled holding tubs, and clean water buckets with a little bleach or approved floral preservatives for stems (FAO and floriculture guides).
What does a compact harvest kit checklist look like?
Use a checklist to standardize packing each morning and to restock after each harvest.
Standard single-kit checklist
- 1 serrated harvest knife
- 1 straight-edge knife
- 1 pair bypass pruning shears
- 3 pairs harvest snips
- 2 collapsible ventilated crates
- 1 insulated cooler with 2 ice packs
- 1 hand sanitizer bottle and wipes
- 2 pairs nitrile gloves
- 1 hand broom and small dustpan
- 1 spray bottle (water)
- 1 waterproof harvest clipboard with harvest log
Add-on items by crop
- Herbs: mesh bags and string for bunching
- Roots: padded crates and root lifters
- Fruits: padded lidded trays and picking aprons
How to organize kits to maximize harvest speed?
Organize kits so each tool is accessible and returned to a fixed slot. Label compartments and use color-coded crates to match crop types.
Place cutting tools on the dominant hand side, bins at waist height, and cooling items near the exit path from the bed. Standardize placement across all kits to reduce decision time during busy harvest windows.
What are ergonomic best practices for micro-farm harvesting?
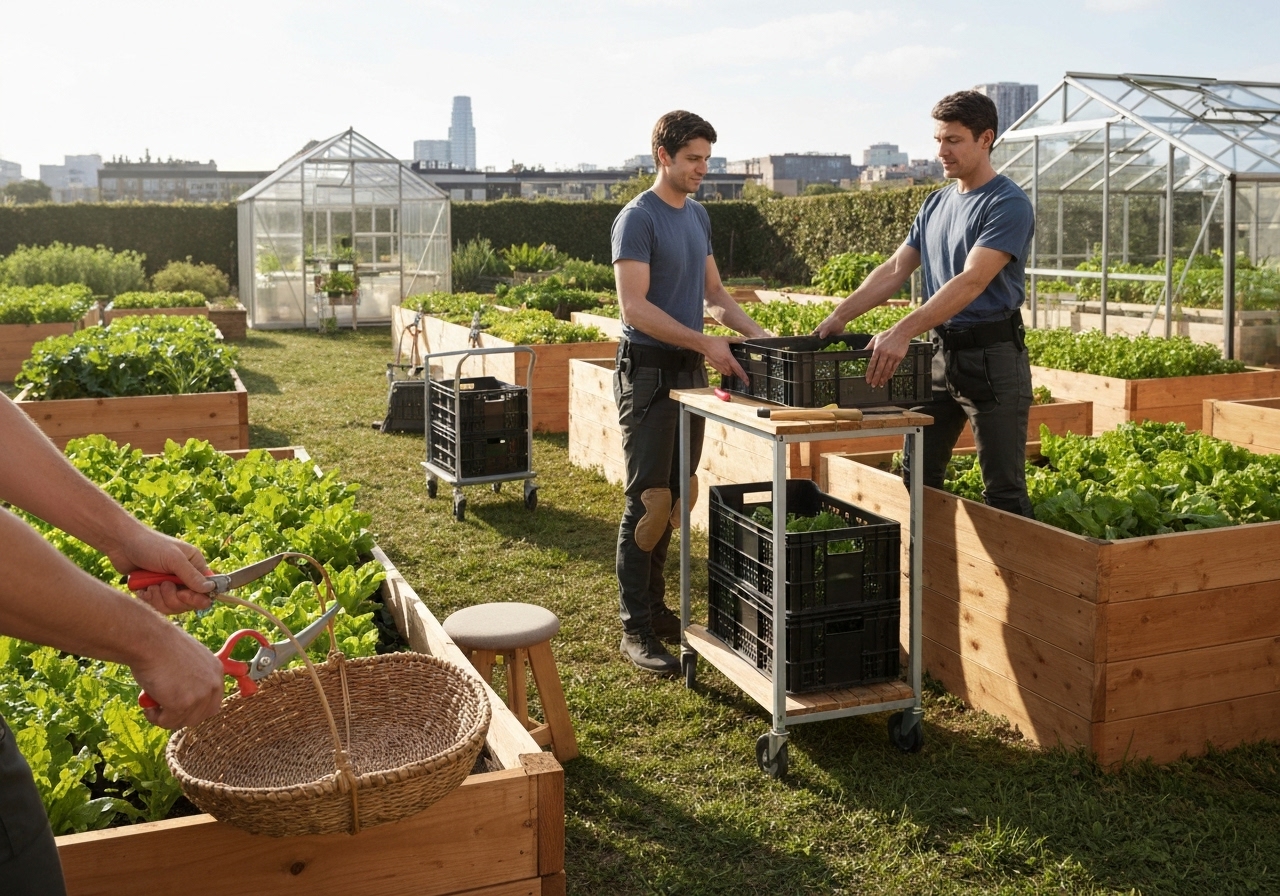
Use ergonomic practices to cut labor injuries and improve throughput.
- Use padded handles and rotate short harvest tasks every 15-30 minutes.
- Use harvest stools for low crops to maintain neutral spine posture.
- Use harnessed carts to transpose heavy loads instead of manual lifting.
Occupational safety extensions recommend routine tool maintenance and job rotation to limit repetitive strain injuries (OSHA agricultural guidance, state extension services).
How should a micro-farm handle post-harvest cooling and sanitation?
Start cooling within 30-60 minutes of harvest for perishable crops. Immediate cooling preserves quality and reduces microbial growth.
Quick cooling methods
- Hydrocooling: submerge root and dense crops in cool water for brief periods.
- Forced-air cooling in a shaded pack area with fans and mesh tables.
- Insulated coolers and ice packs for direct field holding.
Sanitation steps

- Sanitize knives and shears between variety or block switches with 200 ppm chlorine or approved sanitizer.
- Wash bins and crates daily; use food-grade detergents and allow full drying.
- Train staff on handwashing and glove use; use hand sanitizer as adjunct, not replacement.
University of California and Cornell extension resources provide detailed sanitation protocols for small-scale pack operations (UC Davis 2017; Cornell 2018).
How do harvest kits fit into harvest scheduling and crop maps?
Integrate harvest kit deployment with crop maps and daily harvest routes to save labor and fuel. Map morning microclimates and pick routes to match cooling needs and crop maturity.
Consult diversified crop maps to plan which kits go to which beds, and to optimize crew assignments. Planning ties to planting and rotation choices to avoid congestion and ensure continuous harvest windows; see strategies in diversified small-farm crop maps for scheduling ideas.
How should compact kits support integrated crop rotation and soil health goals?
Kits should be designed to avoid cross-contamination between cover crop areas, seed increase blocks, and market beds. Use dedicated bins and clearly labeled tools when working in fields under regenerative or low-input rotations.
Link harvest timing and equipment use to crop rotation plans to preserve seed stock quality and prevent volunteer contamination. Adopting harvest protocols that align with rotation guidance improves long-term soil and crop outcomes; see adaptive rotation planning for implementation methods.
What small mechanization options complement compact harvest kits?
Small mechanization reduces repetitive tasks and speeds bulk harvest without large capital cost.
Light motorized aids
- Electric harvest scooters or mini-carts for quick crew movement.
- Battery-powered shears for dense hedgerow or trellised crops.
- Walk-behind single-row harvesters for small root and bulb crops.
Automation and future tools
Consider pilot tools like robotic pollinators and micro-harvest robotics for high-value specialty crops; these tools are entering small-farm use and can be paired with compact kits for finishing tasks (regenerative micro-harvest innovations).
How much do compact harvest kits cost and what is the ROI?
Estimate costs by itemizing tools. A basic single-kit build typically costs 120-240 USD. Adding cooling, carts, and extra crates raises cost to 400-1,000 USD per kit.
Calculate ROI by measuring reduced harvest time, decreased product loss, and improved pack quality. Case studies in small-farm extension show payback within 1-3 seasons when kits cut labor hours by 15-30% and reduce post-harvest losses (ATTRA 202; Practical Farmers of Iowa reports).
How to train crews to use and maintain compact harvest kits?
Train crews with short, repeatable modules: daily pre-harvest checklist, tool sanitation, ergonomics, and packing protocols.
- Use a 10-minute morning briefing and a single poster checklist at the pack station.
- Run shadow shifts: new workers shadow experienced pickers for 2-3 harvest cycles.
- Perform weekly maintenance checks and a monthly inventory.
Keep a simple harvest log on each kit with fields for time harvested, crop, bin counts, and any quality notes. That data supports scheduling and continuous improvement.
What maintenance and sanitation schedule should farms follow?
Follow a daily-clean, weekly-inspect, seasonal-overhaul routine for all kit components.
- Daily: wash and air-dry crates, sanitize knives and shears, check ice packs.
- Weekly: inspect cart wheels, straps, and cooler seals; sharpen blades.
- Seasonal: replace worn harnesses, deep-clean insulated boxes, paint or mark repairs on crates.
Document maintenance tasks on a simple sheet attached to the kit. Proven farm management guides recommend this approach for reducing downtime and extending tool life (state extension service recommendations).
Which simple innovations and tricks improve kit performance?
Apply small, low-cost upgrades to get immediate benefits.
- Use magnet strips inside kits to hold metal tools and reduce loss.
- Add a mesh shade screen to protect harvested tubs in the field.
- Attach a small whiteboard to each kit for harvest counts and notes.
- Use colored tapes to match kit color to specific crop groups to prevent cross-contamination.
How to scale compact kits as the farm grows?
Scale by replicating kits for parallel crews and by tiering kits by task: cutting kits, packing kits, and transport kits.
Estimate crew size x peak harvest blocks to set initial kit count: 1 kit per picker plus 1 shared transport kit per 2-3 pickers is a common configuration for operations under 5 acres.
What policies and recordkeeping support compact kit use?
Recordkeeping ensures traceability and supports food safety audits.
- Keep a harvest log with dates, crew names, field blocks, and bin counts.
- Record sanitizer concentrations and wash water changes.
- Keep tool maintenance and calibration records for mechanized aids.
These records assist compliance with local food safety requirements and help claim product quality in direct-market sales (state cooperative extension guidance).
Which resources and further reading validate these practices?
Consult extension and industry sources for detailed protocols: USDA small-farm guides, ATTRA sustainable agriculture publications, Cornell and UC Davis post-harvest fact sheets, and FAO small-scale handling recommendations. Practical case studies and peer-reviewed articles on small-scale post-harvest strategies provide data on quality retention and labor savings (USDA 2019; ATTRA 202; Cornell 2018).
What are quick-start next steps for a micro-farm building its first kit?
Follow these actions to get a working kit within a week.
- Choose top three crops to prioritize for kit design.
- Use the standard single-kit checklist and assemble from local suppliers.
- Run a single harvest shift with the kit and collect time and quality metrics.
- Refine the checklist based on feedback and add a second kit if peak windows overlap.
What mistakes should micro-farms avoid when deploying kits?
Avoid these common errors to get full benefit:
- Understocking: not providing enough kits for peak harvests increases walking time.
- Neglecting cooling: failure to start the cool-chain quickly reduces shelf life.
- Poor sanitation: shared dirty tools increase contamination risk.
How do compact kits contribute to regenerative and microclimate farming strategies?
Compact kits support regenerative practices by enabling precise handling of cover-crop seed harvests, minimizing soil compaction through reduced trips, and supporting quick transfer of produce to cooling, which preserves quality and market value.
Use harvest data from kits to refine microclimate-based scheduling and mapping decisions described in microclimate and regenerative farm planning resources (microclimate mapping and zonal practices improve timing and kit deployment).
Where can micro-farmers find templates and suppliers for kits?
Find templates in extension publications and farm incubator resources. Purchase components from food-grade equipment suppliers, local farm stores, and industrial suppliers for carts and coolers.
For custom solutions, partner with nearby makerspaces or small metal fabricators to create harvest sleds or bespoke carts matched to row spacing.
Which internal resources on scheduling, rotation, and regenerative harvest pair well with compact kits?
Pair kit deployment with planning and soil health strategies found in specialized articles: integrate kit workflows with crop calendars and microclimate mapping from diversified crop maps, align harvest timing and equipment to rotation plans, and coordinate kit sanitation with microbial consortia handling protocols to protect soil inoculants.
Relevant internal resources include planning guides on crop maps and rotation methods that help time harvest windows and preserve soil and product quality: diversified crop maps and adaptive rotation plans. For integrating harvest into regenerative micro-harvest systems, see the practical blueprint on regenerative micro-harvest.
What final operational tips improve compact kit adoption?
Start small, measure, and iterate. Prototype one kit, run three harvest cycles, collect simple metrics (time per bed, percent field loss, crate fill rates), and adjust tools and counts.
Standardize placement and color coding, commit to a daily maintenance routine, and use harvest logs to inform staffing and kit counts for the next season.
Key takeaways
- Design kits around crop needs, not trends.
- Start cooling fast and sanitize consistently.
- Use data from kits to refine scheduling and rotations.
Sources: USDA small-farm guides, ATTRA sustainable agriculture resources, Cornell and UC Davis extension fact sheets, FAO handling guidelines, and Practical Farmers of Iowa case studies.
Build a compact harvest kit to reduce labor, protect quality, and support regenerative small-farm goals. Implement the checklists above and iterate with harvest data to achieve consistent gains.
Fungal Networks + Micro-basins: Lock Water in Sandy Soil
Fungal Networks + Micro-basins: Lock Water in Sandy Soil
Sandy soil loses water quickly and limits plant growth. This article explains how combining fungal networks and micro-basins improves water retention, increases infiltration, and builds soil structure. Read practical steps, measurements, amendments, monitoring methods, and common mistakes so you can implement cost-effective field and garden solutions.
What role do fungal networks play in improving water retention in sandy soil?

Fungal networks increase water access by extending root reach, storing water in hyphae, and stabilizing soil aggregates (Smith and Read 2008; Rillig 2015). Mycorrhizal fungi form symbioses with plant roots and connect multiple plants through hyphal networks.
Fungal networks transport water and nutrients across dry pores, effectively increasing the soil volume plants can tap during dry periods (Leake et al. 2004).
Fungal exudates, especially glomalin from arbuscular mycorrhizal fungi, bind soil particles to create micro-aggregates that raise water-holding capacity (Rillig 2004).
Mycorrhizal hyphae and associated biofilms retain thin films of moisture, slowing evaporation in coarse-textured sand (Allen 2007).
How do micro-basins lock water into sandy soils?
Micro-basins capture runoff, concentrate infiltration, and increase residence time of applied water (USDA Natural Resources Conservation Service guidance on micro-catchments).
Micro-basins are shallow, bowl-shaped depressions that intercept rain and irrigation, reducing surface runoff and increasing local infiltration depth.
Micro-basins work at micro-site scales: typical dimensions are 30-100 cm diameter and 5-20 cm depth for garden and small-plot use; larger farm micro-basins may scale to 1m+ diameter and deeper profiles for trees.
Micro-basins slow flow into the soil so fine particles and organic matter settle, improving local pore continuity and water holding over time.
What integrated practices combine fungal networks and micro-basins most effectively?
Combine micro-basins with organic amendments, fungal inoculation, cover-cropping, and minimal disturbance to maximize water locking and build stable soil structure.
Build micro-basins to concentrate water near root zones, then add organic mulch and compost into the basin to feed fungi and microbes.
Inoculate roots or seed with mycorrhizal products or use spore-rich compost to jump-start networks; maintain plant diversity to support fungal species richness.
Use minimal tillage in and around basins; reduced mechanical disturbance preserves hyphal continuity and speeds aggregate formation (Six et al. 2004).
Integrate micro-irrigation to deliver precise, small-volume water pulses into basins; this increases infiltration and lowers evaporation compared with surface sprinkling. For design ideas and irrigation strategies see regenerative micro-irrigation techniques for smallholder farms.
Design planting mixes that include deep-rooted perennials and legumes to feed fungi and maintain year-round hyphal networks.
How do you build fungal-friendly micro-basins step-by-step?
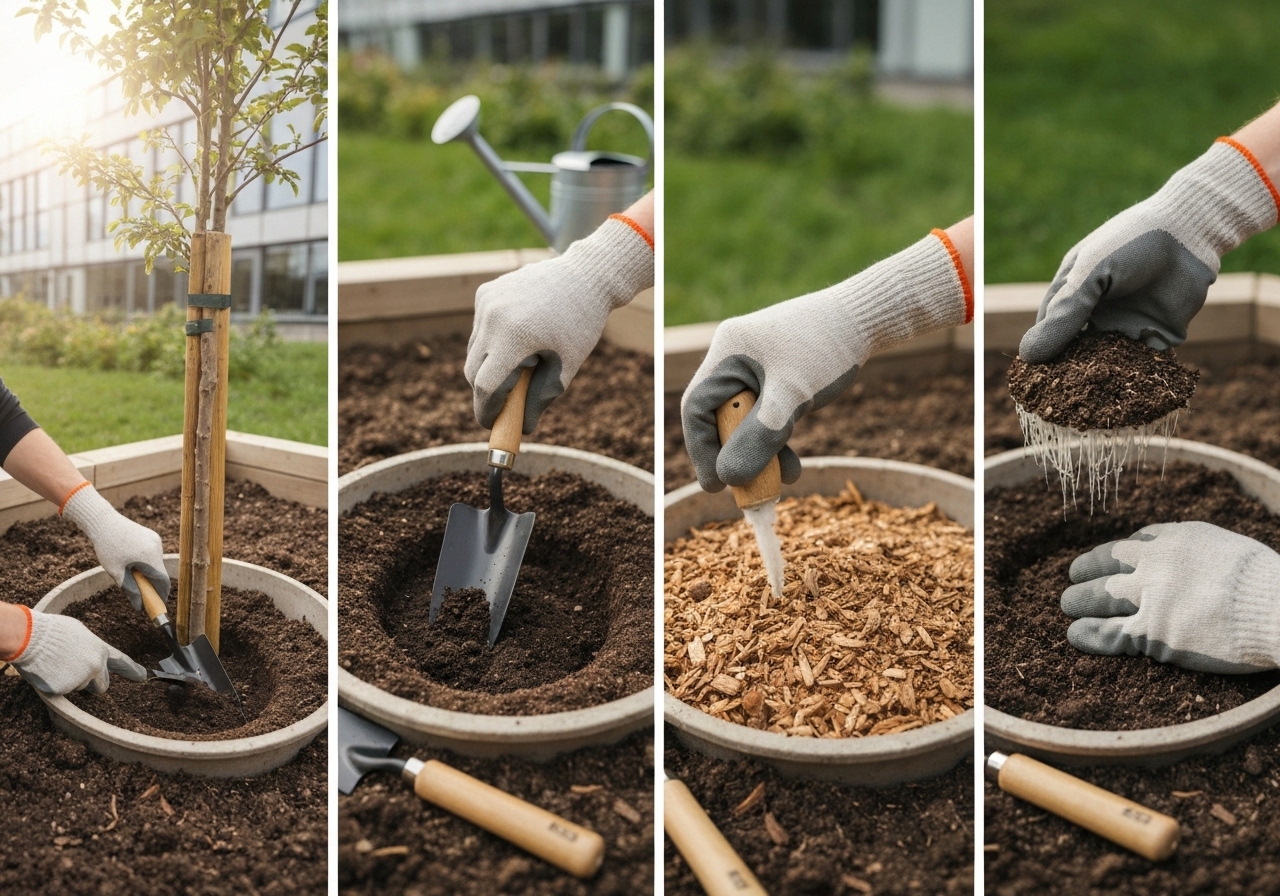
Create a low-cost micro-basin by shaping soil, adding organic matter, planting supportive species, and inoculating with fungi. Follow these steps.
Step 1: Site selection and layout
Step 1: Choose a site on gentle slope or flat ground where runoff forms naturally.
Step 1: Space basins .5-2 meters apart depending on plant size; closer spacing benefits seedlings and groundcovers.
Step 2: Excavation and shaping
Step 2: Dig a shallow basin 5-20 cm deep and 30-100 cm wide for garden use; move excavated soil to form a slight berm on the downslope edge.
Step 2: Firm the basin floor lightly to avoid compaction while maintaining porosity.
Step 3: Amend the basin
Step 3: Add 2-5 cm of compost mixed into the basin floor to supply labile carbon and inoculum sources.
Step 3: Layer 1-3 cm of coarse mulch (wood chips, straw) above compost to slow evaporation and moderate temperature.
Step 4: Inoculation and planting
Step 4: Apply a small dose of mycorrhizal inoculant at root contact during planting or place spore-rich compost in direct contact with roots.
Step 4: Plant a diverse mix of seedlings or direct-seed a cover mix to quickly establish living roots that sustain fungal growth.
Step 5: Watering and maintenance
Step 5: Water the basin deeply once after planting to settle soil and activate fungi; use short, frequent pulses thereafter only if needed.
Step 5: Maintain mulch cover and avoid tilling the basin for at least one season to protect hyphal networks.
What soil amendments most effectively increase water-holding in sandy soil?
Add compost, biochar, clay fines, organic mulches, and targeted hydrogels to increase water-holding capacity.
Compost adds organic matter, increases aggregation, and boosts microbial biomass that produces sticky binding agents (USDA-NRCS; meta-analyses show consistent moisture benefits).
Biochar increases soil porosity and can raise retention when combined with compost; long-term studies report improved moisture buffering and carbon sequestration (Lehmann and Joseph 2015).
Clay or loam fines mixed into sands at low rates (5-15% by volume) raise surface area and capillary water retention; apply evenly and avoid forming impermeable pans.
Hydrophilic polymers (soil hydrogels) absorb many times their weight in water and release moisture slowly; select agricultural-grade, biodegradable products and follow manufacturer application rates (research shows variable results depending on soil and product age).
Coir and peat alternatives increase water retention and improve seedbed moisture; prefer renewable coir where possible.
Which microbial and inoculation approaches work best for sandy soils?
Use arbuscular mycorrhizal fungi for most annual and many perennial crops, and ectomycorrhizal fungi for trees and shrubs where appropriate (Smith and Read 2008).
Select broad-spectrum, locally-adapted inoculants or build site-specific consortia using on-farm materials and testing.
Design inoculation around plant species: combine Rhizophagus and Glomus species for annuals and legumes; use tree-compatible strains for woody plants.
Monitor establishment: check root colonization microscopically or infer from improved seedling vigor, reduced irrigation needs, and increased infiltration over months.
For guidance on assembling microbial mixes and mapping consortia at field scale refer to practical workflows in designing on-farm microbial consortia and related consortia mapping resources.
How should micro-irrigation be integrated with fungal networks and micro-basins?
Use low-volume, frequent pulses delivered into basins to maintain fungal activity without waterlogging.
Place emitters at basin centers near root crowns; use driplines or micro-sprays that wet the basin floor rather than large areas.
Schedule shorter cycles that wet then partially dry the basin; this encourages root and hyphal growth into new pore space while limiting standing water.
Combine irrigation with sensor feedback where possible to reduce over-watering. See practical micro-irrigation setups and drip strategies in regenerative micro-irrigation case studies for smallholder and urban farms at regenerative micro-irrigation for small farms.
How do you monitor and measure improvements in water retention?

Measure infiltration rates, volumetric soil moisture, and plant water use before and after interventions to quantify benefits.
Perform a simple infiltration test: pour 5 liters into a basin and time infiltration; repeat seasonally to track change.
Use gravimetric sampling by taking small soil cores, weighing wet, oven-drying at 105°C, and calculating moisture percent.
Use inexpensive soil moisture sensors or capacitance probes for continuous monitoring; log comparative data across treated and control plots.
For higher-tech monitoring and mapping at scale, combine sensors and AI analytics; explore sensor use cases in AI-enabled soil sensors to guide irrigation and detect soil changes.
What plants best support fungal networks and water locking in sandy soils?
Plant diverse mixtures of deep-rooted perennials, grasses, and legumes to create continuous root networks that feed fungi.
Use cover crop blends that include grasses (rye, millet), legumes (vetch, clover), and brassicas in rotation to deliver year-round root exudates.
Prioritize native grasses and shrubs adapted to local climate; deep roots create macropores and access deeper moisture that connects with fungal hyphae.
Integrate trees or shrubs in micro-basin designs for long-term soil structure benefits and shade that reduces evaporation.
Consider drought-smart species such as millet and other low-input grains for marginal lands; carbon-smart millets have proven resilience on dry soils and can be part of regenerative rotations (see carbon-smart millet approaches).
How long until improvements in water retention become apparent?
Expect measurable infiltration and moisture retention gains within 1-12 months and substantial structural gains in 1-5 years, depending on climate, inputs, and vegetation.
Short-term: mulch and compost often increase surface moisture within weeks to months following application.
Medium-term: mycorrhizal networks and aggregate formation show clear improvements within the first growing season to two years under continuous vegetation.
Long-term: stable increases in soil organic matter and carbon sequestration that permanently improve water holding can require multiple years of consistent practice.
What common mistakes reduce success when locking water in sandy soil?
Avoid over-tilling, excessive fertilizer, poor mulch choices, and deploying unsuitable inoculants or hydrogels.
Avoid frequent deep plowing that severs hyphae and reverses aggregation gains.
Avoid heavy machinery compaction in basins; compaction reduces infiltration and hyphal penetration.
Avoid relying solely on synthetic hydrogels without building organic matter and microbial support; polymers can give short-term benefit but low long-term resilience.
Avoid monocultures and year-round fallow; biological continuity is essential for mycorrhizal persistence.
What low-cost, DIY options can farmers and gardeners use now?
Collect and spread high-quality compost, make shallow micro-basins by hand, transfer small amounts of spore-rich soil, and apply mulch to protect soil surface.
Harvest compost tea or apply compost directly into basins to seed microbes and fungi.
Transfer handfuls of soil from healthy, biologically active sites into basins to introduce local fungal communities.
Use simple rainwater capture into basins during storms to maximize natural infiltration events.
Which metrics justify investment in fungal and micro-basin systems?
Calculate reduced irrigation volume, improved crop survival, and yield stability to quantify returns.
Track irrigation records and compare water used per kilogram of yield before and after treatment to quantify water savings.
Measure seedling survival rates, days between irrigations, and yield per area to evaluate economic benefits.
Use soil organic matter percentage increases and infiltration rate changes as ecological indicators for carbon credits or regenerative certification.
Where do you go for training, labs, and soil testing?
Use local extension services, university soil labs, and certified agronomy consultants for nutrient and mycorrhizal assessments.
Request tests for texture, organic matter, bulk density, and microbial biomass where available.
Join farmer networks and workshops that focus on regenerative micro-farm practices and soil health to exchange local experience.
What final practical checklist ensures success?
Follow a checklist: build basins, add compost and mulch, plant diverse roots, inoculate appropriately, reduce disturbance, monitor, and adapt.
- Build shallow micro-basins sized to plants and rainfall intensity.
- Mix 2-5 cm compost into basin floor; top with mulch.
- Inoculate roots with locally adapted mycorrhizal inoculants or spore-rich compost at planting.
- Plant diverse, deep-rooting species and maintain cover year-round.
- Use low-volume irrigation targeted into basins; monitor moisture and reduce cycles as soil improves.
- Avoid heavy tillage and compaction; maintain mulch to conserve moisture.
Implement these practices at small scale first, monitor results, then scale up. Combining fungal networks with well-designed micro-basins creates resilient sandy soils that hold water, improve plant performance, and increase long-term soil health.
Bio-active Mulches: Best Materials for Veg Crops Guide
Bio-active mulches improve vegetable crop performance by combining physical weed suppression with biological inputs that feed beneficial microbes, cycle nutrients, moderate soil temperature, and increase water retention. This guide compares the best materials, explains when and how to apply them, and gives crop-specific recommendations so small-scale and market gardeners can choose mulches that maximize yield and soil health.
What are bio-active mulches and why should vegetable growers use them?
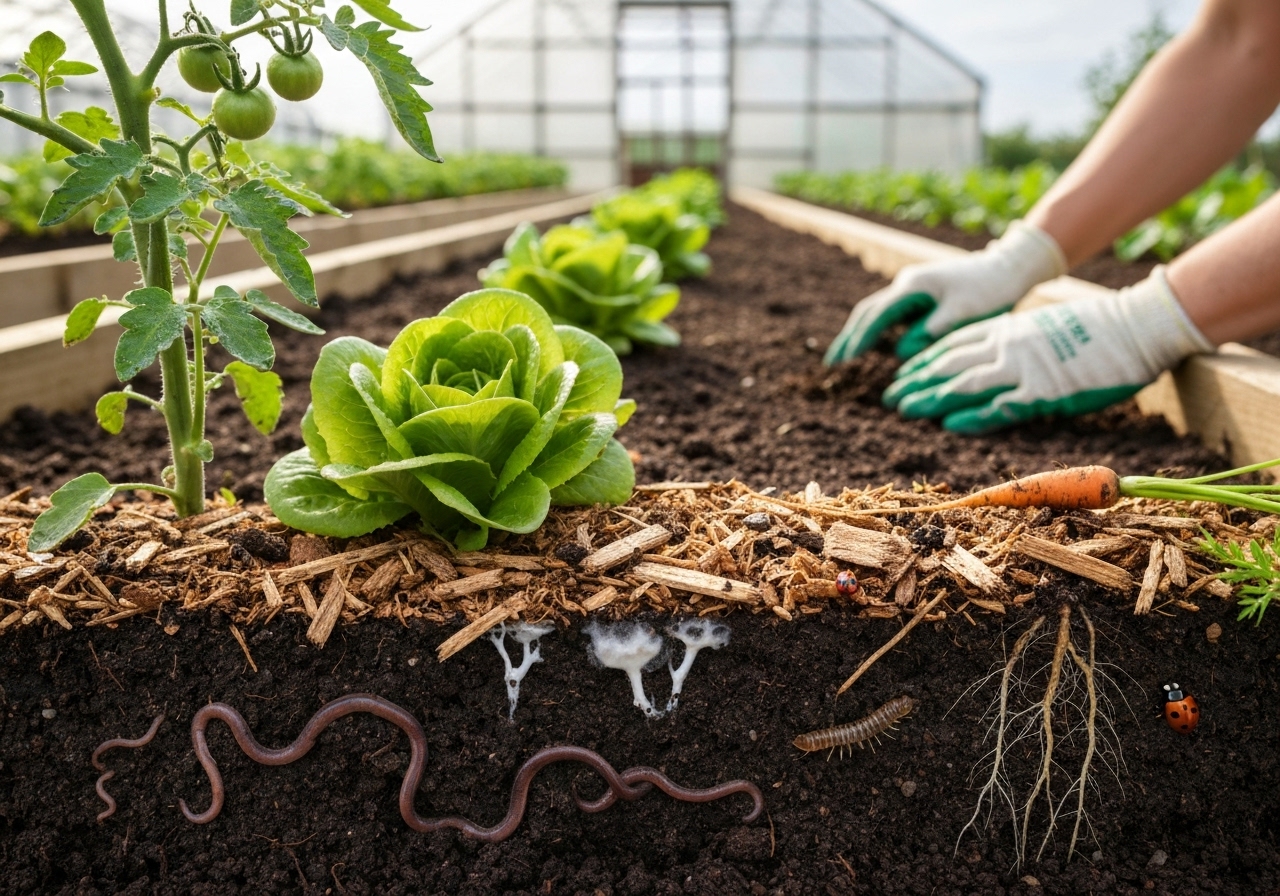
What are bio-active mulches and why should vegetable growers use them? Bio-active mulches are any surface cover that supplies both physical protection and a biological stimulus to soil life — organic residues, living covers, or charged amendments that feed microbes and fauna. Bio-active mulches differ from inert mulches because they add labile carbon, nutrients, pore space, or microbial inoculum that increase soil respiration, aggregate stability, and nutrient availability for crops.
Which mulching materials qualify as bio-active?
Which mulching materials qualify as bio-active? Materials that qualify include mature composts, leaf mold, seaweed, properly cured manure, biochar charged with compost, living mulches, seed-meal residues, and compost-amended woodchip blends. Each material supplies different resources: compost provides microbes and nutrients, biochar offers habitat and adsorption sites, seaweed supplies micronutrients and plant growth regulators, and living mulches fix nitrogen or support diverse microbial consortia.
What is compost and how should it be used as mulch?
What is compost and how should it be used as mulch? Mature compost is decomposed organic matter rich in microbes, available nutrients, and humic substances that support root growth and suppress some diseases. Apply compost as a .5-1 inch surface dressing for direct nutrient supply, or use 2-3 inches if you want lasting moisture retention and weed suppression. Avoid applying more than 3 inches of fresh uncomposted material because it can heat and immobilize nitrogen.
What is compost and how should it be used as mulch? Use quality-tested composts that meet local regulatory standards or garden-producer compost guidelines; look for earthy smell and crumbly texture. Combine compost with straw or leaf mulch to reduce surface crusting and speed microbial colonization.
What is biochar and how do you make it bio-active?
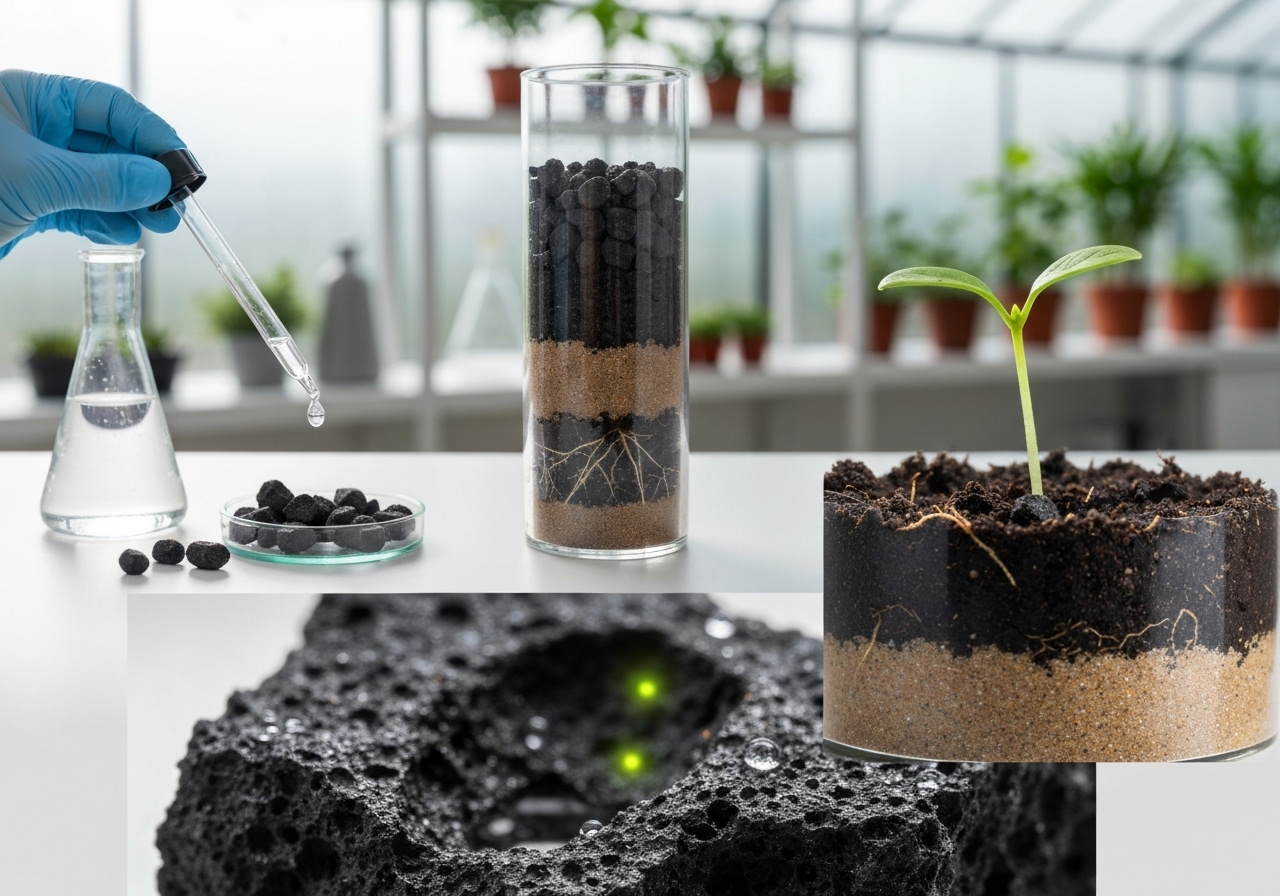
What is biochar and how do you make it bio-active? Biochar is stable, carbon-rich charcoal produced from pyrolysis and becomes bio-active when charged with compost, compost tea, or liquid microbial inoculants before field application. Charge biochar by mixing 1 part biochar with 3 to 6 parts mature compost or soaking in aerated compost tea for 24 to 72 hours. For vegetable beds, incorporate 5-10% by volume into the top 4-8 inches of soil or topdress .5-1 inch of charged biochar mixed with compost.
What are the pros and cons of straw and hay as mulches?
What are the pros and cons of straw and hay as mulches? Straw suppresses weeds, reduces evaporation, and moderates temperature; clean straw (seed-free) is the preferred choice for vegetables, applied 2-4 inches thick. Avoid hay that contains weed seeds. Straw can harbor slugs in wet climates and is bulky to handle. Replace or refresh straw annually; incorporate small amounts into soil during bed renovation.
Can leaf mulch be used for vegetables?
Can leaf mulch be used for vegetables? Leaf mulch and leaf mold supply diverse microbes and improve porosity; apply 2-3 inches and shred leaves to avoid matting and to speed decomposition. Leaves have a carbon-to-nitrogen (C:N) ratio that ranges widely; mix leaves with green residues or compost to balance C:N and avoid temporary nitrogen tie-up near heavy-leaf applications.
Are grass clippings a good bio-active mulch?
Are grass clippings a good bio-active mulch? Grass clippings provide fast-release nitrogen and organic matter but must be dry and applied in thin layers (.5-1 inch) to avoid matting and anaerobic breakdown. Use dry, pesticide-free clippings and mix with drier residues like straw or leaf mulch. Fresh wet clippings can heat and become slimy, so avoid heavy single-layer applications.
Is seaweed an effective mulch for vegetable crops?
Is seaweed an effective mulch for vegetable crops? Seaweed provides micronutrients, plant hormones, and solubles that stimulate microbial activity; apply rinsed, salt-free seaweed as a thin mulch layer or compost it first for the best results. Use seaweed sparingly if you cannot rinse it; high salt loads can harm sensitive seedlings. Seaweed is particularly valuable for brassicas and root crops when applied as a compost or topdressing.
When are wood chips appropriate for vegetable beds?
When are wood chips appropriate for vegetable beds? Wood chips are best used where crops are longer-lived or in pathways and perennial beds; use well-aged or composted chips and avoid deep fresh woodchip layers in seeded or transplant vegetable beds. Fresh wood chips have a high C:N ratio and can immobilize nitrogen near plant roots. If using for annual vegetables, place a thin compost layer between soil and chips or use chips only in paths and around permanent structures.
What about biodegradable plastic and paper mulches?
What about biodegradable plastic and paper mulches? Biodegradable plastics and paper mulches give the moisture and warming benefits of plastics while reducing long-term litter, but their breakdown rate and additives vary significantly by product. Choose certified biodegradable products designed for agricultural use, check local compostability standards, and test on small areas before field-scale adoption. Plastic mulches remain non-bio-active unless combined with organic topdressings or inoculants.
How do bio-active mulches influence soil temperature, moisture, pests, and microbes?
How do bio-active mulches influence soil temperature, moisture, pests, and microbes? Bio-active mulches moderate soil temperature, reduce evaporation, alter pest habitat, and fuel microbial processes that enhance nutrient mineralization and disease suppression. Organic mulches typically lower maximum soil temperatures in midsummer and raise minimums in cool periods, smoothing extremes that stress seedlings. Depending on material and depth, mulches can reduce surface evaporation by roughly 30 to 60 percent and increase plant-available water.
How do bio-active mulches influence soil temperature, moisture, pests, and microbes? Use porous mulches like compost and shredded leaves to promote aerobic microbial activity and avoid anaerobic pockets that can harm roots. Monitor for pests such as slugs under heavy straw in cool wet climates and use integrated strategies where needed.
How should growers match mulch materials to vegetable types and planting systems?
How should growers match mulch materials to vegetable types and planting systems? Match mulch by crop life cycle: short-season transplants need thin, quickly-clearing mulches; long-season crops tolerate thicker, longer-lasting mulches; root crops need loose, mineral-friendly mulches. For warm-season transplants (tomato, pepper, eggplant) use black plastic or dark organic mulches to warm the soil, or use compost topped with straw to combine biological benefits and moderate warming. For direct-seeded carrots and lettuce, use fine leaf mold or compost mulches that allow easy emergence and early-season warmth.
How should growers match mulch materials to vegetable types and planting systems? For cool-season crops (spinach, brassicas), use straw or leaf mulch to protect against late freezes while avoiding excessive warming that delays growth. For root crops, maintain a loose top layer to avoid deformities and allow easy harvest.
Which mulches are best for seedlings and transplants?
Which mulches are best for seedlings and transplants? Fine textured mulches such as well-aged compost, leaf mold, or shredded straw applied .5 to 1 inch deep give seedlings moisture retention and microbial inputs without blocking emergence. Avoid heavy wood chips and dense mats of fresh grass clippings on new transplants.
Which mulches are best for warm-season long-duration crops?
Which mulches are best for warm-season long-duration crops? Straw, compost-based mulches, charged biochar, and biodegradable plastic mulches are effective for tomatoes, peppers, and squash when applied 2-4 inches deep or in continuous plastic beds for warmth and weed control. Combine compost topdressing around plants with a broader straw mulch to promote microbes while preventing contact between mulch and stems.
How to apply and manage bio-active mulches for vegetable beds?
How to apply and manage bio-active mulches for vegetable beds? Prepare beds by removing weeds, apply a starter dose of compost if soil tests recommend it, then spread organic mulch to an even depth and keep mulch 1-2 inches away from stems. For seeded beds, avoid blocking seed emergence by using fine mulches or reduced depth. For transplants, apply mulch after plants are established to reduce transplant shock.
What are recommended application depths and timing?
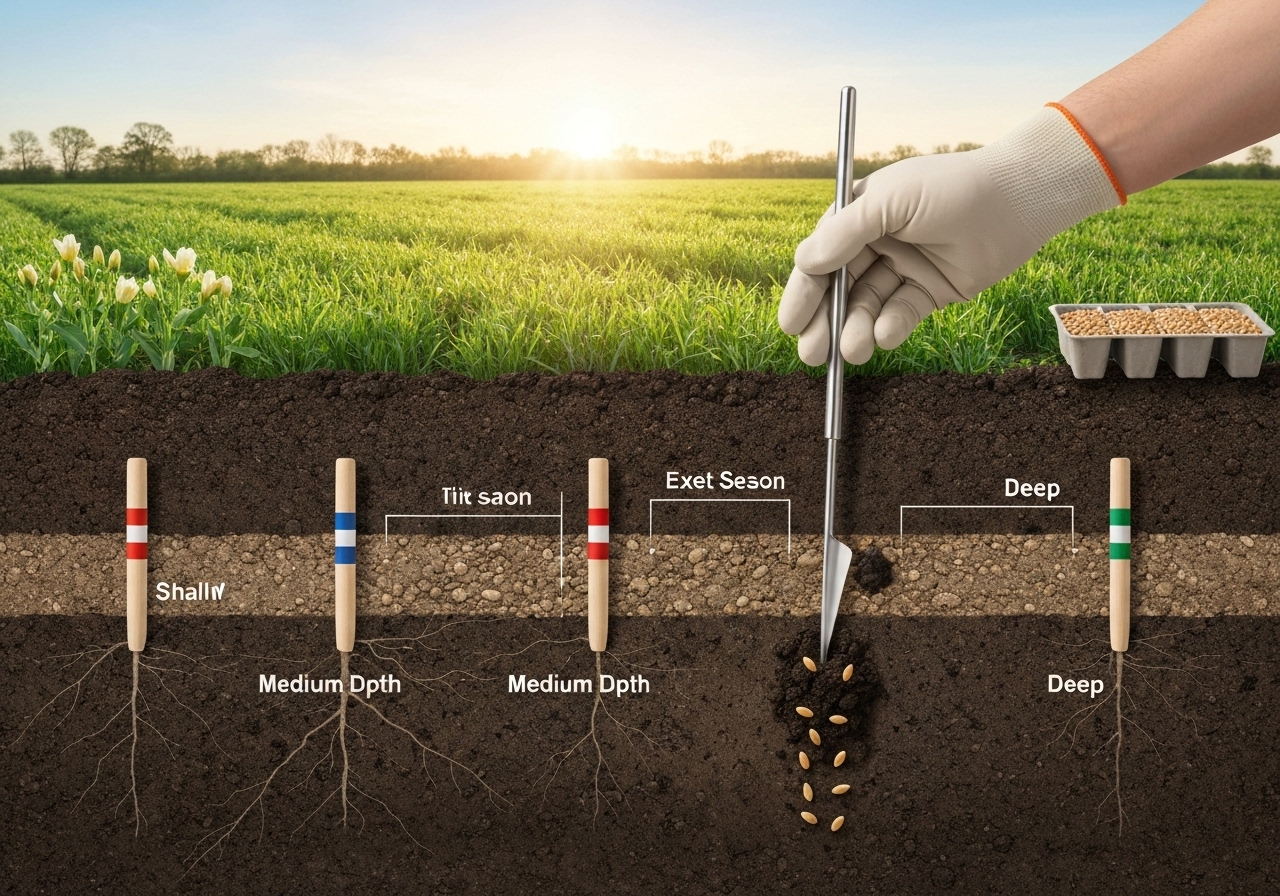
What are recommended application depths and timing? Use .5-1 inch for compost or leaf mold; 2-4 inches for straw or shredded leaves; 1-2 inches for charged biochar mixed with compost; and 2-3 inches for seaweed or cured manure topdressings. Apply mulch after soil warms in spring for warm-season crops; apply before the rainy season or in late fall for winter protection and to reduce erosion.
How often should mulches be renewed or replaced?
How often should mulches be renewed or replaced? Renew light mulches annually and topdress with compost or fresh organic material; heavier mulches like wood chips may last multiple seasons but benefit from periodic incorporation or replacement to refresh biological activity. Monitor mulch decomposition rates and replace when weed pressure increases or when mulch layer becomes patchy.
Can mulches be inoculated to increase biological activity?
Can mulches be inoculated to increase biological activity? Yes — mulches can be inoculated with compost tea, fermented plant extracts, or designed microbial consortia to accelerate colonization and shift soil microbiome composition. When inoculating, follow evidence-based protocols: use aerated compost tea within hours of preparation, avoid introducing pathogens, and pair inoculants with carbon-rich mulches to feed introduced microbes. For program design, consult resources on on-farm microbial consortia for stepwise inoculation strategies.
What common mistakes reduce mulch effectiveness and how to avoid them?
What common mistakes reduce mulch effectiveness and how to avoid them? Common mistakes include applying mulch too thickly, using fresh uncomposted high-carbon materials without a nitrogen source, letting mulch touch stems, and using contaminated or seed-rich materials. Avoid these by following depth guidelines, balancing C:N with green residues or compost, and maintaining a 1-2 inch gap between mulch and plant stems to reduce rot and pest access.
How can mulch cause nitrogen tie-up and how to prevent it?
How can mulch cause nitrogen tie-up and how to prevent it? Fresh high-carbon residues can immobilize nitrogen as microbes decompose them; prevent tie-up by using composted residues, adding a nitrogen-rich topdressing, or allowing a short decomposition period before planting. Monitor plant vigor and soil tests for nitrate if using large volumes of high-carbon mulch in beds that support high-nitrogen crops.
What about disease risks related to mulches?
What about disease risks related to mulches? Mulches can reduce soil splash and lower foliar disease incidence, but they can also harbor pathogens if made from diseased materials or if they smother plants and create anaerobic conditions. Use disease-free material, ensure good airflow, and keep mulch off stems. Composting at adequate temperatures reduces disease risk in source material.
How do mulches integrate with crop rotation and regenerative systems?
How do mulches integrate with crop rotation and regenerative systems? Mulches are a key tool in regenerative rotation plans: they retain moisture, build organic matter, and allow cover crop residue to be converted into active surface mulch that feeds the following cash crop. Combine mulching with rotation sequences that alternate deep- and shallow-rooted crops to cycle nutrients and break pest-disease cycles. For rotation templates and low-input planning, pair mulch strategies with adaptive rotation guides such as adaptive low-input crop rotation plans to align residues, nutrient flows, and planting windows.
How should growers monitor mulch impact on soil biology and crop yields?
How should growers monitor mulch impact on soil biology and crop yields? Track soil tests for organic matter and available nutrients annually, measure microbial activity with respiration or enzyme assays if possible, and keep yield and quality records by bed to compare mulched versus unmulched treatments. Use simple indicators like aggregate stability, earthworm counts, and crop vigor ratings. Where available, integrate sensor data to record soil moisture and temperature trends under different mulch types.
What simple field tests can indicate improved soil biology?
What simple field tests can indicate improved soil biology? Conduct an earthworm count, assess soil structure by hand (crumb structure), observe root health at harvest, and use a basic soil respiration kit if accessible to measure changes in microbial activity over time. Document these metrics annually to build a multipoint dataset that demonstrates mulch-driven changes.
Which mulches are best positioned for carbon accounting and regenerative credits?
Which mulches are best positioned for carbon accounting and regenerative credits? Compost applications, biochar additions, and long-lived organic layers (mulch that increases soil organic matter over years) are the materials most likely to contribute measurable increases in stable soil carbon. Document volumes applied, analyze soil organic carbon trends with regular testing, and follow recognized protocols if you intend to register changes for programs such as soil carbon credits. See strategies for translating soil practices into revenue and reporting in the discussion on soil carbon credits.
How does microclimate affect mulch choice and placement?
How does microclimate affect mulch choice and placement? Microclimate — sun exposure, wind, slope, and local thermal zones — determines whether mulches should prioritize warming, cooling, or moisture conservation. In cool microclimates, choose dark or insulating mulches that raise soil temperature early in the season. In hot, arid microclimates, select reflective or light-colored mulches and thicker layers to conserve moisture. Use microclimate mapping and zoning to place materials where they optimize crop windows; resources on microclimate mapping can help pair mulches with site microzones as described in materials on microclimate mapping.
What are practical recipes and mixes that growers can use?
What are practical recipes and mixes that growers can use? Try these field-proven mixes: 1) Compost-Leaf Blend: 1 part mature compost + 2 parts shredded leaves applied 2 inches for early-season beds; 2) Straw-Compost Topdress: 2 inches straw with .5 inch of compost under transplants; 3) Charged Biochar Mix: 1 part charged biochar + 3 parts compost spread .5-1 inch for perennial beds. Adjust recipes for nutrient-hungry crops by adding compost teas or small mineral amendments based on soil test results.
What are low-cost, high-impact strategies for small farms and market gardens?
What are low-cost, high-impact strategies for small farms and market gardens? Source local compost and shredded leaves, establish perennial mulch sources like hedgerow leaves, and use on-site residues such as cover crop residues and grass clippings to build mulch continually. Prioritize practices that reduce off-farm inputs and fit into rotation schedules. Coordinating residue harvest with rotation planning yields steady mulch supplies and reduces costs — integrate these strategies with broader regenerative planning to maximize benefits.
Where can growers find more guidance on microbial design, rotation and monitoring?
Where can growers find more guidance on microbial design, rotation and monitoring? Growers can deepen mulch programs by learning microbial consortia design, aligning residue flows with adaptive rotations, and using microclimate mapping to place mulches effectively. For stepwise guidance on building beneficial microbial communities in soil and residue systems, consult field resources on designing on-farm microbial consortia and for rotation templates and sequencing pairings refer to adaptive rotation plans.
What quick reference recommendations should growers follow?
What quick reference recommendations should growers follow? Follow these concise rules: 1) Use mature compost or charged biochar when you need biological stimulation; 2) Apply straw or shredded leaves at 2-4 inches for season-long moisture control; 3) Reserve wood chips for pathways and perennials unless composted; 4) Keep mulch off stems by 1-2 inches; 5) Monitor soil tests annually and adapt mulch volumes to crop needs. These simple rules reduce mistakes and accelerate visible benefits in yield and soil health.
What are next steps for implementing a bio-active mulch program?
What are next steps for implementing a bio-active mulch program? Begin with a soil test, pilot 3 to 6 beds with different mulch materials, track soil moisture and yield responses, and scale the mixes that show the best return on labor and soil improvements. Document inputs and results so you can quantify improvements and, where relevant, align data for carbon accounting or certification programs.
Bio-active mulches are a practical lever to convert residue streams into soil fertility and to marry physical bed management with active microbiology. By choosing the right materials for crop type, microclimate and season, and by managing depth, contact with plants, and timing, vegetable growers can improve yields, reduce irrigation needs, and build resilient soil systems over multiple seasons.
Farm Waste to Soil Carbon: Practical Circular Solutions
Farm Waste to Soil Carbon: Practical Circular Solutions
Convert common farm wastes into stable soil carbon through low-cost, practical circular systems that reduce emissions, feed soil biology, and generate on-farm value. This guide explains methods, step-by-step practices, measurement, economics, and implementation timing for small and medium farms.
What is farm waste to soil carbon?
Farm waste to soil carbon is the practice of transforming biodegradable farm residues into stable organic matter that increases soil carbon stocks.Farm waste includes crop residues, manure, processing byproducts, expired feed, pruning material, and food scraps.
Farm waste to soil carbon reduces greenhouse gases by capturing carbon in soil pools.According to the Food and Agriculture Organization, diverting organic waste from open burning or unmanaged decomposition lowers methane and CO2 emissions when managed into stable soil carbon.
Why should farms convert waste into soil carbon?
Convert waste to soil carbon to improve soil health, increase water holding capacity, and reduce fertilizer dependency.Multiple studies show higher soil organic matter improves yield stability and drought resilience (IPCC 2019 synthesis; USDA NRCS guidance).
Convert waste to soil carbon to create revenue opportunities and circular resource flows.Soil carbon credits, compost sales, and reduced input costs make the practice economically attractive for many farms (see recent small-farm carbon market analyses).
Which on-farm methods build stable soil carbon from waste?
Use composting, biochar, anaerobic digestion, managed grazing residues, and microbial enhancement to turn waste into stable carbon pools.Each method varies in carbon permanence, labor, capital, and co-benefits; adopt a mix to match farm scale and goals.
How does composting convert waste into soil carbon?
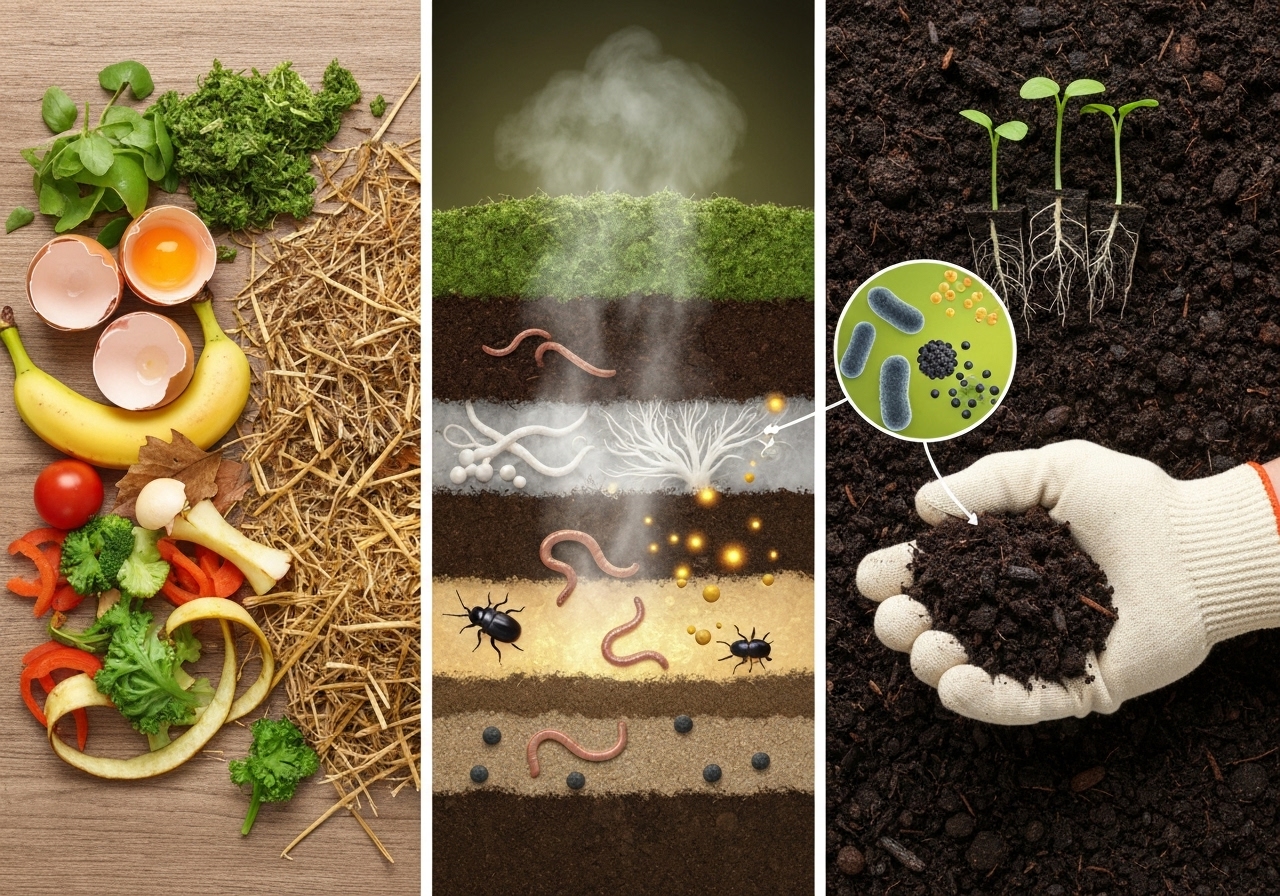
Composting stabilizes labile carbon into humus-like material that increases soil organic matter when applied.Active aerobic composting reduces pathogens and weed seeds when managed to reach thermophilic temperatures (55-65 C) for sufficient time.
Follow these steps for effective on-farm composting:
- Collect and sort waste streams: separate meat/dairy from plant residues when producing compost for food crops.
- Balance carbon-to-nitrogen (C:N) ratio to 25:1 to 35:1 by mixing high-carbon materials (straw, wood chips) with nitrogen sources (manure, green waste).
- Construct static piles, windrows, or in-vessel systems depending on scale; maintain moisture at 40-60% and turn to aerate.
- Monitor temperature and cure compost for 4-12 weeks before use; test maturity and nutrient content.
Composting permanence varies; a portion of compost carbon remains labile but increases soil aggregation and microbial habitat. The Rodale Institute and multiple meta-analyses report compost applications raise soil organic carbon and crop productivity over time.
How does biochar stabilize carbon from farm waste?
Biochar converts biomass into highly stable carbon via pyrolysis, delivering century-scale carbon storage when mixed into soils.Biochar is produced by heating organic material in low-oxygen conditions, creating porous charcoal rich in aromatic carbon bonds resistant to decomposition.
Apply these biochar practices:
- Feedstock selection: use crop residues, orchard prunings, or wood waste free of treated wood.
- Pair biochar with compost or manure to charge surfaces with nutrients and microbes before soil application.
- Incorporate at .5-5% by volume in topsoil, focusing on degraded or low-carbon fields.
Meta-analyses in Global Change Biology and long-term field trials indicate biochar increases soil carbon persistence and often improves nutrient retention and water infiltration, especially on coarse-textured soils.
How does anaerobic digestion convert farm waste into carbon and energy?
Anaerobic digestion captures methane from wet organic wastes and produces a stabilized digestate that contributes to soil carbon when applied.AD systems break down organic matter in oxygen-free tanks, producing biogas and a nutrient-rich effluent.
Implement AD on farms as follows:
- Select suitable wastes: manure, wet crop residues, food processing byproducts.
- Choose scale-appropriate digesters: farm-scale plug-flow or covered lagoons for livestock farms; modular systems for co-digestion.
- Use produced biogas for on-farm heat or electricity to offset fossil fuel use; apply pasteurized digestate as a soil amendment.
Digestate tends to be more plant-available and less emission-prone than raw manure; a 2018 synthesis by the European Commission notes AD reduces net greenhouse gas emissions when designed and managed properly.
How does managed grazing and manure handling build soil carbon?
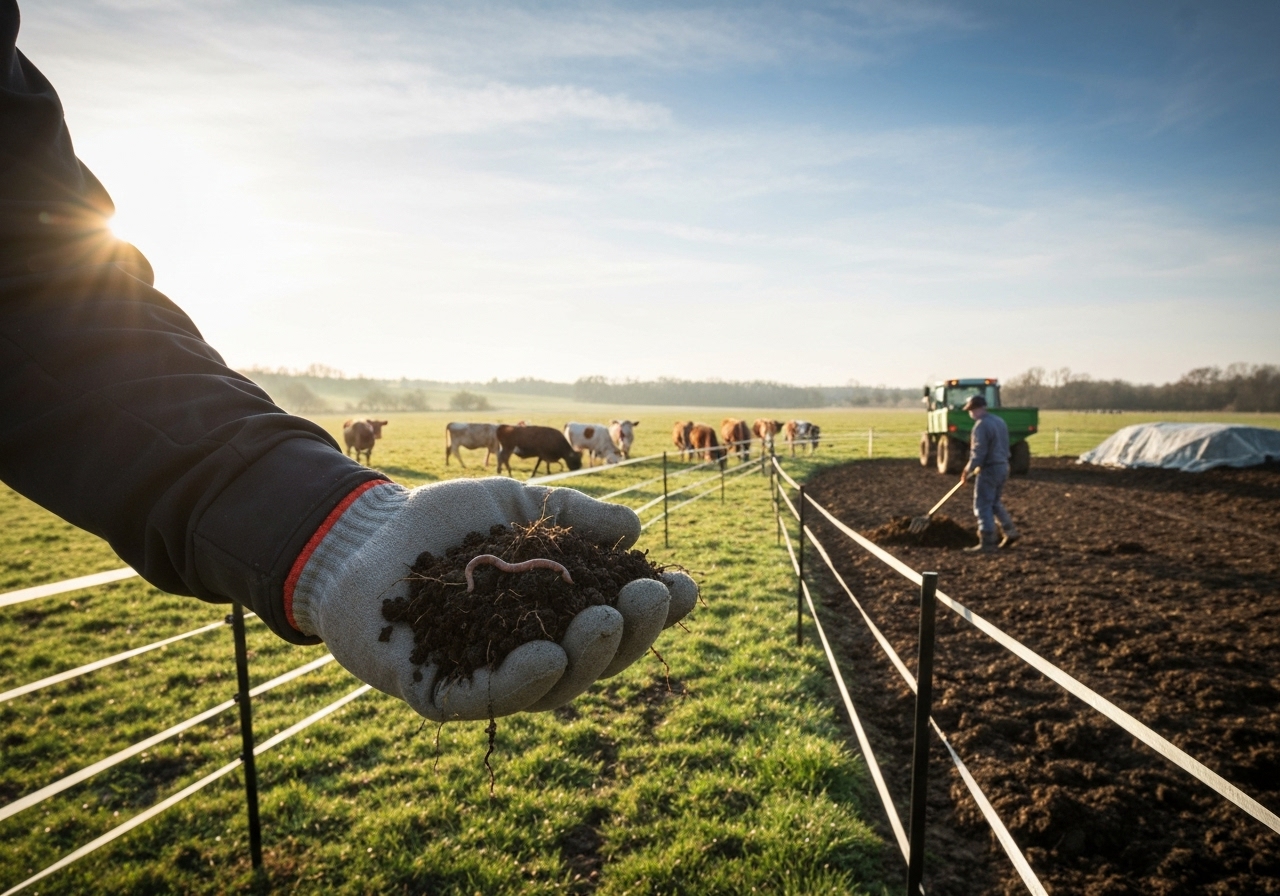
Use rotational or adaptive grazing and composted manure to increase plant productivity and return stable organic matter to soils.Well-managed grazing stimulates root growth and allocates more carbon belowground; manure applied as compost or integrated with tillage reductions enhances soil carbon accrual.
Follow these best practices:
- Rotate paddocks frequently to maintain plant vigor and residue cover.
- Stock at adaptive densities, not maximum, to balance forage regrowth and soil protection.
- Compost manures before field application where practical to stabilize nutrients and reduce pathogen and nitrate leaching risks.
Studies coordinated by USDA and academic partners show rotational grazing with extended recovery intervals builds more soil carbon than continuous grazing on similar lands.
How can vermicomposting and in-vessel systems help small farms?
Use vermicomposting and small in-vessel reactors to quickly process kitchen scraps and other small-volume wastes into high-quality soil amendments.These systems are low-footprint and scalable for market gardens and diversified farms.
Design considerations:
- Vermicompost in shallow beds or bins for rapid decomposition and nutrient-rich castings.
- Deploy small in-vessel systems to control odors and vectors while treating food-processing residues.
- Blend outputs into potting mixes, transplanting media, or field topdressings.
How to design a circular on-farm waste-to-carbon system?
Design a circular system by mapping waste streams, selecting treatments by scale, and returning stabilized products to appropriate fields.Start with a simple flowchart: source -> treatment -> product -> field application -> monitoring.
Use these steps to build the system:
- Inventory all waste: list volumes, moisture, and seasonal peaks.
- Prioritize streams by carbon potential and contamination risk.
- Match treatment: compost high-fiber residues; digest wet manures; pyrolyze woody waste.
- Plan storage, biosecurity, and application timing to prevent runoff or nutrient losses.
- Integrate with cropping plans and livestock cycles to ensure steady feedstock and amendment demand.
Integrate waste planning with crop rotation to maximize carbon retention and reduce inputs; see guidance on flexible rotations in adaptive rotation planning.
How to use microbial consortia to increase carbon stabilization?

Apply tailored microbial consortia to enhance decomposition pathways that favor stable soil aggregation and carbon formation.Microbial inoculants can accelerate humification and reduce nitrogen losses when matched to feedstock chemistry.
Leverage on-farm microbial strategies by consulting field-tested designs; for actionable approaches see the principles in microbial consortia for soil enrichment.
Can small farms monetize soil carbon increases?
Yes, small farms can access soil carbon markets and other revenue streams, but success depends on measurement, protocols, and transaction costs.Newer market models, including cooperative aggregation and blockchain tracing, reduce barriers for family farms.
Consider these revenue options:
- Soil carbon credits under verified protocols (project-level or bundled).
- Premium pricing for compost-amended or regenerative-labeled products.
- On-farm energy from AD or biochar sales to landscapers.
Case studies in recent sector reports show small farms can achieve net positive income from credits when grouped or when co-benefits (reduced inputs, yield gains) are counted; explore program designs summarized in soil carbon credits: small farm revenue.
How to measure and verify soil carbon changes on farms?
Measure soil carbon using baseline sampling, periodic lab analysis, and established protocols combined with remote sensing and modeling for verification.Verification requires a clear baseline, control or reference plots, and standardized sampling depth (commonly -30 cm).
Follow this measurement plan:
- Establish baseline with 10-20 composites per field depending on variability.
- Use consistent depth and lab methods (dry combustion preferred) and report in mass per area (tons C/ha).
- Monitor annually or every 3-5 years depending on the protocol; supplement with modeling and imagery.
- Document management actions, amendment rates, and provenance for auditing.
Protocols from recognized bodies (ICROA, Verra, USDA pilot frameworks) specify sampling density and permanence requirements; consult these standards when aiming for credits.
What are environmental, regulatory, and safety considerations?
Address air, water, and biosecurity risks by following local manure rules, composting standards, and application timing restrictions.Avoid surface application before heavy rains; manage nitrate risks by testing and staging applications.
Implement safety procedures:
- Train staff in pathogen controls and safe handling of compost and digestate.
- Comply with manure and waste spread limits and buffer zones for watercourses.
- Monitor odors and neighbors; use containment or covers for digesters and piles near sensitive receptors.
Cite national extension guidance and local environmental regulations when planning systems; many agencies offer decision trees and permitting advice.
How to schedule farm waste-to-carbon activities across a year?
Schedule feedstock collection during harvest peaks, compost during warmer months, pyrolyze woody residues in winter, and apply amendments before planting or during fall incorporation.Stagger activities to use storage capacity and to match soil application windows.
Example annual calendar:
- Spring: apply cured compost and digestate; topdress cover crop plantings.
- Summer: active composting and turning; biochar production from pruning.
- Fall: incorporate residues, spread compost, and seed cover crops.
- Winter: process woody waste; plan next-year feedstock flows and equipment maintenance.
Use crop maps and microclimate calendars to time applications for best uptake; consult regional scheduling resources like diversified small-farm crop maps to align practices with local microclimates.
What are the costs, returns, and simple ROI examples?
Estimate capital costs for equipment, labor, and permits against returns from lower input costs, increased yields, compost sales, energy capture, and potential carbon payments.Small-scale composting needs minimal capital; digesters and pyrolysis units have higher upfront costs but offer energy and stable carbon outputs.
Run the following simple ROI checks:
- Calculate avoided disposal fees and fertilizer costs.
- Estimate increased yield or reduced irrigation cost after soil carbon gains.
- Model potential carbon credit revenue and add co-benefits value to the farm.
Many farms reach payback within 3-7 years when energy offset and input savings are combined with compost sale or carbon income; perform farm-specific cash flow analysis before investing.
What quick operational tips improve carbon permanence?
Keep soils covered, minimize inversion tillage, and combine amendments with root-promoting crops to lock carbon belowground.Cover crops and reduced tillage move carbon into protected aggregates and deeper root zones.
Follow these operational rules:
- Never leave soils bare for extended periods.
- Use deep-rooting species in rotations to transfer carbon deeper.
- Incorporate biochar with compost to protect labile carbon.
What monitoring and recordkeeping are required for best practice?
Keep records of feedstock volumes, compost recipes, application rates, sampling results, and management actions for verification and improvement.Digital logs and photographs simplify audits and continuous improvement.
Maintain these records:
- Feedstock receipts and pile composition.
- Temperatures, turning dates, and curing times.
- Application fields, rates, dates, and weather conditions.
Frequently asked questions about turning farm waste into soil carbon
Will composting eliminate all pathogens?
No, composting reduces many pathogens if thermophilic conditions are reached, but pasteurization or testing may be required for certain uses.Follow validated temperature-time regimes and test before using on produce with direct contact.
Does biochar always increase yields?
It varies; biochar most often improves yields on degraded, sandy, or nutrient-poor soils and when charged with nutrients or compost.Trials show heterogeneous yield responses — perform a small trial before large-scale adoption.
Are carbon credits accessible to a one-acre market garden?
It depends on program rules but typically small farms need aggregation or simplified protocols to participate cost-effectively.Join cooperatives or regional aggregators to pool credits and share verification costs.
Where to find further technical and policy resources?
Consult national extension services, FAO resources, and recognized carbon protocol documents for technical specifics and compliance requirements.University extension bulletins provide region-specific compost recipes, AD feasibility tools, and biochar guidelines.
For practical on-farm examples linking soil biology and carbon strategies, explore posts describing microbial design and microclimate practices across small farms such as microbial consortia for soil enrichment and crop planning resources like the diversified small-farm calendar.
What are the next steps for a farm starting this transition?
Start with a waste audit, select one pilot stream, and run a 12-month trial to refine operations and document outcomes.Scale activities once material balance, storage, and market pathways are validated.
Implement these starter actions:
- Perform a one-week material inventory by volume and type.
- Create a simple pest and odor management plan.
- Build one pilot compost pile, or partner with a nearby digester or biochar service.
- Collect baseline soil samples and plan monitoring.
Treat farm waste as a resource: stabilize its carbon, feed your soil, and build a resilient, circular farm system. Practical, documented steps lead to measurable soil carbon gains and stronger farm economics.
Simple Seasonal Farm Records: A Beginner’s Mobile Guide
Simple Seasonal Farm Records: A Beginner’s Mobile Guide
Keep clear, mobile-friendly seasonal farm records to improve decisions, reduce waste, and boost profitability. This guide gives beginner farmers a compact system for daily entries, seasonal summaries, and repeatable templates that fit a smartphone or tablet.
What are seasonal farm records and why keep them?
Seasonal farm records are dated notes and data about field operations, inputs, outputs, and observations for a single growing season.
Track the season to measure yields, compare practices, and satisfy buyers or regulators.
Documenting the season helps identify trends across years and supports decisions such as crop choice, planting dates, and irrigation timing.
Maintain records to access incentives or carbon programs when applicable as described in agricultural extension guidance (USDA, local extension services).
How should a beginner decide what to record this season?
Prioritize simple, high-value fields and avoid over-recording at the start.
Record these essentials first: date, field or bed ID, crop variety, operation type, quantity or area, and immediate outcome.
Add cost and labor only when you need a break-even calculation or when selling direct to consumers.
Include photos and short notes for scouting and troubleshooting later.
Essential recording fields to start with
- Date and time
- Field or bed identifier
- Crop and variety
- Operation performed (planting, weeding, harvest, pest control)
- Area or count (m2, row feet, number of plants)
- Yield or harvest weight
- Notes and photo
What mobile tools work best for on-farm record keeping?
Choose tools that work offline, sync to the cloud, export to CSV, and accept photos and GPS tags.
Use one of three tool categories: 1) simple note apps or spreadsheets, 2) specialized farm management apps, or 3) form builders that create repeatable templates.
Start with a spreadsheet on your phone if you want maximum control and easy exports.
Adopt a farm management app if you want mapping, task scheduling, and integrated sales tracking later.
Key app features to require
- Offline access and later sync
- Photo attachments with timestamps
- CSV or Excel export
- Custom fields and templates
- GPS or field mapping (optional)
Cost and tool selection guideline
Select a free or low-cost tool for the first season. Upgrade only when data volume or reporting needs increase.
How do you set up a simple mobile template for daily entries?

Build a minimal template that you can use for every field visit. Reuse it to speed data entry and ensure consistency.
Create a template with labeled fields, dropdowns for common values, and a photo upload slot.
Single-visit mobile template example
- Date: auto-filled
- Field ID: dropdown or short code
- Crop/Variety: dropdown
- Operation: dropdown (planting, weeding, scouting, irrigation, harvest)
- Area or count: numeric field
- Input used: text (seed, fertilizer, amendment)
- Quantity/Rate: numeric and units
- Labor: hours and person initials
- Photo: attach one or more
- Notes: short free text
Use form-builder apps or a single-sheet spreadsheet template to implement this design quickly.
How should a beginner record planting, harvest, and yield data accurately?
Use consistent units, measure small sample areas for yield estimation, and record calibration details for scales.
Label transplants and seed lots to track variety performance across fields.
Planting recording steps
- Note seed lot or transplant batch code.
- Record seeding rate and row spacing.
- Tag bed or row start and end points for later scouting.
Harvest and yield recording steps
- Weigh harvest using a calibrated scale.
- Record harvest weight, sample size, and moisture if needed.
- Convert weights to per-area yields using recorded harvested area.
- Document harvest losses and reasons.
Follow extension recommended sampling methods from university extension guides to ensure comparable yield data.
How should a beginner track inputs: seed, fertilizer, water, and labor?
Record inputs by batch, rate, and cost to link inputs to outputs and calculate efficiency.
Create input logs with reusable dropdowns for common products and unit conversions pre-defined.
Input tracking fields
- Input type and brand or batch
- Application rate and units
- Date and field
- Applicator name
- Cost per unit and total cost
- Purpose or target pest/nutrient
Track irrigation as minutes or liters per zone and link to field ID for later water use efficiency estimates.
How do you link records to microclimate and crop rotation plans?
Map each field and reference microclimate zones and rotation plans in your records to improve placement and scheduling decisions.
Use your field ID to connect a visit entry to a microclimate map or rotation sequence.
Refer to existing mapping practices such as crop maps by microclimates when assigning plantings to zones. For detailed mapping strategies consult regional microclimate mapping resources and practical guides.
Review crop maps by microclimates to align planting records with local microclimate zones.
How should you track crop rotation and low-input plans in records?
Maintain a rotation log that lists past crops per field to avoid repeating families and to plan low-input sequences.
Record cover crops, green manures, and fallow periods as part of rotation entries.
Consult adaptive rotation frameworks for low-input systems to record the sequence and rationale for each rotation decision.
See adaptive low-input crop rotation plans for templates that can be adapted as a rotation-recording module.
How can records help with pest and disease scouting and response?

Use a scouting log to record pest sightings, severity estimates, thresholds reached, and action taken.
Photograph symptoms, specify pest stage, and timestamp entries to build a seasonal incidence timeline.
Scouting log fields
- Date and observer
- Field ID and location
- Crop and growth stage
- Pest or disease observed
- Severity estimate or count
- Action threshold and response
- Treatment details and re-check date
Compare entries against integrated pest management thresholds from extension recommendations to decide actions.
How should a beginner keep soil health and amendment records?
Record soil tests, amendment applications, and biological treatments to track soil condition changes over seasons.
Document testing lab, test date, and all measured parameters such as pH, organic matter, and nutrient levels.
Record microbial amendments and their source, batch, rate, and timing.
Use on-farm microbial design practices to log inoculants and measure soil response over time.
Refer to research and field guides on designing soil microbial consortia when you record biological amendment strategies; that guidance helps link application to soil health outcomes.
Consult designing on-farm microbial consortia for details on documenting biological products and expected soil responses.
How do you organize seasonal logs for reporting, certification, and marketing?
Create separate folders or sheets for compliance, sales, and farm management so you can extract reports quickly.
Keep an invoice and sales log with customer details, product weight, price, and delivery date.
Store compliance records—such as organic inputs or pesticide applications—in a dedicated compliance file for audits.
Sales and marketing record fields
- Product, quantity, and price
- Customer or market
- Delivery or pickup date
- Payment status
- Special handling notes
How should a beginner backup and secure mobile records?
Enable automatic cloud backup for your chosen app and export monthly CSV copies to a secondary cloud or local drive.
Use strong passwords and two-factor authentication on cloud accounts to protect data privacy.
Keep a printed season summary if you must meet audit requirements or handle intermittent connectivity.
How do you analyze seasonal records at the end of the season to plan next year?

Summarize key metrics such as yield per area, input cost per unit produced, labor hours per kilo, and profitability per enterprise.
Create simple pivot tables or charts from CSV exports to spot best and worst performing fields and varieties.
Minimum end-of-season metrics
- Total yield and yield per area
- Total input costs and cost per unit
- Labor hours and labor cost per unit
- Gross income and net margin by enterprise
- Water use per yield unit for irrigated systems
Use these metrics to adjust planting area, shift rotation sequences, and refine input choices for the next season.
What are common beginner mistakes in farm record keeping and how to avoid them?
Record inconsistency is the most common mistake. Avoid it by using templates and a single entry method.
Over-detailing and underuse of data both reduce value. Start small and expand fields only when you will analyze them.
Failing to back up data risks loss. Automate backups and export monthly copies.
Using multiple unlinked systems fragments data. Merge or standardize tools early to maintain linked field IDs and crop names.
Practical fixes for common mistakes
- Set a daily 10-minute logging routine and stick to it.
- Use dropdowns for repeat fields to avoid typos.
- Train all team members on the one template and the field ID system.
What simple seasonal checklist can a beginner follow on a phone?
Follow a concise, repeatable checklist to capture the season’s core information while on the move.
Daily mobile checklist
- Open the field ID template
- Enter date and time (auto)
- Select field and crop
- Choose operation type
- Enter quantity or area
- Attach one photo if there is an unusual observation
- Note input used and labor
- Save and sync when online
Weekly review checklist
- Export last week to CSV for backup
- Summarize pest events and actions
- Adjust the coming week schedule
End-of-season checklist
- Export full season data
- Compute yields per area for each field
- Calculate per-unit input costs and labor
- Write three lessons learned and three action items for next season
How can records help small farms access payments and carbon programs?
Keep documented records of practices, inputs, and soil health to demonstrate eligibility for incentive and carbon programs.
Record dates, methods, and outcomes for cover cropping, reduced tillage, and soil carbon practices to support claims during verification.
Use consistent field IDs and dated photos to strengthen program applications and audits.
How can you scale record keeping as the farm grows?
Automate repetitive tasks such as field mapping and CSV exports as your data volume grows.
Standardize naming conventions and field IDs to avoid fragmentation when adding staff or tools.
Integrate sensors or simple IoT where needed, while keeping the core mobile template for human observations.
What role do mapping and sensors play in seasonal records?
Use simple field mapping to attach each record to a polygon and improve spatial analysis of yields and inputs.
Deploy soil moisture or weather sensors to complement human observations and automatically log environmental triggers.
Link sensor time-series to manual entries for a richer seasonal dataset that supports irrigation and pest forecasting decisions.
How can records support regenerative practices and soil health goals?
Record cover crop species, termination dates, and biomass estimates to measure regenerative progress.
Document biological amendments and microbial strategies to correlate treatments with soil test trends.
Use records to validate outcome-based incentives such as soil carbon credits or payments for ecosystem services.
Integrate soil microbiome and amendment records with field results when experimenting with new biological inputs.
How should you name fields, crops, and files for clarity?
Use short, consistent codes for fields such as “F1”, “NB-Row3”, or “Greenhouse-A” and include a master field map file.
Name crops by crop family and variety code to avoid ambiguity, for example “Tomato_CherokeePurple”.
Use date-first file names for exports, for example “2026-10-01_Harvest_F1.csv” to keep chronological order.
Which simple analytics give the best return on time invested?
Compute yield per area, input cost per unit, and labor hours per unit as your primary analytics.
Track these three metrics per field and enterprise to prioritize improvements that impact profitability fastest.
Visualize trends across years to detect variety or field performance shifts early.
How do you turn seasonal records into actionable changes?
Translate records into three specific actions: change one variety, alter one input rate, and adjust planting date for next season.
Use evidence from yield and cost metrics to justify changes and then record the experiment to validate outcomes.
Which resources and references should beginners consult?
Consult local extension publications, USDA guidance, and practical tools from sustainable agriculture organizations for templates and sampling protocols.
Use university extension sampling guides for yield and soil test methods to keep data comparable across seasons.
Refer to practical posts on rotation and mapping to integrate records into larger farm planning tools.
Explore specialized articles such as microclimate mapping and rotation planning available from practical farm practice collections for detailed workflows and templates.
How to start today: a 7-step beginner action plan?
Follow these steps on your phone to create a useful seasonal record system by the end of the week.
- Create a single field ID scheme and map fields roughly with GPS or tape measures.
- Build the daily template in a spreadsheet or form app with the essential fields listed above.
- Record every visit for one week using the template to build the habit.
- Export a CSV at the end of week one and review entries for missing data.
- Adjust dropdowns and templates to reduce typing errors.
- Back up the weekly CSV to cloud storage and a secondary location.
- At season end, compute yield and input cost metrics and note three changes for next season.
Start small, iterate fast, and keep the system aligned with the decisions you want to make.
What final advice helps beginners persist with record keeping?
Make the records directly useful for tasks you perform weekly to keep motivation high.
Reward consistency by reviewing one metric weekly and celebrating small wins such as a better germination rate or a minor cost saving.
Involve the team by assigning simple logging tasks and using photos to make entries quicker and more engaging.
Keep the system flexible and refine fields each season so records grow in value without becoming a chore.
Use internal knowledge resources and relevant articles on mapping, rotation, and soil biology to expand your record modules only when the core system works reliably.
Link practical mapping and rotation resources as your records mature to support strategic decisions and experimental trials.
Good record keeping is iterative. Start with the essentials and add complexity only as you will use the data for decisions.
Integrating Micro-Wetlands to Halt Farm Nutrient Runoff
Integrating Micro-Wetlands to Halt Farm Nutrient Runoff
Integrating micro-wetlands on working farms provides a practical, low-tech, and scalable way to intercept nutrient-rich runoff before it reaches streams, rivers, and lakes. This article explains what farm nutrient runoff is, how micro-wetlands remove nitrogen and phosphorus, where to place them, how to design and maintain them, how to combine them with other practices, and how to measure and fund their implementation.
What is nutrient runoff and why does it matter?
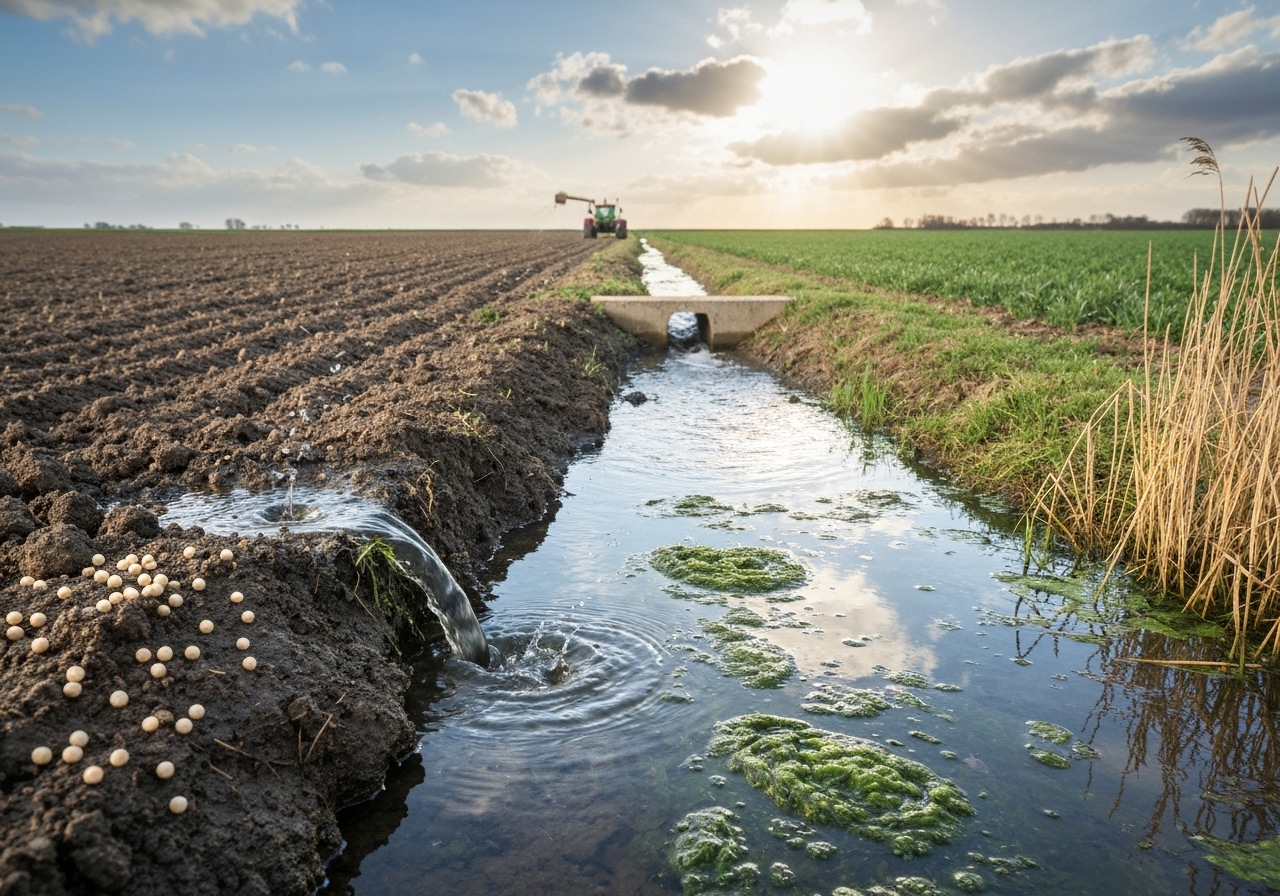
Nutrient runoff is the movement of dissolved and particulate nitrogen and phosphorus from fields into surface waters, and it causes algal blooms, oxygen loss, and ecosystem damage. Nutrient runoff originates from fertilizers, manure, soil erosion, tile drains, and failing septic systems. It reduces water quality, creates harmful algal blooms, decreases fisheries productivity, and increases water treatment costs. Federal and international agencies including the U.S. Environmental Protection Agency (EPA) and the Food and Agriculture Organization (FAO) identify agricultural nonpoint sources as a leading contributor to freshwater eutrophication.
How do micro-wetlands stop nutrient runoff on farms?
Micro-wetlands intercept runoff and use physical settling, plant uptake, microbial transformation, and adsorption to remove nitrogen and phosphorus. Micro-wetlands slow water, enabling suspended sediments and attached phosphorus to settle. Emergent vegetation takes up dissolved nutrients. Microbial communities in saturated soils convert nitrate to harmless nitrogen gas through denitrification. Organic soils and reactive substrates can adsorb or retain phosphorus. Agencies such as USDA Natural Resources Conservation Service (NRCS) and EPA promote wetland-based edge-of-field practices for nutrient control because they address both particulate and dissolved forms.
Where should micro-wetlands be located on a farm for maximum effect?
Micro-wetlands should be placed at natural low points, at tile drain outlets, along field edges, and in riparian corridors where runoff concentrates. Site placement must intercept drainage pathways to capture the majority of runoff. Locate small constructed wetlands at the outlet of a catchment or in a channel that drains a group of fields. Place wetlands downslope of areas with heavy manure application or high soil erosion risk. Positioning in riparian buffers increases co-benefits for stream shading and habitat.
What design elements make a micro-wetland effective?
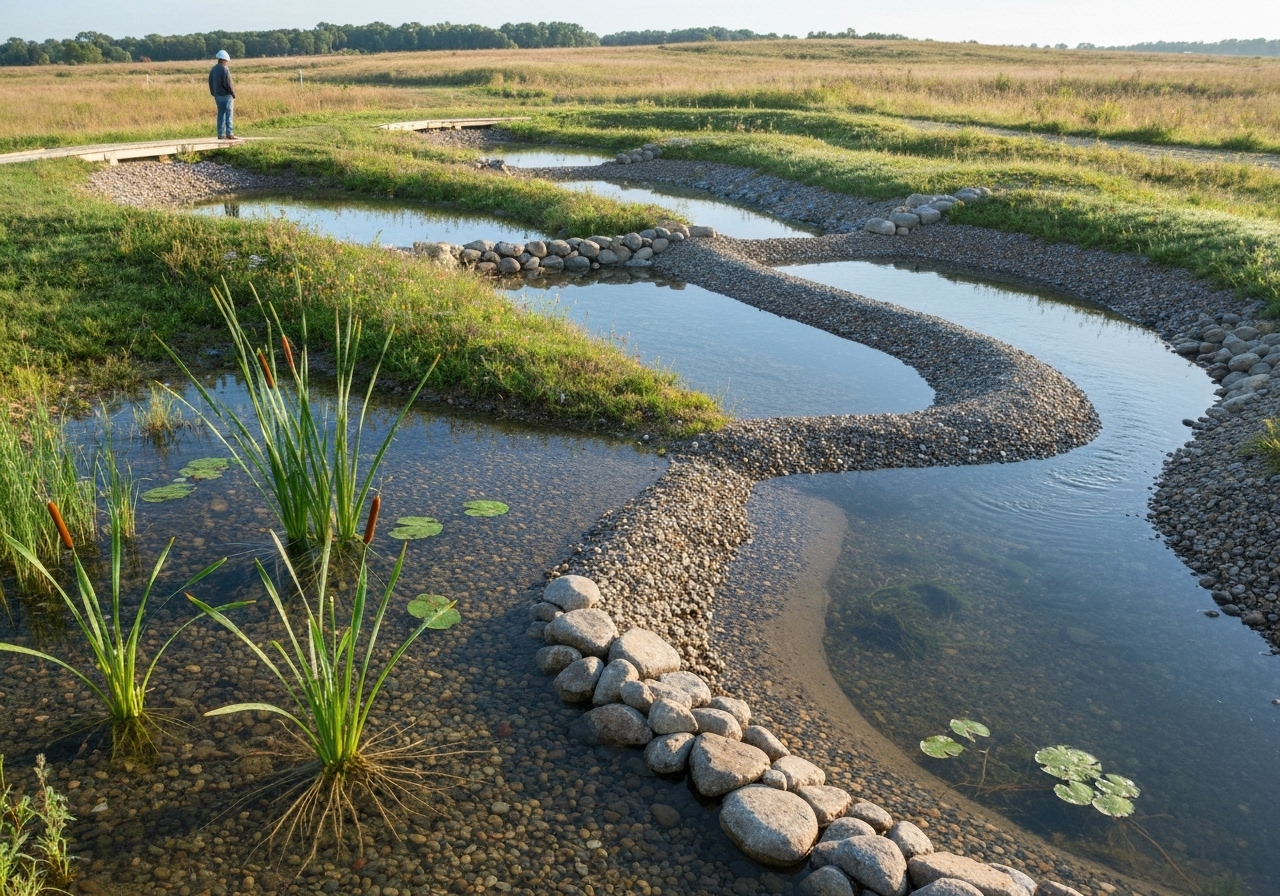
Design effective micro-wetlands by sizing for the contributing area, providing a forebay, creating varied shallow and deep zones, and ensuring sufficient residence time. Design steps include establishing an inlet structure or forebay to trap coarse sediments, creating a main treatment cell with emergent vegetation, and designing an outlet that controls flow and prevents short-circuiting. Aim for a hydraulic residence time that allows biological processes to occur; many guidance documents recommend target residence times in the range of days rather than hours for meaningful nitrate removal. Provide a sequence of shallow (.1 to .5 m) and deeper (.5 to 1. m) zones to support diverse plants and processes. Use a perimeter berm or engineered channel to manage inflows and overflow during storms.
How large should a micro-wetland be?
Size the micro-wetland to treat the expected runoff: a common rule-of-thumb is .5 to 2 percent of the contributing watershed for sediment and phosphorus control, and larger when nitrate loads are high. Exact sizing depends on soil type, slope, precipitation, and nutrient loading. For small drainage areas, a wetland area of .5 to 1.5 percent of the contributing area often yields measurable particulate and phosphorus removal. For nitrate attenuation, pair wetlands with denitrifying substrates or increase retention time, which may require wetland footprints in the range of 1 to 5 percent of the watershed. Use local NRCS design guidance and hydrologic calculations to refine size.
What hydrologic controls matter?
Hydrologic controls that matter are inlet distribution, flow path length, outlet control, and overflow routing to avoid short-circuiting during storms. Design the inlet to distribute flow evenly across the wetland surface rather than concentrating it in a single channel. Include a forebay to capture sediment and simplify maintenance. Use a simple weir or adjustable outlet to set the usual water level and allow controlled drawdown for maintenance or enhanced oxygenation during certain seasons.
Which plants and microbes should be used in micro-wetlands?
Use native emergent plants, sedges, rushes, and shallow-rooted aquatic species to maximize nutrient uptake, and encourage native microbial communities for denitrification. Effective emergent plants include cattails (Typha spp.), bulrushes (Schoenoplectus spp.), common reed alternatives where reed is invasive, and diverse sedge species. Edge shrubs and trees such as willows can stabilize banks and uptake nutrients. Promote microbial denitrifiers by maintaining organic carbon in sediments or adding a carbon-rich substrate in targeted zones. Consult regional native plant lists to avoid invasive species and to support local biodiversity.
Design microbial consortia by encouraging diverse soil and sediment communities rather than relying on single strains. Microbial communities perform nitrification and denitrification sequences. Adding organic matter such as woodchips, compost, or biochar in a subsurface zone can supply electron donors to heterotrophic denitrifiers. For more on on-farm microbial approaches to enrich soil and rhizosphere processes, review guidance on designing on-farm microbial consortia.
What construction and installation steps are required?
Construct micro-wetlands by surveying the site, preparing an inlet and forebay, shaping treatment cells, placing planting media, and installing outlet controls. Begin with a topographic survey and mapping of drainage. Excavate to shape shallow basins; amend soils only when necessary to improve retention. Install an armored inlet and a forebay to intercept coarse sediment. Prepare planting zones with locally sourced native plugs or seed. Construct an outlet control structure that sets normal pool elevation and provides an emergency spillway.
What materials and liners are appropriate?
Use natural soils where possible; consider clay liners or geosynthetics only where infiltration must be limited. Infiltrative soils may be acceptable when groundwater connections are small and the goal includes groundwater recharge, but where contaminant migration is a concern, compacted clay layers or geomembranes provide containment. Use rock-lined spillways and erosion protection at inlets and outlets to protect structures during high flow.
What are quick-build, low-cost micro-wetland options?
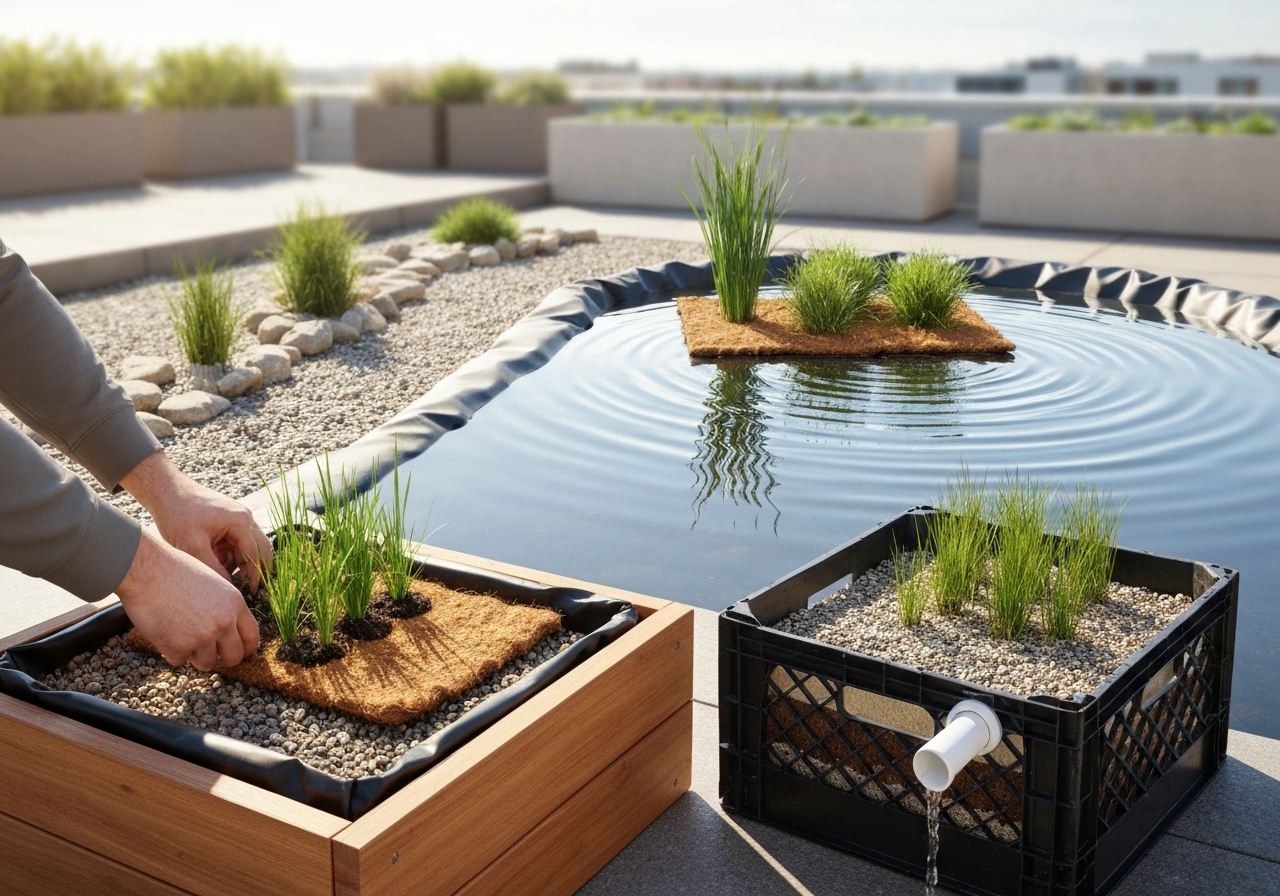
Quick-build options include shallow excavated basins with native plantings, retrofits of existing farm ponds with wetland fringe, and channelized wetlands in terraces or two-stage ditches. Simple trials can use small depressions fenced from grazing, or a planted fringe around an existing retention pond to add treatment capacity. Two-stage ditches and vegetated filter strips augment wetland function and are inexpensive to install.
How much maintenance do micro-wetlands need?
Maintenance includes periodic sediment removal from forebays, control of invasive plants, inspection of inlet/outlet structures, and occasional replanting. Inspect forebays annually and remove accumulated sediments when they occupy a large fraction of the forebay volume. Control woody encroachment in treatment cells if it reduces hydraulic function. Repair erosion at inlet and outlet points. Manage vegetation to retain emergent cover while allowing seasonal drawdown when needed to oxidize soils or facilitate removal of accumulated biomass.
How should micro-wetlands be integrated with other farm practices?
Integrate micro-wetlands with cover crops, buffer strips, adaptive crop rotations, and controlled fertilizer management for combined nutrient reduction. Use wetlands as one element in a treatment train. Maintain upstream cover crops to reduce sediment and nitrate mobilization. Plant perennial buffer strips to reduce edge runoff and provide wildlife habitat. Implement precision fertilizer application and soil testing to lower excess nutrient input at the source.
Coordinate wetland placement with crop rotation and field planning to maximize benefits across seasons. For guidance on rotation planning that reduces nutrient loss risk through timing and cropping choices, pair micro-wetland strategies with adaptive rotation frameworks such as those described in adaptive low-input crop rotation plans. Couple wetlands with efficient irrigation practices to reduce leaching; see applications in regenerative micro-irrigation that can inform irrigation optimization on small plots.
What monitoring and evaluation are needed to measure performance?
Monitor inflow and outflow water quality for nitrate, total nitrogen, orthophosphate or total phosphorus, turbidity, and flow to quantify removal rates. Establish baseline measurements before construction. Use automatic or manual flowgages to estimate loads. Sample inflow and outflow periodically across seasons. Calculate mass removal as the difference between incoming and outgoing loads. Consider simple indicators such as dissolved nitrate and turbidity for routine checks and add periodic laboratory analyses for total nitrogen and total phosphorus.
Use performance targets and adaptive management based on monitoring results. If nitrate removal is lower than expected, check for short-circuiting, insufficient residence time, or limited carbon availability. If phosphorus is being released, assess sediment disturbance and redox swings that mobilize bound phosphorus.
What are typical costs and funding sources?
Costs range widely: small, simple micro-wetlands can cost a few thousand dollars, while engineered systems with liners and controls can reach tens of thousands; cost-share and incentive programs often offset a large share. Cost drivers include excavation volume, liner choice, planting costs, and outlet structure complexity. Many programs such as USDA NRCS Environmental Quality Incentives Program (EQIP), state-level conservation cost-share, and watershed grants provide funding or technical assistance. Investigate regional conservation districts and nonprofit watershed partnerships for additional support.
What common design or management failures should be avoided?
Common failures include improper siting that misses concentrated flows, short-circuiting, under-sizing for peak events, invasive plant takeover, and lack of maintenance. Avoid placing wetlands on slopes where inflow energy will erode the basin. Prevent short-circuiting by distributing inlets and using baffles or plant patterns to force longer flow paths. Design spillways for extreme storms. Plan for ongoing maintenance in the farm budget and schedule.
How do micro-wetlands perform in different climates and seasons?
Micro-wetlands perform across climates but seasonal dynamics change processes: denitrification is higher in warm seasons, while freeze-thaw cycles can reduce plant uptake in winter. In cold climates, design considerations include extended residence times and subsurface carbon zones to maintain denitrification during shoulder seasons. In semi-arid climates, occasional dry periods require wetland design that can tolerate drying and rapid rewetting. Use vegetation mixes adapted to local hydrology to maintain year-round function where possible.
How can farmers pilot micro-wetlands with limited resources?
Start with a small pilot wetland at a single tile outlet or low-field corner, monitor performance, and scale based on results. Use low-cost excavation and native plant plugs. Document inflow and outflow quality to build a case for expansion. Partner with local extension services, university researchers, or conservation districts for design reviews and monitoring support. Small trials reduce risk and provide practical learning.
What are the co-benefits of micro-wetlands beyond nutrient control?
Micro-wetlands provide habitat for pollinators and birds, store floodwater, recharge shallow groundwater, and increase landscape resilience while enhancing farm biodiversity. Wetlands can sequester organic carbon in sediments over time and diversify on-farm habitats, supporting beneficial insects and wildlife. These co-benefits often strengthen grant and incentive applications for conservation funding.
Which regulatory or permitting issues should be considered?
Permitting depends on jurisdiction: consult local conservation districts, state environmental agencies, and U.S. Army Corps of Engineers or equivalent to determine wetland and watercourse permitting requirements. Many small agricultural treatment wetlands fall under agricultural exemptions in some regions, but regulated waters and jurisdictional wetlands may require permits. Work with technical service providers and conservation agencies early to identify permit needs.
How should micro-wetlands be scaled across a watershed?
Scale micro-wetlands by prioritizing critical source areas and aggregating small treatment sites into a distributed network to intercept runoff from many fields. Map contributing areas and identify high-export fields for targeted placement. Use a network of smaller wetlands to treat runoff at multiple levels in the landscape rather than a single large centralized structure. Distributed networks are resilient and easier to site on working lands.
What immediate steps can a farmer take this season?
Survey problem drainage points, fence a small low spot for planting, trial an excavated fringe around an existing pond, and contact local NRCS or extension for a design check. Test soil and water to quantify the issue. Plant a buffer strip and install a simple forebay behind a low berm. Document costs and results to inform future investments.
Where can farmers find technical resources and support?
Find technical resources through USDA NRCS practice standards, state conservation agencies, university extension services, and watershed groups; many offer templates, design tools, and cost-share programs. Consult NRCS practice standards for constructed wetlands and related edge-of-field practices. Contact local extension agents for native plant lists and monitoring protocols. Partner with watershed organizations for funding and monitoring collaboration.
How do micro-wetlands fit within regenerative farm systems?
Micro-wetlands complement regenerative practices by capturing losses from intensified areas while upstream regenerative practices reduce source loading. Combine wetlands with cover cropping, reduced tillage, diversified rotations, and improved manure management to reduce the need for downstream treatment. For integrated planning that balances rotations and soil health with edge-of-field measures, see approaches in crop mapping and diversified planning and consider microbial soil-building strategies that reduce nutrient mobilization.
Implement wetlands as part of a treatment train: prevention at source, interception mid-field, and polishing at field edges. This layered approach maximizes nutrient reduction while maintaining production goals.
How to quantify success and report outcomes?
Quantify success by tracking reductions in nutrient loads (kg N and kg P removed), changes in downstream water quality, and co-benefits such as acres of habitat created. Use load calculations from flow and concentration data to estimate mass removal. Report metrics to funders and certification programs. Translate environmental benefits into economic terms where possible to inform farm business planning.
Seek partnerships with local universities or citizen science groups for robust monitoring that supports adaptive management. Peer-reviewed and agency-standard protocols strengthen claims of performance and support applications for conservation payments or carbon/nutrient credit programs.
What are the long-term outlook and policy trends?
Policy trends increasingly favor nature-based solutions and payments for ecosystem services, making micro-wetlands an eligible practice under many emerging conservation programs. Programs that value water quality, biodiversity, and carbon storage are expanding. Anticipate increased technical and financial support as watershed-scale nutrient reduction targets gain prominence in regional planning.
Plan micro-wetland deployments to align with evolving incentive programs and watershed plans to capture funding and maximize landscape impact.
Integrating micro-wetlands into farm planning offers a practical pathway to reduce nutrient runoff, improve resilience, and generate co-benefits for biodiversity and water resources. Pilot small, monitor results, and scale with complementary practices for the greatest environmental and farm viability outcomes.
Top Lesser-Known Legumes for Boosting Soil Nitrogen
Top Lesser-Known Legumes for Boosting Soil Nitrogen
Top Lesser-Known Legumes for Boosting Soil Nitrogen: This guide profiles underused legumes that reliably add biologically fixed nitrogen, with species-specific fixation ranges, establishment and management steps, inoculation notes, and practical rotation use for small and diversified farms.
What are the top lesser-known legumes for boosting soil nitrogen?
What are the top lesser-known legumes for boosting soil nitrogen? The best lesser-known legumes include sunn hemp, sesbania, tagasaste (tree lucerne), serradella, sainfoin, velvet bean, pigeon pea, narrow-leaf lupin, and lablab — each offers strong nitrogen-fixation potential in specific climates and management systems.
Why these species?
Why these species? These legumes combine high N-fixation per hectare, rapid biomass accumulation or perennial habit, compatibility with many cropping systems, and tolerance to marginal soils compared with common cover crops.
How much nitrogen can these lesser-known legumes fix?
How much nitrogen can these lesser-known legumes fix? Fixation ranges vary by species and conditions: 30-300 kg N/ha annually is reported across species and management regimes.
How much nitrogen can these lesser-known legumes fix? Farmers should use species-specific ranges: sunn hemp often supplies 80-150 kg N/ha in warm, long-season environments (Ledgard and Giller), while perennial shrubs like tagasaste can contribute 50-200 kg N/ha annually under favorable conditions (Peoples et al., 2009; FAO reviews).
Which characteristics determine nitrogen contribution?

Which characteristics determine nitrogen contribution? Biomass yield, proportion of N derived from fixation, nodule efficiency, growing season length, and soil fertility determine N contribution.
Which characteristics determine nitrogen contribution? Rapid-growing summer legumes produce large aboveground biomass and often immobilize less N in residues when terminated at flowering; deep-rooted perennials access subsoil moisture and fix N across seasons.
What is sunn hemp and how does it perform for nitrogen?
What is sunn hemp and how does it perform for nitrogen? Sunn hemp (Crotalaria juncea) is a tropical/subtropical summer cover crop that produces large biomass and commonly fixes 80-150 kg N/ha when grown to full bloom in one season.
Sunn hemp: establishment and management
Sunn hemp: Establish with warm soil temperatures above 18 C and a firm seedbed; use 15-30 kg/ha seeding rate for broadcast or 8-15 kg/ha for drilled sowing. Inoculate with generic fast-growing rhizobia if local strains are absent.
Sunn hemp: Terminate at early flowering for best N release and quick residue decomposition; incorporate or crimp depending on system goals. Sunn hemp suppresses nematodes and weeds but can volunteer in some climates.
What is sesbania and where should it be used?
What is sesbania and where should it be used? Sesbania (Sesbania spp.) is a fast-growing annual or short-lived shrub ideal for wet or poorly drained tropical soils and can supply 80-200 kg N/ha when managed as green manure or hedgerow.
Sesbania: establishment and uses
Sesbania: Sow in warm, moist soils; use as a fallow green manure, riparian buffer, or alley-cropping hedgerow. Cuttings regrow quickly and return N via prunings.
Sesbania: Note potential seed toxicity to livestock in some species; avoid grazing untested varieties and manage seed set to prevent invasiveness.
What is tagasaste (tree lucerne) and what are its benefits?
What is tagasaste (tree lucerne) and what are its benefits? Tagasaste (Chamaecytisus proliferus) is a deep-rooted perennial shrub that fixes nitrogen year-round in Mediterranean and subtropical climates and contributes 30-200 kg N/ha depending on stand age and pruning intensity.
Tagasaste: management for small farms
Tagasaste: Plant as shelterbelts, alley-cropping rows, or permanent forage shrubs. Establish seedlings or tubestock with 2-3 m in-row spacing; prune regularly to encourage leafy regrowth and transfer N to adjacent crops via litter and root turnover.
Tagasaste: Use for erosion control, fodder, and long-term soil-building; match variety to frost risk and water availability.
What is serradella and why use it on acid soils?
What is serradella and why use it on acid soils? Serradella (Ornithopus spp.) is a small-seeded winter annual legume adapted to acidic, low-phosphorus soils in Mediterranean climates and can fix significant N where other legumes fail.
Serradella: sowing and benefits
Serradella: Sow at 10-15 kg/ha into firm seedbeds; use for short winter-spring cover cropping and to reduce erosion on sloping land. Serradella forms effective nodulation on acid soils where clovers perform poorly.
What is sainfoin and when is it useful?
What is sainfoin and when is it useful? Sainfoin (Onobrychis viciifolia) is a perennial forage legume tolerant of alkaline, drought-prone soils that provides moderate N fixation, improved soil structure, and strong anti-bloat forage qualities.
Sainfoin: management tips
Sainfoin: Establish in well-drained soils with rhizobia inoculant specific to sainfoin; manage as mixed sward or pure stand for forage and nitrogen contribution over multiple seasons.
What is velvet bean and what niches suit it?
What is velvet bean and what niches suit it? Velvet bean (Mucuna pruriens) is a vigorous tropical cover crop that smothers weeds, builds biomass, fixes 50-120 kg N/ha in many trials, and suits fallow replacement or alley cropping in warm regions.
Velvet bean: pros and cautions
Velvet bean: Sow at 30-60 kg/ha; allow vine growth to cover ground before frost. Beware of seed dormancy and potential itch-causing hairs on some varieties; select low-irritant cultivars for safety.
What is pigeon pea and where does it fit?
What is pigeon pea and where does it fit? Pigeon pea (Cajanus cajan) is a semi-perennial shrub adapted to dry tropics and subtropics that fixes nitrogen over multiple seasons and supplies 30-150 kg N/ha when coppiced or used as a biomass source.
Pigeon pea: integration strategies
Pigeon pea: Use as hedgerow, living fence, or intercrop with cereals. Plant with 1-3 m spacing; coppice after 12-18 months to return biomass and nitrogen to the system.
What is lablab and why consider it?
What is lablab and why consider it? Lablab (Lablab purpureus) is a versatile tropical legume used as forage, food, and cover crop that produces moderate to high biomass and fixes useful N in mixed rotations.
Lablab: sowing and timing
Lablab: Sow after risk of frost has passed; use 15-30 kg/ha seeding rates. Terminate at pod set if using as green manure to maximize N availability and reduce seed bank risk.
How should farmers choose the right lesser-known legume for their site?
How should farmers choose the right lesser-known legume for their site? Choose based on climate zone, soil pH, season length, frost risk, target use (green manure, fodder, hedgerow), and nodulation compatibility with local rhizobia.
How should farmers choose the right lesser-known legume for their site? Prioritize warm-season legumes like sunn hemp, velvet bean, and lablab in tropics; select serradella, sainfoin, or narrow-leaf lupin for Mediterranean or marginal soils.
How important is inoculation and microbial management?
How important is inoculation and microbial management? Inoculation with compatible rhizobia is critical for many lesser-known legumes, and effective microbial seed coatings or on-farm consortia can improve nodulation success on low-rhizobia soils.
How important is inoculation and microbial management? Apply strain-specific inoculants where available; use peat-based, liquid, or carrier coatings and handle inoculants carefully to preserve viability (Peoples and Herridge, 199).
How important is inoculation and microbial management? Consider designing microbial consortia for persistent soil benefits and consult guidance for seed coatings when working in saline or degraded fields (microbial seed coatings).
How do you integrate lesser-known legumes into crop rotations?
How do you integrate lesser-known legumes into crop rotations? Integrate as short-term cover crops, fallow green manures, intercrops, hedgerows, or multi-year perennial rows depending on farm goals and rotation length.
How do you integrate lesser-known legumes into crop rotations? Use sunn hemp or velvet bean as warm-season replacements for fallow; plant serradella or lupin in winter-lean cycles; use tagasaste or pigeon pea in longer-term rotations and agroforestry rows.
How do you integrate lesser-known legumes into crop rotations? For practical rotation templates and low-input options consult adaptive low-input crop rotation plans tailored to small farms.
What are best practices to maximize N fixation and its availability to following crops?
What are best practices to maximize N fixation and its availability to following crops? Maximize biomass by allowing legumes to reach peak vegetative or early flowering, ensure strong nodulation via inoculation and soil fertility, and time termination to favor rapid residue decomposition.
- Ensure phosphorus and molybdenum are adequate because both limit fixation in many soils (FAO nutrient guides).
- Avoid heavy nitrogen fertilizer for legumes; low starter N can be used but high N suppresses fixation.
- Terminate legumes when C:N ratio favors mineralization (C:N <20) or incorporate residues to speed N release.
How should you seed, inoculate, and handle lesser-known legume seeds?
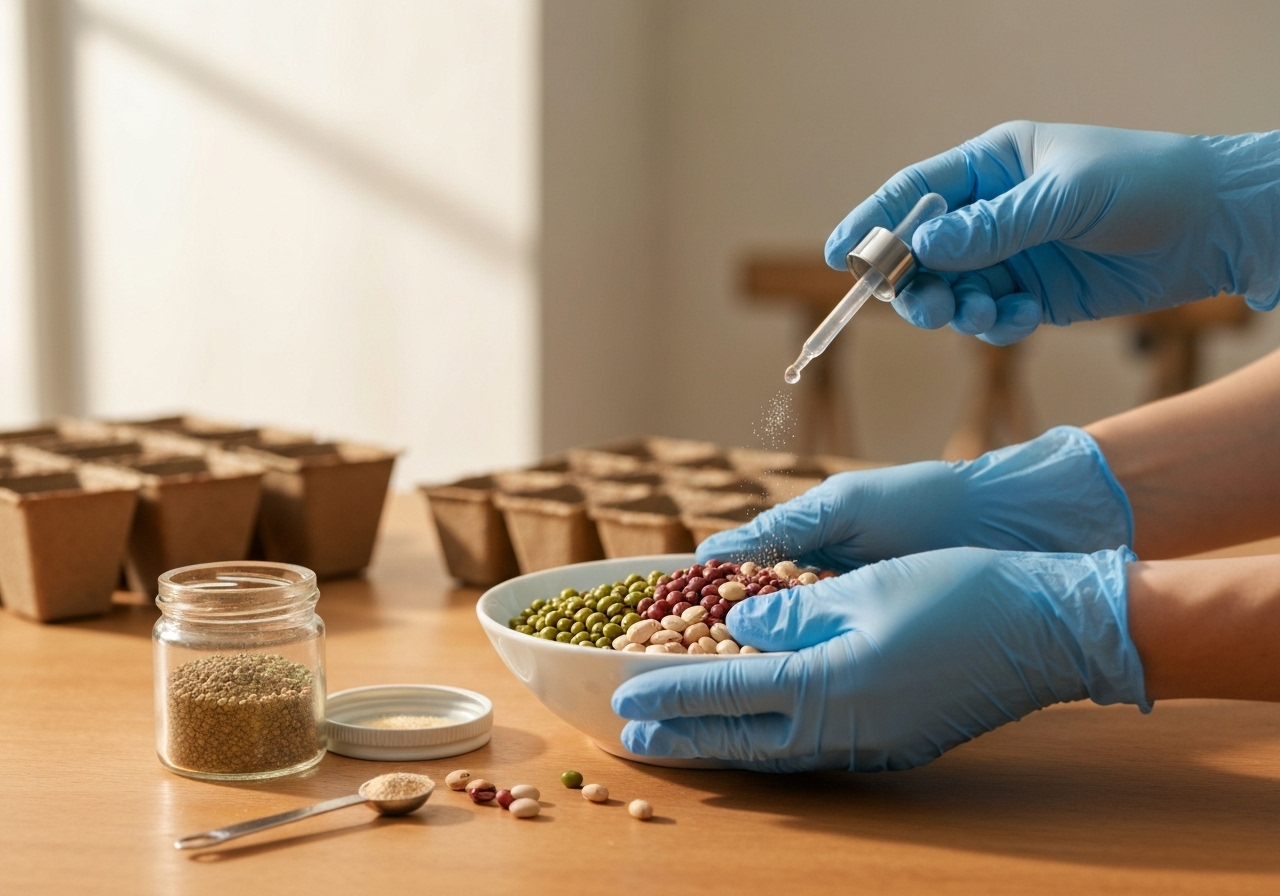
How should you seed, inoculate, and handle lesser-known legume seeds? Use species-specific seeding rates, inoculate with appropriate rhizobia strain immediately before sowing, and avoid exposing coated seed to high heat or sunlight.
How should you seed, inoculate, and handle lesser-known legume seeds? Use carrier formulations or modern microbial seed coatings for saline or degraded soils; follow product label rates and mixing instructions to maintain rhizobia viability and performance (industry extension guides).
What are common management risks and how to mitigate them?
What are common management risks and how to mitigate them? Risks include poor nodulation, seed predation, volunteer weeds from unharvested seed, livestock toxicity, and climatic mismatch; mitigate by testing inoculation, using termination windows, variety selection, and seedbed preparation.
What are common management risks and how to mitigate them? Scout for pests and diseases; avoid planting sensitive species in frost-prone microclimates; manage seed set to reduce volunteer issues.
Which lesser-known legumes are best for saline or degraded soils?
Which lesser-known legumes are best for saline or degraded soils? Serradella, some lupin species, and certain tagasaste varieties tolerate marginal soils; combine with tailored microbial coatings and soil amendments for best results.
Which lesser-known legumes are best for saline or degraded soils? Consider seed priming and inoculation strategies proven in trials for saline fields and consult research on microbial seed coatings to boost establishment (microbial seed coatings).
How do perennial shrubs compare with annual cover legumes for long-term soil N?
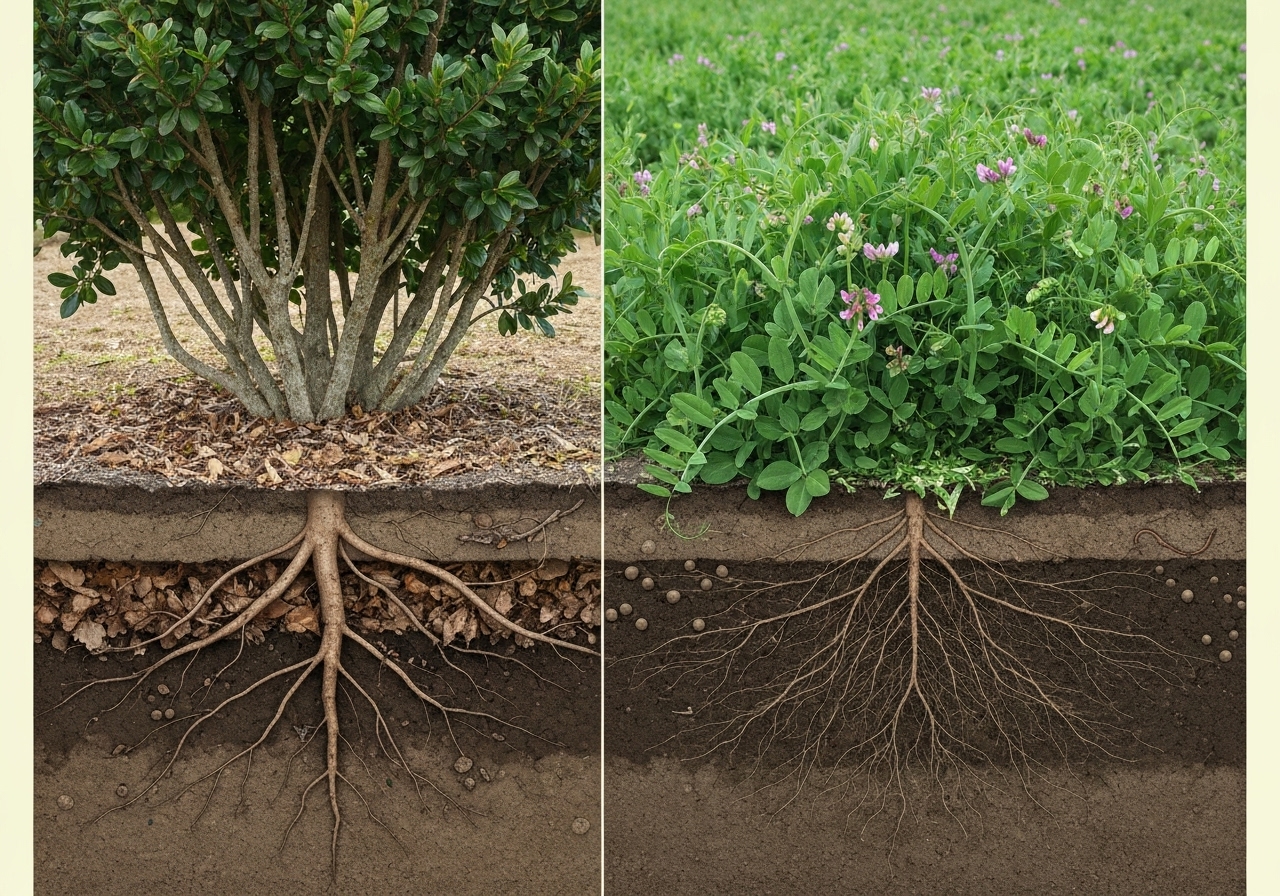
How do perennial shrubs compare with annual cover legumes for long-term soil N? Perennial shrubs deliver steady, multi-year N inputs via root turnover and prunings and build structure; annual legumes deliver large pulse N and fast weed suppression but require repeated sowing.
How do perennial shrubs compare with annual cover legumes for long-term soil N? Use a mix of strategies: permanent shrub rows plus annual cover crops provide both stable inputs and seasonal biomass peaks.
What monitoring and measurement should farmers use to track legume N contribution?
What monitoring and measurement should farmers use to track legume N contribution? Monitor shoot and root biomass, tissue N concentration, and calculate N accumulation (biomass x %N), and use soil tests before and after legume phases to detect changes.
What monitoring and measurement should farmers use to track legume N contribution? Consider occasional isotopic or 15N studies for precise fixation estimates on research plots; for practical farm decisions, use biomass sampling and soil nitrate tests combined with yield responses of subsequent crops.
What are on-farm examples of integrating these legumes into regenerative systems?
What are on-farm examples of integrating these legumes into regenerative systems? Examples include alley-cropping tagasaste for orchard understories, sunn hemp summer fallows before maize, serradella winter covers in Mediterranean vineyards, and pigeon pea hedgerows in dryland cereal systems.
What are on-farm examples of integrating these legumes into regenerative systems? Use legumes as part of sensor-guided or microclimate-aligned plantings to optimize establishment and maximize nitrogen benefits across small, zoned plots (crop maps by microclimates references can help with placement).
Which policy or market opportunities amplify farmer uptake?
Which policy or market opportunities amplify farmer uptake? Incentives for soil carbon, payments for ecosystem services, and technical assistance for inoculant supply chains raise adoption of nitrogen-fixing legumes.
Which policy or market opportunities amplify farmer uptake? Link legume adoption to soil carbon credit programs and local value chains for legume biomass or forage to create revenue streams while improving fertility (recent analyses on soil carbon for small farms illustrate these models).
What final practical checklist should a grower use to trial a lesser-known legume?
What final practical checklist should a grower use to trial a lesser-known legume? Checklist: match species to climate and soil, source quality seed and inoculant, set a clear rotation slot and termination date, monitor nodulation and biomass, and record N and yield responses on following crops.
What final practical checklist should a grower use to trial a lesser-known legume? Run small replicated strips if possible, adjust seeding rates in year two, and document pest/disease or volunteer issues; use results to scale successful entries across microclimates.
Further technical resources
Further technical resources: Consult local extension publications, global reviews on legume N-fixation (Peoples and Herridge, Ledgard and Giller), and practical guides on rotations and microbial interventions—see adaptive rotation templates and microbial consortia design for implementation details.
Further technical resources: For practical planning and microclimate placement use the site’s farm mapping and rotation content such as adaptive low-input rotation plans and explore microbial design options in designing microbial consortia.
Key takeaways
Key takeaways: Integrate lesser-known legumes to expand climatic options, increase yearly or perennial N inputs, and reduce external fertilizer needs; pair species choice with correct inoculation, termination timing, and rotation placement to capture real N benefits.
Innovative No-Greenhouse Season Extension Tactics Guide
Innovative No-Greenhouse Season Extension Tactics Guide
Innovative no-greenhouse season extension tactics let growers push planting and harvest windows without expensive structures. This guide shows passive and active methods, plant choices, design steps, monitoring tools, and biological strategies to extend production effectively.
What are season extension techniques without greenhouses?
Season extension techniques without greenhouses are practices that protect crops from cold, wind, and moisture extremes to lengthen the growing season.
Season extension techniques rely on microclimate control, movable covers, thermal mass, mulches, and management changes rather than permanent greenhouse structures.
How do covers like row covers, low tunnels, and cloches work?
Covers raise air and soil temperatures and reduce frost risk by creating a trapped layer of warmer air and blocking wind.
Covers come in three main forms: floating row covers, low tunnels using hoops, and individual cloches for single plants.
- Floating row covers: lightweight fabric laid directly on plants to add 1-6 C to air temperatures and protect against insects and light frost; recommended by university extension services including USDA Extension.
- Low tunnels: hoops plus fabric or plastic increase protection and allow taller crops and passable aisles.
- Cloches: rigid or plastic domes for transplants or high-value vegetables; portable and easy to ventilate.
Research summarized by land-grant extensions shows covers reduce plant stress and improve early yields when managed for ventilation and pest control.
How to design and manage low tunnels and row covers for no-greenhouse season extension?
Design low tunnels and row covers to match crop height, wind exposure, and frost risk specific to your site.
Design steps: choose fabric weight for target frost protection, secure edges with soil or sandbags, and plan ventilation for sunny days to avoid heat stress.
Manage covers by removing or propping during warm days, inspecting for pests, and replacing worn material every few seasons as needed.
What is the role of cold frames and hotbeds in season extension without greenhouses?
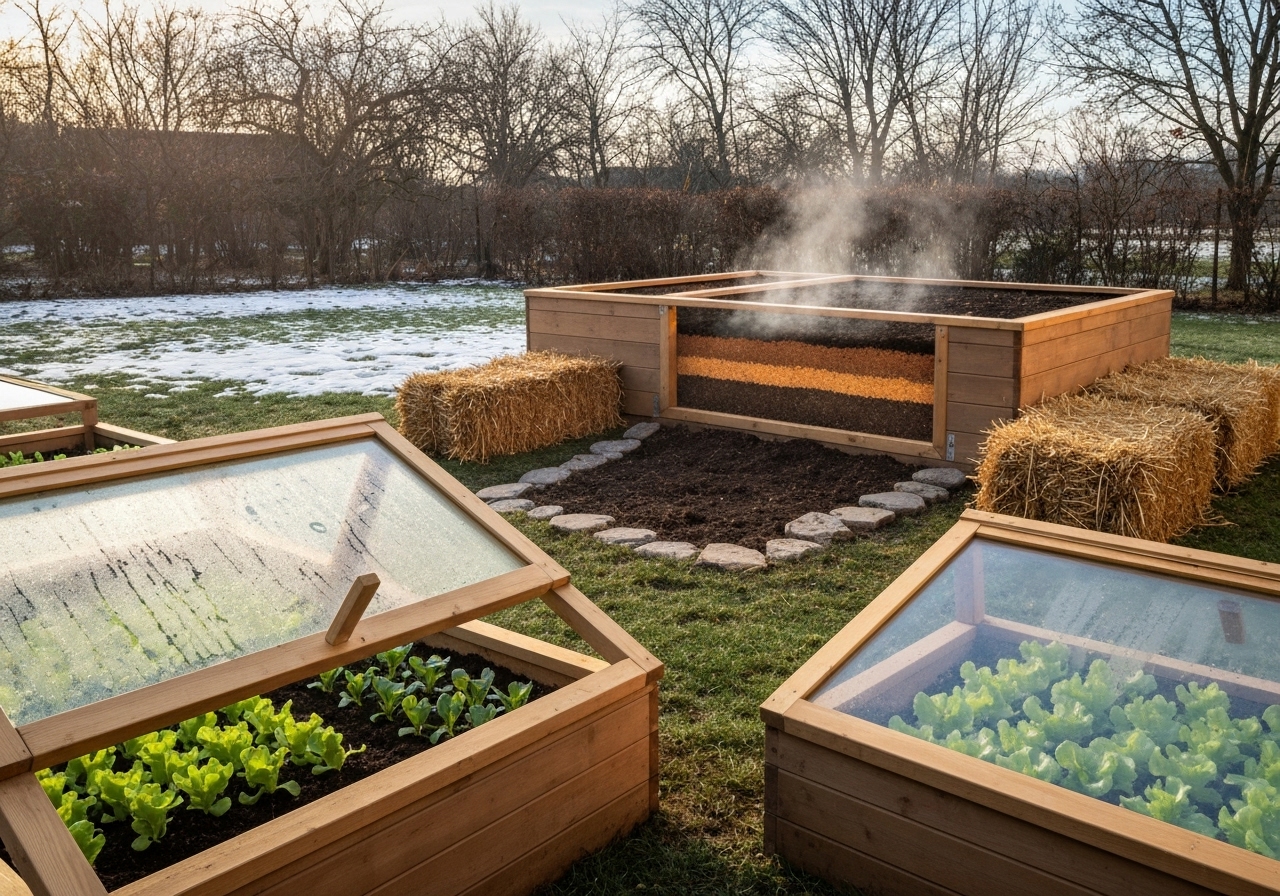
Cold frames and hotbeds provide sheltered, elevated soil temperatures near the ground level for seed starting and hardening transplants.
Cold frames use transparent covers and insulated walls; hotbeds add heat via compost or manure underneath to raise soil temps further.
Cold frames extend harvests and permit earlier transplants; extension publications from Cornell and UC Cooperative Extension outline construction and compost-heating guidelines.
How does mulch, ground cover, and thermal mass extend the season?
Mulch and thermal mass stabilize soil temperature, reduce heat loss at night, and protect roots from freeze-thaw cycles.
Principles: dark mulches absorb daytime heat; stone, water barrels, or concrete absorb heat and release at night; organic mulches insulate soil and moderate extremes.
Use raised beds with stone or water barrels on the south side for passive heat storage as recommended by microclimate farming guides.
How can microclimate mapping and site selection improve no-greenhouse season extension?
Microclimate mapping finds warmer pockets and frost-prone depressions to place crops and protective features optimally.
Microclimate mapping uses i) slope and aspect, ii) windbreak presence, and iii) thermal imaging or simple thermometers to identify ideal planting zones.
Microclimate zoning increases success of low-tech season extension; for small plots, follow best practices in microclimate mapping for urban regenerative farming and microclimate farming techniques.
What wind and frost management tactics support season extension without greenhouses?
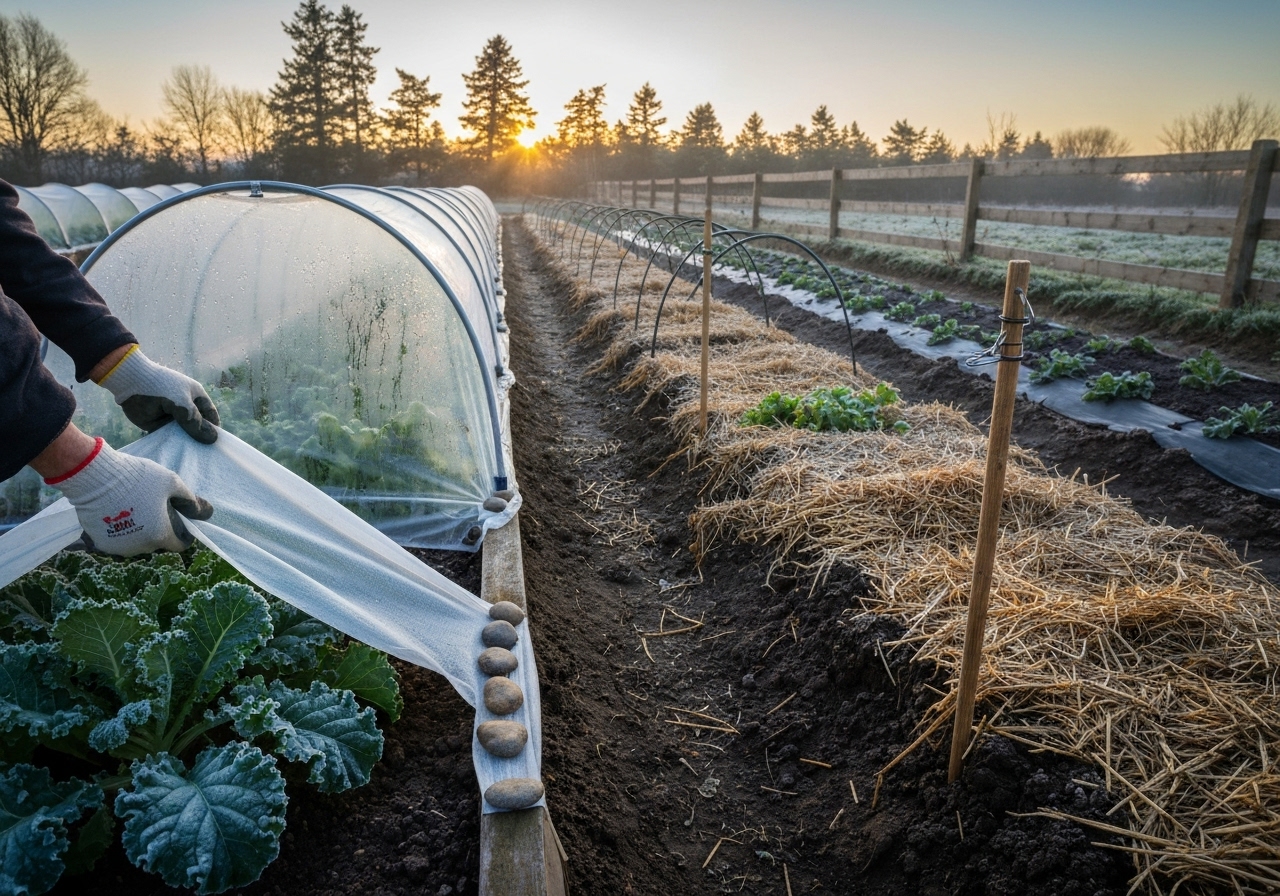
Wind and frost management reduce convective cooling and radiative heat loss during clear nights.
Tactics: install windbreaks, plant hedgerows, use temporary fences, and place thermal mass on the protected side to capture solar energy.
Windbreak design should use porous barriers at the correct height and distance; NRCS and university extension resources recommend staggered plantings for longevity.
Which crops are best for no-greenhouse season extension?
Crops with short stature and cold tolerance perform best under covers and in extended seasons.
- Early spring: radish, spinach, lettuce, arugula, peas, scallions.
- Late fall/winter: kale, collards, mizuna, tatsoi, mache, winter lettuces.
- Transplants for summer crops: tomatoes and peppers benefit from protected starts in cold frames.
Choose cultivars labeled cold-tolerant and seed for maturity time suited to your extended windows; university cultivar trials often list top performers.
What planting schedules and succession strategies work without greenhouses?
Planting schedules for season extension use staggered sowing, relay planting, and overwintering beds to maximize harvest length.
Strategies: sow fast crops early under covers, transplant protected starts into warmed beds, and plant late-season cut-and-come-again greens under low tunnels.
Use a diversified small-farm calendar and map plantings to microclimates to increase continuous yields; see approaches in diversified small-farm calendars.
How do soil health and microbial strategies support season extension?
Soil health and beneficial microbes improve plant resilience to cold, disease, and transplant shock.
Practices: maintain organic matter, use cover crops, and apply microbial consortia or inoculants tailored to your soil to enhance nutrient cycling and root vigor.
Design microbial applications based on on-farm trials and scientific guidance; consult resources like designing on-farm microbial consortia for integration ideas.
What irrigation and water strategies help extend seasons without greenhouses?
Irrigation and water management prevent cold-induced root damage and supply moisture when evapotranspiration continues in cool weather.
Strategies: use drip irrigation beneath covers, water in the morning to avoid freezing overnight, and place water barrels as thermal mass on the south side of beds.
Micro-irrigation paired with mulches reduces water stress and supports early season growth; see regenerative micro-irrigation practices for guidance.
What monitoring tools and low-cost sensors help with no-greenhouse season extension?
Monitoring tools provide real-time microclimate data to time covers and ventilation precisely.
Tools: inexpensive soil thermometers, HOBO loggers, wireless temperature sensors, infrared thermometers, and simple frost alarms help prevent crop loss.
Integrate sensors with simple rules: close covers when air temps approach critical thresholds and ventilate at midday if temps exceed plant tolerance.
How to integrate pest and disease management with season extension tactics?
Integrate cultural controls, sanitation, and compatible covers to reduce pest pressure while extending seasons.
Practices: rotate crops, inspect under covers frequently, use insect netting where needed, and apply biological controls to avoid pest outbreaks in warmer microclimates.
Follow IPM principles and consult extension resources on cover-related pest dynamics to design safe management routines.
What low-cost materials and construction tips support durable no-greenhouse systems?
Low-cost materials like agricultural fabric, PVC or metal hoops, recycled windows for cold frames, and used plastic film lower capital costs.
Construction tips: anchor edges, use UV-stabilized materials for longer life, seal joints in cold frames, and design modular systems that can be disassembled for season maintenance.
How to plan a seasonal layout for no-greenhouse production?
Plan layout by mapping exposures, wind directions, and frost pockets then allocate early and late beds accordingly.
Layout steps: build south-facing beds for thermal gain, situate windbreaks on windward sides, and position cold frames near water sources and tool storage for efficient management.
How to measure success and adapt season extension tactics over time?
Measure success using yield per bed, days to first harvest, frost damage incidence, and labor hours invested.
Adaptation: keep a season log, compare covered versus uncovered plots, and adjust fabric weights, sowing dates, and bed placement across years.
Use iterative trials and simple statistics to scale tactics that deliver consistent benefit on your microclimates.
Step-by-step plan to implement no-greenhouse season extension
Step 1: Map microclimates with thermometers across the site and record frost-prone areas.
Step 2: Select target crops and list protection needs for each crop through desired window expansions.
Step 3: Choose protection methods—row covers, low tunnels, cold frames, or mulch—and source materials.
Step 4: Construct beds oriented for solar gain, add thermal mass elements, and install windbreaks where needed.
Step 5: Start protected sowings and record performance; adjust timing and protection as data indicate.
What are common mistakes and how to avoid them in season extension without greenhouses?
Common mistakes include poor ventilation, inadequate anchoring, overreliance on a single tactic, and ignoring soil health.
Avoid mistakes by planning ventilation, securing covers firmly, combining tactics, and maintaining soil fertility and structure.
How much will season extension cost without greenhouses?
Costs vary widely: basic row covers and hoops for a 10 m bed can cost under $100 in materials; cold frames and water-barrel thermal mass add more initial expense.
Estimate ROI by comparing earlier yields, higher quality produce, and market prices for early-season crops versus material and labor costs.
Are there case studies or research supporting these no-greenhouse tactics?
Yes, multiple extension publications and research trials from land-grant universities validate cover efficacy, thermal mass benefits, and cold-frame performance.
Examples: university extension trials show improved germination and earlier harvests with floating row covers; compost-heated hotbeds are documented in agricultural manuals.
How to combine season extension with regenerative practices?
Combine season extension with cover cropping, rotational plantings, and microbial amendments to maintain long-term fertility and resilience.
Regenerative integration increases soil carbon, reduces erosion in exposed winter plots, and supports plant health during early and late season stress.
See related regenerative crop rotation strategies for planning integration across the farm in adaptive low-input rotation plans.
What are simple trial ideas to test on small plots?
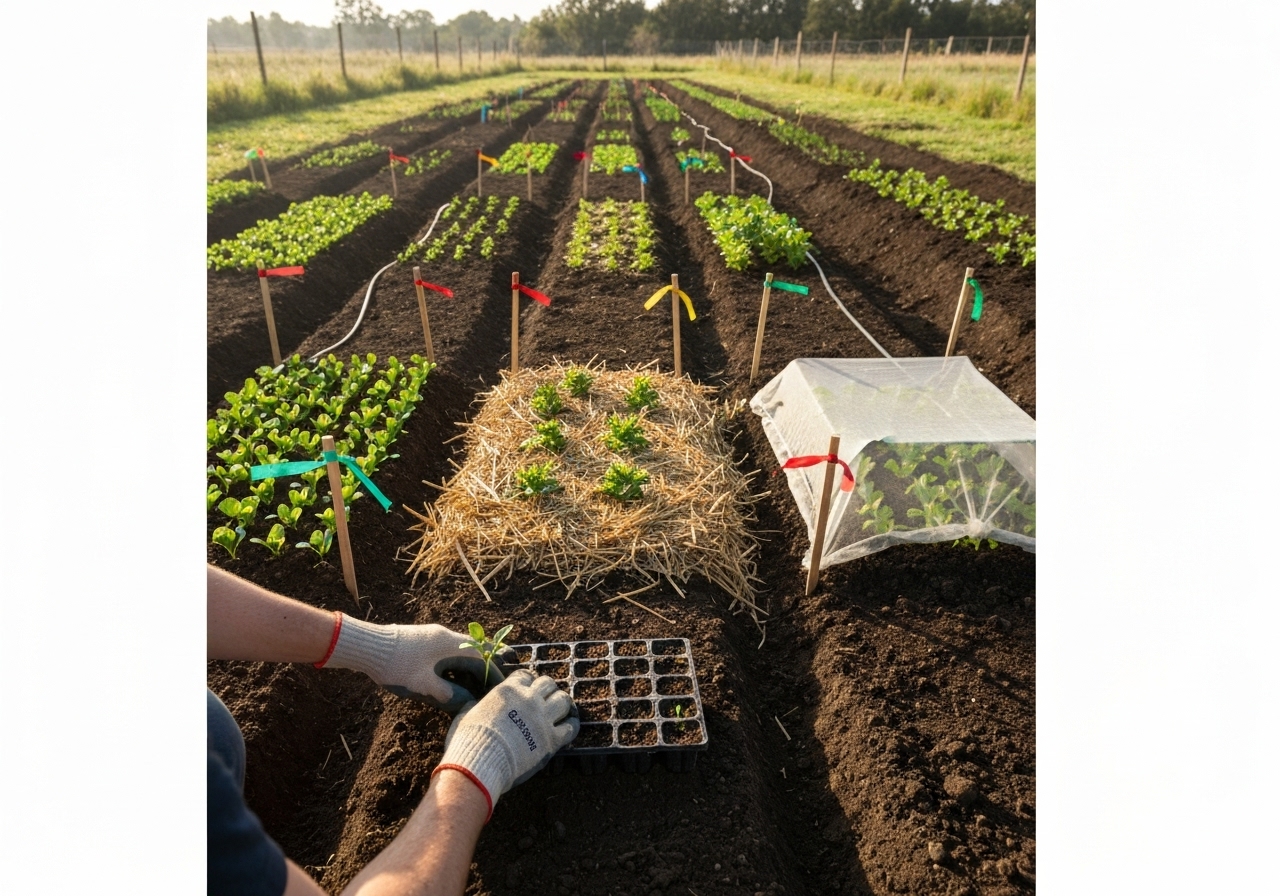
Trial idea 1: compare row cover versus no cover for lettuce sown six weeks earlier than usual and track days to harvest.
Trial idea 2: test water-barrel thermal mass versus none on south-facing beds for nighttime temperature moderation.
Trial idea 3: compare cold frames with and without compost-heated beds for early tomato transplants.
Where to find additional resources and technical support?
Find resources at local extension offices, NRCS, and university publications for region-specific recommendations and cultivar trials.
Attend farmer field days, join grower networks, and review extension fact sheets for construction plans and management checklists.
Combine published science with on-farm trials to refine tactics for your exact microclimates and markets.
End of guide: apply these techniques incrementally, measure outcomes, and adapt to your site’s microclimate and production goals.
Microbiome-Focused Land Prep for Vegetable Farming
Microbiome-Focused Land Prep for Vegetable Farming
Prepare land for vegetable farming by prioritizing the soil microbiome: test soil, reduce disturbance, add organic matter, select cover crops and design microbial enrichments to build resilient, productive beds.
What is microbiome-focused land preparation?
Microbiome-focused land preparation means shaping the physical, chemical and biological soil environment to favor beneficial microbes before planting vegetables.
Define goals: improve nutrient cycling, increase disease suppression, enhance water holding capacity, and stabilize soil structure.
Why should vegetable farmers focus on the soil microbiome first?
Focusing on the soil microbiome improves plant nutrient uptake, reduces need for synthetic inputs, and increases resilience to drought and disease.
Support claims with data: the USDA Natural Resources Conservation Service reports that practices increasing organic matter and reducing tillage raise microbial biomass and aggregate stability. A 2019 review in Nature Reviews Microbiology found that diverse microbial communities promote plant health through nutrient mineralization, pathogen suppression and signaling with roots. A 2018 meta-analysis in Soil Biology & Biochemistry linked cover cropping and compost amendments to consistent increases in microbial activity and soil carbon.
How do you assess existing soil health and the microbiome?
Assess soil health through soil tests, physical inspections and microbial assays to establish a baseline before major land changes.
Take these steps:
- Order a standard soil test for pH, texture, organic matter, macronutrients and micronutrients from a certified lab. Use NRCS and university labs when possible.
- Run a biological soil test. Choose DNA-based microbial community profiling or functional assays that measure respiration, enzyme activity, or nitrogen mineralization. Use results to target amendments.
- Survey field physical condition: compaction, drainage, erosion signs and topsoil depth. Walk the field in wet and dry states to identify low spots and hardpans.
- Map microclimates, slopes and sun exposure. Use a simple hand-held sensor or modern tools: implement AI-enabled soil sensors to collect continuous moisture and temperature data where budgets allow.
How do you design a microbiome-friendly land-prep plan?

Design a plan by sequencing soil tests, amendments, cover crops, minimal disturbance and targeted microbial additions using a timeline tied to planting dates.
Follow these design steps:
- Prioritize pH and nutrient corrections 8-12 weeks before planting to allow microbiome response. Apply lime if pH is below crop optimum or sulfur if too high.
- Increase organic matter through compost, composted manures, or well-aged green manures applied 4-12 weeks before planting depending on stability.
- Define tillage intensity. Choose minimal tillage to preserve fungal networks unless severe compaction or weeds require deeper work.
- Select cover crops for root architecture and residue type to favor desired microbes (see cover crop section).
- Plan crop rotations and low-input sequences that reduce pathogen carryover and support diverse microbial niches; integrate principles from adaptive low-input crop rotation plans to match planting windows and disease break strategies.
- Identify candidate microbial amendments and design application windows—seed coatings, soil drenches or compost extracts—preferably informed by on-farm microbial mapping.
Which cover crops and green manures best support the vegetable soil microbiome?
Choose cover crops by purpose: deep-rooted species to break compaction, legumes to boost nitrogen, and high-carbon species to build fungal networks.
Recommended species and mixtures:
- Legumes: hairy vetch, crimson clover, field pea — provide biologically fixed nitrogen and stimulate rhizobia and associated microbiota.
- Brassicas: oilseed radish and mustard — produce biofumigant compounds that reduce soil-borne pathogens when incorporated strategically, but may suppress some beneficial fungi if overused.
- Grasses/rye: cereal rye, oats — create high-residue biomass that supports saprophytic fungi and stabilizes aggregates.
- Mixes: combine a legume + grass + brassica in rotation or cocktail mixes to balance N, biomass and biofumigation effects.
Manage cover crops for microbiome benefit:
- Terminate at flowering or at appropriate biomass stage to maximize rooting and residue inputs.
- Use roller-crimping for no-till termination where possible to protect soil structure.
- Aim for 3,000–6,000 lb/acre dry biomass for meaningful organic matter addition where climate allows.
How do you build and introduce beneficial microbial communities?
Introduce beneficial microbes by adding stable organic matter, cultured consortia when needed, and by fostering native populations through habitat and food resources.
Practical steps:
- Apply well-made compost at 2–5 tons/acre to supply diverse microbes and labile carbon. Confirm compost maturity to avoid phytotoxicity.
- Use compost teas or extracts cautiously: apply aerated teas during cooler parts of the day and avoid untested recipes that encourage opportunistic microbes.
- Design targeted inoculants for constraints: mycorrhizal inoculum for low-P soils, rhizobia for legumes, or specific bacterial consortia for salinity or drought stress. Use guidance from designing on-farm microbial consortia to match strains to local needs.
- Prefer locally-sourced inoculants or on-farm enrichment to increase establishment success; native microbes adapt better to field conditions.
How does tillage and physical preparation affect the microbiome?

Tillage alters microbial habitat: shallow or no-till conserves fungal hyphae and aggregation while deep tillage resets communities and speeds decomposition.
Tillage guidelines:
- Use reduced tillage (one-pass shallow disk or zone till) to limit disturbance to 2–4 inches for bed preparation when soil structure is good.
- Employ deep ripping only to remedy compacted layers; follow with biological recovery measures—cover crops and compost—to rebuild networks.
- Prepare raised beds or hills where drainage is poor to reduce anaerobic zones that harm beneficial aerobic microbes.
- Avoid working wet soil. Compaction from trafficking crushes pore space and reduces oxygen, directly decreasing aerobic microbial activity.
How should nutrient management be adapted to favor beneficial microbes?
Balance nutrients through organic inputs and slow-release mineral sources to feed both plants and microbes without creating imbalances that favor pathogens.
Nutrient strategies:
- Base fertilizer plans on soil tests and expected crop removal rates. Avoid blanket high-soluble-N applications that can reduce mycorrhizal colonization.
- Apply organic amendments with C:N ratios of 20:1–30:1 to promote gradual mineralization. Add small amounts of high C residues to stimulate fungal activity.
- Correct phosphorus and potassium deficiencies when they limit plant-microbe symbioses; phosphorus extremes can suppress mycorrhizal formation.
- Use gypsum to improve sodic soils without altering pH when sodium is a problem, and lime to raise pH for neutral-preferring microbes when necessary.
What irrigation and mulching practices protect the microbiome?
Employ irrigation that avoids prolonged saturation and surface crusts; mulch to stabilize temperature and moisture and supply carbon to decomposers.
Water and mulch tactics:
- Install drip or subsurface drip to deliver water to the root zone and reduce surface wetness that favors foliar pathogens and anaerobic microbes.
- Use micro-irrigation combined with soil moisture scheduling guided by sensors to maintain soil moisture at levels that support microbial activity without waterlogging; consider practices highlighted in regenerative micro-irrigation resources.
- Apply organic mulches (straw, chopped cover crop residues) at 2–4 inches to reduce evaporation, buffer soil temperature swings and feed decomposer communities.
How do you use microbial inoculants and seed coatings effectively?
Use inoculants when testing shows deficits or when introducing legumes or planting into degraded soils; match inoculant strains to crops and local conditions.
Best practices:
- Apply mycorrhizal inoculants to transplants or low-P soils; use granular or plug-inoculants at transplant. Ensure inoculants are applied in contact with roots.
- Use rhizobia-coated seed for legumes with compatible strains and evidence of nodulation in trials.
- Prefer seed coatings designed for field conditions; review research on microbial seed coatings for salinity-prone sites.
- Test new products on a small scale first. Monitor for establishment and crop response over at least one season.
How do you monitor microbiome and soil health after land prep?
Monitor soil health with repeated tests, sensor data and plant performance observations to confirm that interventions are delivering intended microbiome benefits.
Monitoring plan:
- Repeat a soil chemical and organic matter test annually or biannually in the same sampling zones.
- Use biological assays (soil respiration, enzyme assays) or DNA-based surveys every 1–3 years to detect community shifts.
- Record yield, disease incidence and input rates each season and correlate with soil data to inform adjustments.
- Deploy field sensors for moisture and temperature where resources permit to fine-tune irrigation and avoid stress events that disrupt microbial processes.
How does crop rotation fit with microbiome-focused prep?
Integrate crop rotation to diversify plant root traits and break pathogen cycles, thereby sustaining diverse soil microbes and improving long-term productivity.
Rotation principles:
- Sequence families: avoid consecutive Solanaceae or Brassicaceae plantings in the same bed; include non-host cover crops as breaks.
- Interpose deep-rooted and shallow-rooted crops to explore different soil horizons and support diverse microbial niches.
- Adopt rotating green manures to replenish organic matter and supply functional diversity; consult adaptive rotation planning resources for small farms such as adaptive low-input crop rotation plans to tailor sequences to labor and market needs.
What is a practical starter checklist to prepare land for the upcoming vegetable season?
Use this checklist to sequence actions and ensure microbiome-focused readiness.
- Collect composite soil samples and order a lab analysis for chemical and organic matter metrics.
- Map the field for microclimates, compaction zones and prior disease hotspots.
- Decide on tillage intensity: choose minimal disturbance where structure is acceptable.
- Apply lime or sulfur based on test results and allow 6–12 weeks for pH adjustment.
- Spread compost at recommended rates and incorporate shallowly or topdress under mulch.
- Sow a chosen cover crop or green manure that matches the intended rotation and biomass goals.
- Plan irrigation layout (prefer drip) and place sensors for critical zones if available.
- Plan microbial amendments and small-scale trials; source local inoculants or design on-farm consortia with testing guidance.
- Prepare planting beds, apply starter compost teas only if tested, and transplant when soil temperatures and moisture are stable.
What mistakes reduce the effectiveness of microbiome-focused land prep?
Avoid common errors: overuse of broad-spectrum biocides, working wet soils, applying immature compost, and rapid high-rate soluble fertilizers that disrupt microbial communities.
Specific cautions:
- Do not apply raw manure without proper composting. Raw manure can introduce pathogens and imbalanced microbial loads.
- Do not incorporate excessive high-carbon residue right before planting; allow partial decomposition to prevent nitrogen tie-up.
- Avoid repeated use of the same microbial product without monitoring; communities shift and efficacy can drop over time.
How should small-scale and urban farms adapt microbiome-focused prep?
Adapt practices to scale by prioritizing container composting, raised beds with imported topsoil, and compact cover crop cycles to fit shorter land availability windows.
Scaling tips:
- Use high-quality compost in raised beds at 20–30% by volume for immediate benefits.
- Employ short-duration cover crops like buckwheat to rapidly build biomass between cash crops.
- Consider local networks or cooperative models to share specialized services: soil DNA testing, bulk compost and microbial inoculum production.
Which metrics indicate success for microbiome-focused land prep?

Track improvements in soil respiration, aggregate stability, organic matter, reduced disease incidence and yield per input unit as primary success metrics.
Benchmark values where available:
- Increase in soil organic matter by .25–1. percentage points over several seasons signals meaningful change.
- Soil respiration rates and microbial biomass carbon rising year-on-year indicate rising biological activity.
- Reduced fertilizer or pesticide inputs per unit yield show improved biological nutrient cycling and pest suppression.
What resources and further reading inform practice?
Consult university extension publications, NRCS soil health guides, and peer-reviewed reviews on soil microbiomes. For applied methods, review on-farm microbial consortia design and adaptive rotation guidance available from practitioner-focused sources such as designing on-farm microbial consortia and adaptive crop rotation plans.
Implement a monitoring plan and iterate annually. Prioritize soil tests, conservative trials of new products, and record keeping to build farm-specific knowledge.
Final practical guidance
Start small: trial microbiome-focused practices on a single block or bed. Measure soil chemistry and biology before and after interventions. Scale successful tactics gradually while maintaining plant diversity and minimizing disturbance to maximize long-term soil health and vegetable yields.
Upcycled Pallets & Solar Low-Cost Fencing for Small Farms
Upcycled Pallets & Solar Low-Cost Fencing for Small Farms: Practical Guide
Upcycled pallets & solar low-cost fencing for small farms present practical, affordable ways to protect crops, control livestock, and create wildlife barriers using reclaimed wood, low-voltage solar energizers, and recycled wire. This guide compares materials, shows step-by-step builds, presents cost estimates, warns about safety and legal issues, and explains how to integrate fences with farm planning, microclimate mapping, and regenerative enterprise strategies.
What are the main low-cost fencing options for small farms?
What are the main low-cost fencing options for small farms? The primary low-cost fencing solutions for small farms are upcycled pallet fences, solar-powered electric fences, woven wire or field fence using recycled materials, welded wire on reclaimed posts, and temporary polywire poultry or small-livestock netting.
What are the main low-cost fencing options for small farms? Use upcycled pallets where vertical containment and visual barriers are needed, and use solar electric fencing for rotational grazing or predator control.
What are the main low-cost fencing options for small farms? Combine approaches: pallet panels for garden beds, woven wire for perimeter, and solar electric polywire for flexible paddocks.
How does an upcycled pallet fence work and when should you use it?
How does an upcycled pallet fence work and when should you use it? An upcycled pallet fence uses salvaged shipping pallets as panels attached to posts to create a solid or semi-solid barrier suitable for small livestock, garden protection, windbreaks, or rustic property edges.
How does an upcycled pallet fence work and when should you use it? Use pallet fences around orchards, market garden beds, chicken runs, and compost/yard areas where a low-cost solid barrier is useful.
How does an upcycled pallet fence work and when should you use it? Pallet fences work best where pallets are structurally sound and treated or sealed for weather resistance; avoid pallets marked with “MB” (methyl bromide) or unknown chemical treatments.
Can upcycled pallet fences contain livestock safely?
Can upcycled pallet fences contain livestock safely? It depends on the species: pallet fences can contain poultry, pigs, and small ruminants when reinforced, but they require upgrades to hold mature cattle or strong goats.
Can upcycled pallet fences contain livestock safely? Reinforce pallet panels with horizontal bracing, steel posts, and welded wire on the interior face to prevent biting, climbing, or hoof damage.
Can upcycled pallet fences contain livestock safely? Reinforce with corner bracing and spacing at 4 to 6 feet between supports to avoid panel sagging; consult local extension resources like Penn State Extension for weight load recommendations and livestock-specific advice.
What are solar-powered low-cost fencing options for small farms?
What are solar-powered low-cost fencing options for small farms? Solar-powered fencing options include low-voltage DC energizers paired with polywire, steel wire, or tape, and battery-backed systems sized to the perimeter, enabling off-grid electrified fences for rotational grazing and predator control.
What are solar-powered low-cost fencing options for small farms? Use small solar energizers rated .5 to 2 joules for <2 acre paddocks and larger 4 to 10 joule units for multi-acre perimeters, matching energizer output to fence length and leak potential per USDA and extension recommendations.
What are solar-powered low-cost fencing options for small farms? Use insulated step-in posts for polywire, and integrate ground-return systems on dry soils using multiple ground rods driven into moist soil for consistent performance.
How to combine upcycled pallets with solar electric fencing?
How to combine upcycled pallets with solar electric fencing? Combine pallets as static visual and physical barriers with solar polywire or tape installed above or inside the pallet line to add an electrified deterrent for predators and escape-prone animals.
How to combine upcycled pallets with solar electric fencing? Bolt or cable-tie insulators to the pallet face at 6, 12, and 18 inches above ground and run polywire connected to a solar energizer; use a separate insulated bracket for grounding the energizer safely away from the pallet posts.
How to combine upcycled pallets with solar electric fencing? Maintain clear vegetation around the pallet-plus-electric line to reduce contact and power leakage, and install warning signage if the fence is electrified to meet local safety norms.
What materials, fasteners, and tools are needed for a pallet fence build?
What materials, fasteners, and tools are needed for a pallet fence build? Core materials include 10 to 15 used pallets, treated or cleaned; 6×6 or 4×4 pressure-treated posts for corners and end supports; 1.5 to 2 inch galvanized carriage bolts; exterior-grade screws; and a gravel or concrete mix for post footings.
What materials, fasteners, and tools are needed for a pallet fence build? Use tools like a post hole digger, circular saw for trimming pallets, impact driver, drill, level, tape measure, and protective gloves and eye protection.
What materials, fasteners, and tools are needed for a pallet fence build? Add welded wire or hardware cloth if pest exclusion or smaller animal containment is required; use stainless-steel fasteners near salt or wet conditions to reduce corrosion.
How to build a durable upcycled pallet fence step-by-step?

How to build a durable upcycled pallet fence step-by-step? Step 1: Inspect pallets and discard chemically treated or rotten units; choose pallets stamped HT (heat-treated) or clearly unpainted and clean.
How to build a durable upcycled pallet fence step-by-step? Step 2: Set corner posts at least 2 feet deep in compacted gravel or concrete with spacing of 6 to 8 feet between posts depending on pallet width and reinforcement plan.
How to build a durable upcycled pallet fence step-by-step? Step 3: Attach pallets to posts with carriage bolts through pallet stringers into the post; use two bolts per pallet edge for lateral stability.
How to build a durable upcycled pallet fence step-by-step? Step 4: Add horizontal bracing at top and mid-height using 2x4s or metal angles, and fix welded wire behind pallets if needed for predator exclusion.
How to build a durable upcycled pallet fence step-by-step? Step 5: Seal or paint pallets with breathable exterior wood sealer to extend service life; avoid tar-based products that trap moisture and accelerate rot.
How much does an upcycled pallet fence cost compared with traditional fencing?
How much does an upcycled pallet fence cost compared with traditional fencing? Upcycled pallet fences often cost 40 to 70 percent less than new lumber or professionally installed woven-wire fences when pallets are free or low-cost, with most expense in posts, hardware, and labor.
How much does an upcycled pallet fence cost compared with traditional fencing?
How much does an upcycled pallet fence cost compared with traditional fencing? Estimate: 10–20 pallets at $–$10 each if salvaged; posts $20–$50 each; fasteners and concrete $150–$400; total for a 100-foot fence often falls between $300 and $1,200 in materials, excluding labor.
What are the pros and cons of pallet fencing?
What are the pros and cons of pallet fencing? Pros include low material cost, rapid assembly, good windbreak and visual barrier, and recycling value; cons include variable pallet quality, shorter lifespan than pressure-treated lumber if unsealed, and potential safety hazards from protruding nails or splinters.
What are the pros and cons of pallet fencing? Mitigate cons by selecting clean pallets, sanding sharp edges, replacing rotten stringers, and adding welded wire to prevent bite-through for animals like goats.
How to size and select a solar energizer for your low-cost fence?
How to size and select a solar energizer for your low-cost fence? Select an energizer based on fence length, presence of vegetation contact, and animal type: choose a unit rated for at least 250 to 500 miles of fence for very long lines, or a smaller 2-10 joule unit for paddocks under 5 acres with minimal leakage.
How to size and select a solar energizer for your low-cost fence? Match energizer joules to expected load: .5–2 joules for poultry and small paddocks, 2–5 joules for sheep and goats, 5+ joules for cattle per extension literature and manufacturer guidance.
What grounding and safety best practices apply to solar electric fences?
What grounding and safety best practices apply to solar electric fences? Use multiple galvanized or copper-clad ground rods at least 6 to 8 feet long, spaced 10 feet apart in moist soil, and connect with heavy-gauge cable to ensure a solid return path for the energizer.
What grounding and safety best practices apply to solar electric fences? Place ground system away from buried utilities and water lines; inspect annually; and mount warning signage per local code where public access exists.
What grounding and safety best practices apply to solar electric fences? Use a lockable enclosure for the energizer and disconnect the system during maintenance on the non-energized side; consult your local utility or extension service before major installations.
How to maintain and repair low-cost fences on a small farm?
How to maintain and repair low-cost fences on a small farm? Inspect fences monthly for loose posts, broken pallet boards, vegetation contact on electrified lines, and rusted fasteners; tighten, replace, and re-stain or re-seal wood annually to extend life.
How to maintain and repair low-cost fences on a small farm? Maintain solar panels by clearing shade and wiping panels quarterly; keep battery compartments dry and replace deep-cycle batteries every 3–5 years depending on usage and climate.
How to plan fence placement with microclimate and farm layout in mind?
How to plan fence placement with microclimate and farm layout in mind? Plan fence placement to support windbreaks, shade, sun exposure, and water flow, and to optimize paddock rotations for feed and shelter by mapping microclimates on the property.
How to plan fence placement with microclimate and farm layout in mind? Use a diversified farm calendar and crop maps to decide where fences will protect sensitive crops during cold snaps or create sheltered microclimates for seedlings; tools like a microclimate map help site fences strategically.
How to plan fence placement with microclimate and farm layout in mind? Learn mapping strategies from resources such as the Diversified Small-Farm Calendar to align fencing with planting and rotational schedules.
How can low-cost fences support regenerative practices and farm revenue?
How can low-cost fences support regenerative practices and farm revenue? Low-cost fences enable rotational grazing, protect regenerating hedgerows, and allow incorporation of agroforestry belts that increase carbon sequestration and biodiversity, which can support soil carbon credit programs or diversified sales.
How can low-cost fences support regenerative practices and farm revenue? Design fenced corridors for pollinator strips or alley cropping and use fencing to protect high-value crops that support farm-to-table partnerships and market resilience.
How can low-cost fences support regenerative practices and farm revenue? Explore market options and revenue models such as soil carbon credits to monetize on-farm sequestration; resources on carbon-smart practices help small farms evaluate benefits like those described in Soil Carbon Credits.
What regulations, permits, and safety codes must small farmers check?
What regulations, permits, and safety codes must small farmers check? Check local zoning, municipal bylaws, homeowner association rules, and utility easements for fence height limits, electrified fence restrictions, and setback requirements; verify with county extension offices or planning departments.
What regulations, permits, and safety codes must small farmers check?
What regulations, permits, and safety codes must small farmers check? Consider animal welfare codes for livestock containment, and signage or insulation mandates for electrified fences in areas with public access or trails.
How to source safe, usable pallets and avoid hazardous materials?
How to source safe, usable pallets and avoid hazardous materials? Source pallets stamped HT (heat treated), CP (chemical-free), or explicitly labeled food-grade; avoid pallets with MB (methyl bromide) or with heavy chemical residues, paint, or strong odors.
How to source safe, usable pallets and avoid hazardous materials? Ask suppliers such as local warehouses, garden centers, or recycling hubs for rejected pallets and inspect them for structural integrity, nailed joints, and pest damage.
How to source safe, usable pallets and avoid hazardous materials? Sand sharp edges and coat pallets with water-based exterior sealers before use around food crops to minimize surface contaminants.
Which pests and predators are best managed by pallet and solar fencing?
Which pests and predators are best managed by pallet and solar fencing? Pallet fences deter ground predators like foxes, dogs, and raccoons when combined with welded wire, and solar electrified lines deter coyotes, stray dogs, and climbing predators when properly installed.
Which pests and predators are best managed by pallet and solar fencing? Use a layered approach: solid pallet walls low to the ground to block digging, welded wire to stop small mammal entry, and an electrified top or perimeter to deter larger predators.
How to integrate fencing with water, irrigation, and crop rotation systems?
How to integrate fencing with water, irrigation, and crop rotation systems? Coordinate fence layout with irrigation lines and access points to avoid damaging infrastructure; create gates and lanes sized for equipment and water delivery systems.
How to integrate fencing with water, irrigation, and crop rotation systems? Use micro-irrigation corridors and protected valve enclosures to keep critical water infrastructure accessible but secure; reference micro-irrigation strategies for tight spaces to maximize layout efficiency.
How to integrate fencing with water, irrigation, and crop rotation systems? For urban or smallholder examples, review adaptive micro-irrigation guides like Regenerative Micro-Irrigation for Urban Smallholder Farms for integration tips applicable at small-farm scale.
What common mistakes to avoid when building low-cost fences?
What common mistakes to avoid when building low-cost fences? Mistakes include using rotten or chemically treated pallets, undersizing posts, failing to brace corners, neglecting ground system design for electrified units, and not planning gates or access pathways for equipment.
What common mistakes to avoid when building low-cost fences? Avoid over-reliance on free materials without inspection; invest in a quality energizer and ground system for solar fences to prevent chronic outages and wasted time troubleshooting.
What are low-cost fence retrofit ideas to increase lifespan and performance?
What are low-cost fence retrofit ideas to increase lifespan and performance? Retrofit ideas include adding metal flashing at base to reduce rot, installing pressure-treated kickboards, applying breathable sealers, attaching welded wire inside pallet panels, and anchoring posts in compacted gravel with through-bolts.
What are low-cost fence retrofit ideas to increase lifespan and performance? Replace damaged pallet stringers and remount with carriage bolts rather than nails to improve longevity and repairability.
Where can farmers find technical help and evidence-based recommendations?
Where can farmers find technical help and evidence-based recommendations? Seek guidance from local extension services, university agricultural departments, and nonprofit farm technical assistance programs; consult USDA and state extension publications for fencing guidelines and electrification safety data.
Where can farmers find technical help and evidence-based recommendations? Use local case studies and mapping tools to align fencing with rotational grazing and perennial systems; resources on microclimate zoning can refine fence placement for yield and shelter benefits.
Where can farmers find technical help and evidence-based recommendations? Explore microclimate mapping and sensor-guided practices to optimize fence siting and paddock design by checking regional microclimate resources and practical guides such as Microclimate Mapping.
Quick cost-and-material checklist
- Quick cost-and-material checklist: Pallets: free to $10 each.
- Quick cost-and-material checklist: Posts: $20–$50 each for treated wood; metal posts vary.
- Quick cost-and-material checklist: Energizer: $150–$600 depending on joules and features.
- Quick cost-and-material checklist: Wire, polywire, hardware cloth: $50–$300 depending on coverage.
- Quick cost-and-material checklist: Tools and concrete: $100–$400 if not already owned.
Recommended inspection schedule
Recommended inspection schedule Inspect electrified fences monthly, inspect wood panels seasonally, and perform a full winter check before freeze-thaw cycles to tighten fasteners and replace compromised posts.
Suggested next steps for implementing a low-cost fencing project
Suggested next steps for implementing a low-cost fencing project Start with a 10–20 minute site map showing gates, water, shade, and microclimate zones, then prototype a 10–20 foot pallet section and a 50–100 foot polywire line to test performance before full-scale rollout.
Suggested next steps for implementing a low-cost fencing project
Suggested next steps for implementing a low-cost fencing project: Prioritize safety, secure any necessary permits, source high-quality salvage pallets, and consider pilot testing solar energizer performance over several seasons.
By following these practical, low-cost methods—combining reclaimed pallets for structure with solar electrified lines for flexibility—small farms can secure crops and livestock affordably while supporting regenerative practices and farm resilience.
Flow-Channeling Biochar Trenches for Clay Field Drainage
Flow-Channeling Biochar Trenches for Clay Field Drainage: Practical Guide
Flow-Channeling Biochar Trenches for clay field drainage provide a low-energy, regenerative method to improve infiltration, reduce surface runoff, and create long-term soil structure benefits in poorly draining heavy soils. This guide explains what flow-channeling biochar trenches are, why they work in clay fields, how to design and install them with numerical dimensions and material ratios, how to integrate them with existing drainage systems and cropping operations, and how to monitor performance and costs. The guidance draws on soil physics, biochar science, field-tested practice, and relevant agency and peer-reviewed sources to offer practical, implementable steps for farmers, consultants, and land managers.
What are flow-channeling biochar trenches?

Flow-channeling biochar trenches are linear excavations filled with a coarse structural layer and a biochar-amended filter that direct and store excess runoff and promote vertical infiltration through stubborn clay soil. Flow-channeling biochar trenches use an engineered sequence of coarse aggregate, biochar-amended media, and surface inlet features to create preferential pathways for water. The trenches accept overland flow and concentrate it into discrete, high-permeability channels that bypass the very-low-permeability matrix of compacted clay. Biochar within the trench provides durable macroporosity, high surface area for moisture buffering, and habitat for microbial consortia that increase aggregate stability and porosity over time.
Why should you use biochar trenches to improve drainage in clay soil fields?
Because biochar trenches increase field-scale infiltration rates, reduce ponding and erosion, store water for crop uptake, and sequester stable carbon while improving soil biology. Research and agency guidance show that creating localized macropores and permeable paths is the most effective strategy for clay soils with low saturated hydraulic conductivity (often <1 x 10⁻⁶ m/s). The USDA Natural Resources Conservation Service recommends practices that increase infiltration and reduce surface runoff; flow-channeling trenches meet that objective while adding soil health benefits. Studies in Soil Use and Management and the Journal of Environmental Quality report that biochar-amended porous media can increase infiltration and retain nutrients, reducing nutrient loss during high flows. The result is improved field operability, higher rooting depth, and better resilience to intense rain events.
How do you design a flow-channeling biochar trench for a clay field?
Design a flow-channeling biochar trench by sizing depth, width, spacing, slope, media layers, and outlet details based on infiltration tests, field slope, and target runoff volume. Design steps and key parameters follow:
What infiltration and site data do you need?
Collect measured infiltration rate, slope, surface flow lines, and depth to restrictive layers before designing trenches. Perform 3–5 ring infiltrometer tests or double-ring tests across representative positions in the field to quantify saturated infiltration (units mm/hr). Map surface microtopography and flow lines with a laser level or GPS slope mapping. Identify the depth to compacted plow pan or restrictive clay horizon using a soil probe; trenches should penetrate or reach near that layer without compromising structural stability.
What are recommended trench dimensions and spacing?
Use trenches 30–60 cm deep, 20–50 cm wide, spaced 5–20 m apart depending on slope and infiltration rates. Recommended sizing rules of thumb: 1) For infiltration <5 mm/hr, use 10--12 m spacing; 2) For 5--15 mm/hr, use 6--10 m spacing; 3) For 15--30 mm/hr, use 5--8 m spacing. Increase trench depth on heavier clay (up to 80 cm) if practical. Maintain a gentle longitudinal slope in the trench of .2--1% toward a stable outlet to avoid sedimentation.
What are the internal trench layer specifications?
Construct a 3-layer trench: coarse bedding, biochar-amended infiltration zone, and a capped top with vegetative filter. Typical layer sequence from bottom to top: 1) 10–15 cm coarse angular gravel or crushed stone (20–40 mm) to provide structural drainage; 2) 15–30 cm of biochar-amended media (by volume: 60–80% coarse sand/grit/aggregate + 20–40% coarse biochar + 5–10% compost or stabilized organic matter); 3) 5–10 cm of topsoil and grass/cover crop to reduce erosion and trap fines. Use geotextile separation if native clay is extremely plastic to prevent fine intrusion.
What hydraulic capacity should the trench handle?

Size trench cross-sectional area to accept the 10- or 25-year design storm runoff from the contributing area per local climate tables. Example calculation: for a 1-hectare upslope contributing area with a design event of 30 mm/h rainfall and a runoff coefficient of .6 on wet clay, peak runoff = .18 m3/s (180 L/s). If trenches are spaced 10 m apart, each linear meter of trench receives 1/100 of that area, so design flow per meter = 1.8 L/s. A trench with an effective flow area of .06 m2 and a hydraulic gradient of .005 will convey that flow; adjust dimensions in practice with local hydrology software or engineer review for large fields.
What biochar types and particle sizes work best in trenches?
Choose coarse, inert, well-characterized biochar (particle size 2–20 mm) produced at moderate pyrolysis temperatures (350–600 C) from uncontaminated feedstock. Coarse biochar maintains macroporosity and resists fine mobilization that can clog the trench. The International Biochar Initiative and the European Biochar Certificate recommend feedstock traceability and testing for heavy metals and PAH content. Avoid powdered pelletized biochar that can compact; select durable, fractured chunks or engineered granules. For improved water retention and microbial habitat, age biochar by pre-charging it with compost tea or liquid digestate before installation.
What soil amendments should you mix with biochar in the trench?
Mix biochar with coarse sand/grit and a small fraction of stable compost or humified organic matter, and optionally inoculate with beneficial microbes. Use by-volume mixes such as 25–35% biochar, 60–70% coarse sand/grit/aggregate, and 5–10% compost. Incorporate mycorrhizal or microbial consortia where available to jump-start biological colonization; designing on-farm microbial consortia improves aggregation and nutrient cycling (see research and practice described in designing on-farm microbial consortia). Avoid high-nitrogen manures in the trench fill that could increase nutrient leaching during the establishment phase.
How do you install flow-channeling biochar trenches step-by-step?
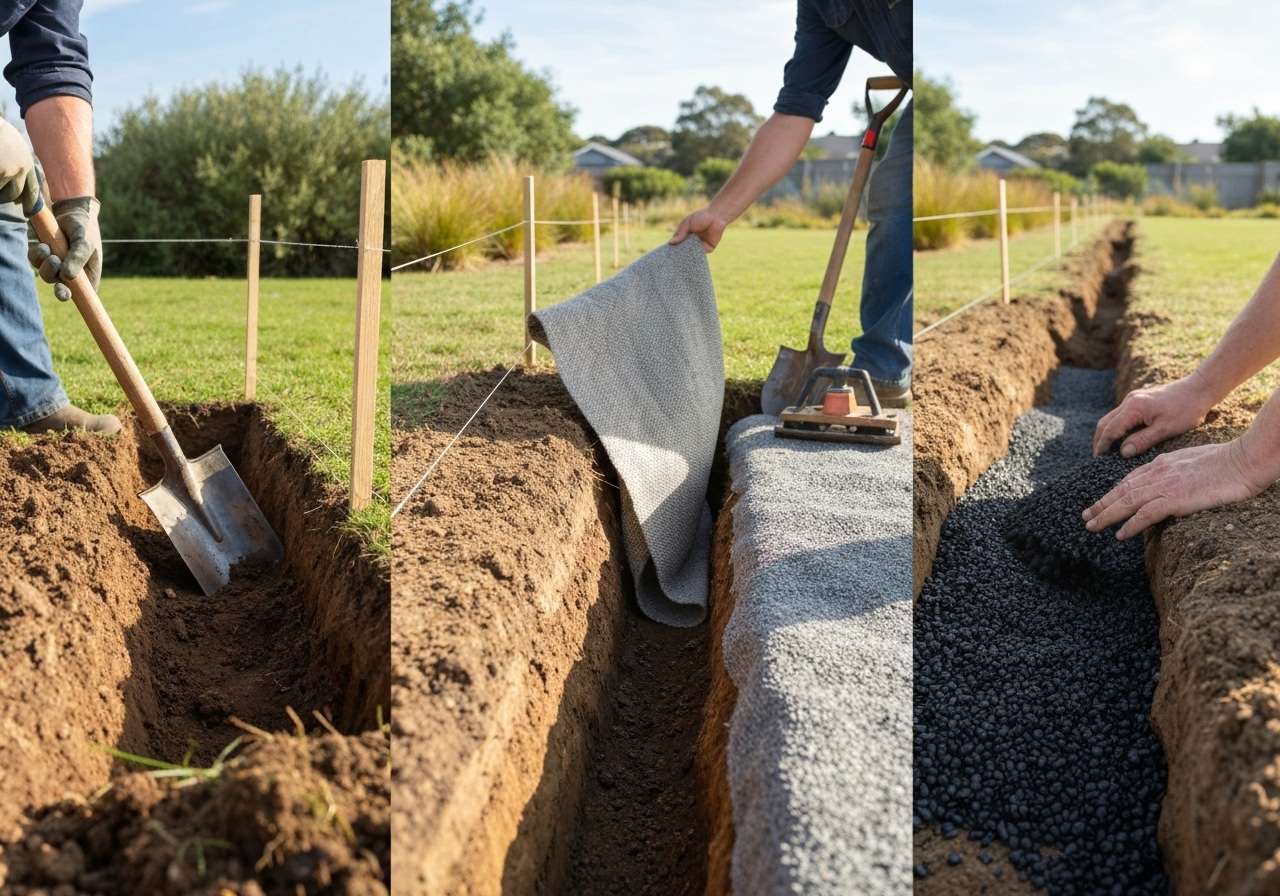
Install trenches by mapping flow lines, excavating to design dimensions, placing geotextile and base layer, adding biochar-amended media, and finishing with topsoil and vegetation. Follow these steps:
- Map: Use contour mapping, survey or GPS to mark flow lines and trench alignment.
- Prepare: Remove existing surface vegetation only where trench will be installed; keep adjacent sod intact to limit erosion.
- Excavate: Excavate 30–60 cm deep x 20–50 cm wide trenches along marked lines; slope the bottom slightly toward outlet.
- Line: Install a nonwoven geotextile if fines migration is likely; extend fabric up trench sides.
- Base: Place 10–15 cm coarse gravel as bedding and spread evenly.
- Biochar fill: Mix biochar with coarse sand/grit and compost and place as 15–30 cm zone; lightly tamp to settle but avoid overcompaction.
- Outlet: Connect upstream and downstream ends to stable rock outfall, infiltration pit, or tile system; include an overflow spillway sized for extreme events.
- Cap and revegetate: Backfill with topsoil 5–10 cm and seed with deep-rooted perennial grass or cover crop to trap fines and increase root penetration into the trench.
- Protect during establishment: Install temporary silt fences or sediment traps downslope until grass is established.
How do trenches integrate with existing drainage systems and field operations?
Integrate trenches by aligning them with surface flow lines, connecting to tile drains or ditches where needed, and locating them outside primary cultivation lines to avoid machine interference. For tile systems, place trenches upstream to reduce sediment and nutrient loads entering tile, or lead trench overflow into a buffer pond that discharges to tile at controlled rates. Maintain a 50–75 cm safety depth below typical cultivation depths so plows and tillage do not damage the trench. Coordinate trench spacing with field traffic lanes and headlands; place trenches parallel to working widths to minimize interference with equipment.
Integrate monitoring and control systems using modern sensor approaches when scaling installation. For example, use soil moisture sensors and remote telemetry to track infiltration performance per meter of trench and adapt spacing or additions over time; farms deploying sensor systems benefit from AI-guided monitoring such as those described in studies on AI-enabled soil sensors for family farms.
What maintenance is required and what is the expected lifespan?
Inspect trenches annually and after major storms; remove accumulated sediment, replenish or top-dress biochar-amendments every 5–15 years, and maintain vegetated cover for the long-term lifespan of decades. Expected lifespans: 1) Structural aggregate and geotextile: 10–50 years depending on loading; 2) Biochar functionality: stable for decades to centuries but surface fines may require periodic topping; 3) Vegetative cover: continuous maintenance. Replace or rework trenches if compaction recurs due to heavy machinery passage or if persistent sedimentation reduces hydraulic capacity.
How much do biochar trenches cost and what is the cost-benefit?
Costs vary widely; expect installation costs from USD 10–60 per linear meter for small-scale manual installs and USD 5–20 per meter for larger machine-installed programs, with biochar feedstock and transport as primary cost drivers. Cost factors: excavation (labor, fuel), biochar cost (.50–3.00 USD/kg depending on quality and region), coarse aggregate, geotextile, and revegetation. Benefits include improved crop yields from reduced waterlogging, lower erosion and sediment control costs, improved field trafficability, and potential revenue from soil carbon credits for stable biochar carbon sequestered in soil (see options on soil carbon credits). Perform a simple payback analysis: divide net present value of yield gains plus avoided drainage pumping and erosion by installation cost; many small farms see payback in 3–8 years when improved yields and avoided repairs are counted.
Will trenches reduce soil compaction and help with salinity problems?
Yes, trenches reduce effective compaction by creating permanent macropore networks that relieve perched water and promote root development; they can assist salinity management when combined with controlled leaching and salt-tolerant vegetation. Trenches increase aeration and pore continuity which reduces the mechanical impedance roots face. For saline soils, trenches act as controlled leaching pathways to flush salts from the crop root zone toward an outlet or a subsurface collection system; biochar can adsorb some ions and buffer cation exchange, but salt management requires integrated water balance planning and sometimes subsurface drainage to carry salts away from fields.
What are common risks and contraindications?
Risks include improper placement on very steep slopes causing erosion, using contaminated biochar, creating perched water that affects adjacent crops, and under-sizing trenches for extreme rainfall events. Avoid installing trenches where they would destabilize slopes or direct concentrated flow to sensitive infrastructure. Use certified low-contaminant biochar and test feedstock. Account for downstream effects; concentrated flow must be safely conveyed to a stable outlet or storage basin. Where water table is very shallow, trenches may increase saturation and are not recommended without professional hydrologic design.
How should you monitor trench performance and document benefits?
Monitor performance using periodic infiltration tests, soil moisture sensors, shallow observation wells, and crop yield records to quantify improvements. Install moisture sensors at depths of 15, 30, and 60 cm adjacent to trenches and at control plots 10–20 m away. Perform seasonal double-ring infiltration tests to track infiltration rate changes over time. Use simple field indicators such as reduced ponding duration, earlier field working days after rain, and deeper root profiles from soil cores. For advanced monitoring, pair sensors with telemetry and analytics; farms using AI-enabled soil sensors can automate alerts and optimize trench spacing and maintenance.
What data should you collect for carbon or grant reporting?
Collect trench length and volume of biochar installed, source and certification of biochar, baseline soil organic carbon, and follow-up SOC samples at defined intervals. Baseline and post-installation soil sampling for SOC (–30 cm and 30–60 cm) supports carbon credit claims or grant reporting. Retain invoices and lab certificates for biochar to verify feedstock and production conditions when pursuing soil carbon programs.
What are example field case studies and practical tips?
Small-farm trials in temperate zones show that a network of 10–20 m-spaced biochar trenches reduced ponding days by 40–75% and increased root-zone water retention while improving early-season trafficability. Practical tips from growers include: stage installation during drier months to limit sidewall collapse; pre-charge biochar with compost tea to reduce initial N-immobilization; place trenches on the contour where possible for even interception; avoid cultivator paths over trenches or protect with hard surfacing at crossings.
Practical tip: pair trenches with adaptive management systems like rotational cropping and micro-irrigation to maximize benefits. For example, align trench networks with low-input rotation plans to ensure crops with deep root systems access improved infiltration zones and benefit from better drainage; see approaches in adaptive low-input crop rotation planning and water-efficient strategies described in regenerative micro-irrigation resources and rotation guides such as adaptive low-input crop rotation plans and regenerative micro-irrigation.
What are scalable options for larger farms or conservation projects?
Scale by shifting from hand-constructed trenches to machine-excavated interceptor lines, increasing use of packaged biochar blends, and integrating with tile systems and detention basins. For large programs, design by watershed sub-units, coordinate with drainage districts, procure biochar in bulk or produce on-farm via controlled pyrolysis to lower costs, and use contractor crews with trenching plows or backhoes for efficiency. Consider offsetting costs with soil carbon credit programs if biochar sources are certified and monitoring plans are in place (see soil carbon credits guidance for small farms).
What next steps should a farmer take to pilot a trench program?
Start with a pilot: map a .1–.5 ha test area, perform baseline infiltration and SOC tests, install 50–100 m of trench network with recommended media, monitor for 12–24 months, and document agronomic and operational outcomes. Use pilot results to refine spacing and media ratios before field-scale rollout. Engage local extension, conservation district engineers, or a soil scientist to review designs for regulatory compliance if connecting to municipal drainage or altering natural flow paths.
Flow-channeling biochar trenches combine physical, chemical, and biological levers to turn impermeable clay fields into productive, resilient ground. They provide actionable pathways for small and large farms to reduce surface runoff, improve crop access to water, and build soil health while offering an avenue to sequester carbon. Implement with careful site assessment, certified biochar, and monitoring to capture the full agronomic and environmental value.
Sensor-Managed Mixed-Height Windbreaks for Crop Resilience
Sensor-managed mixed-height windbreaks combine layered plantings and real-time monitoring to protect crops, reduce water loss, and improve microclimates. This guide explains purpose, design, sensor choices, species layout, planting and maintenance steps, expected benefits, costs, and how to integrate windbreaks into rotation and farm planning.
What is a sensor-managed mixed-height windbreak for crops?
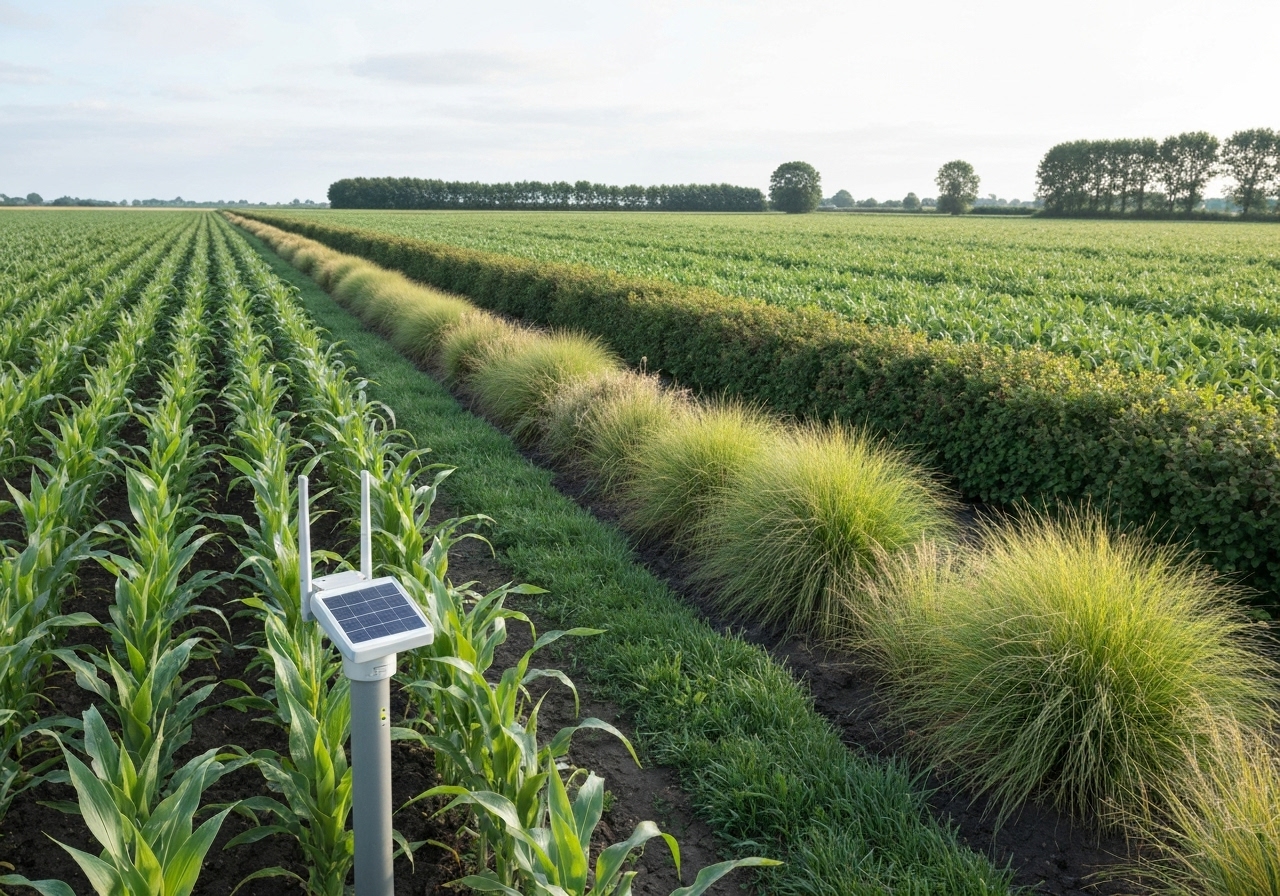
What is a sensor-managed mixed-height windbreak: a deliberately layered shelterbelt managed with sensors to optimize wind reduction, microclimate buffering, and ecological services for adjacent crops. What is a sensor-managed system contrasts with static windbreaks by using weather, soil, and plant sensors to guide pruning, irrigation, and reinforcement plantings. What is essential to include are mixed-height rows – tall trees, medium shrubs, and low perennial grasses – combined with distributed sensors for an active management loop. What is important for designers is to treat the windbreak as an adaptive infrastructure that responds to seasonal and multi-year changes using data-driven thresholds (USDA NRCS guidance 2018; FAO agroforestry manuals).
Why use mixed-height windbreaks for crop protection?
Why use mixed-height windbreaks: they reduce wind speed, cut soil erosion, lower crop evapotranspiration, reduce lodging, and provide habitat that increases biodiversity and pollination services. Why use this approach produces layered shelter that intercepts different wind profiles, reducing gusts and turbulence more effectively than single-row plantings. Why use is backed by conservation studies showing windbreaks increase yields near leeward edges by measurable margins and reduce topsoil loss (FAO 2013; Agroforestry Systems research 2015). Why use mixed heights increases year-round protection when evergreen shrubs are included, and enhances multi-functionality by combining timber, forage, and habitat values.
How do sensors improve windbreak performance?
How sensors improve performance: sensors provide real-time wind, temperature, humidity, soil moisture, and plant-stress data so managers can act on thresholds for irrigation, pruning, and gap plantings. How sensors work includes anemometers to measure wind speed and direction, sonic or cup types for gust detection, temperature and relative humidity probes for microclimate mapping, soil moisture probes at multiple depths, leaf wetness sensors for disease risk, and camera or multispectral drone imagery for canopy health. How sensors feed into decision systems that automate or advise actions – for example, triggering targeted irrigation when moisture falls below a crop-specific threshold or scheduling selective thinning to restore optimal porosity. How sensors have reduced water use and improved survival in trials of sensor-guided agroforestry and polyculture systems (IoT in Agriculture review 2019; Smart Agriculture field trials 202).
What species and layout work for mixed-height windbreaks?
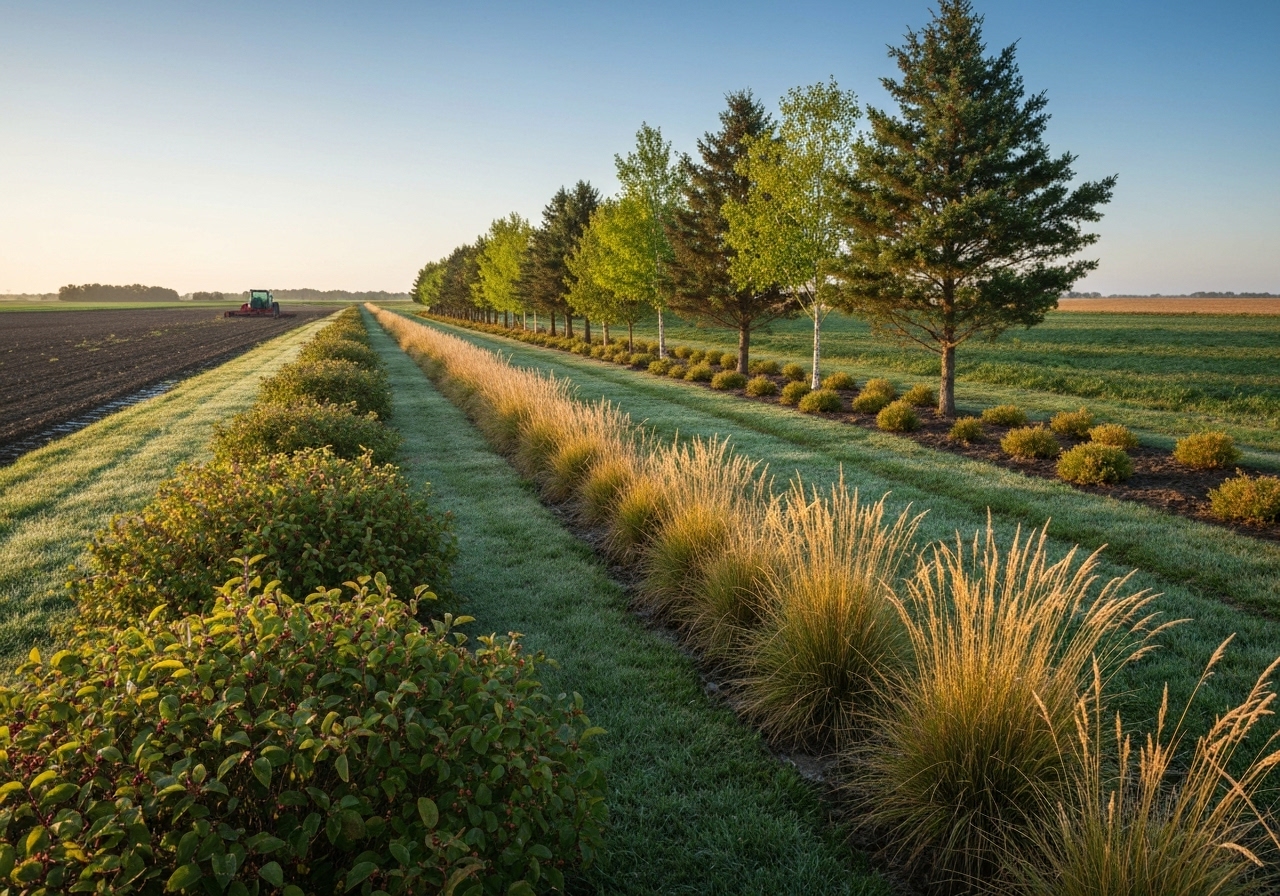
What species and layout work: select regionally adapted species arranged in layers – tall trees in outer rows, medium shrubs in middle rows, and dense low shrubs or grasses in inner rows – to achieve 40-60% porosity and diverse functionality. What species selection prioritizes native or non-invasive trees for long-term resilience, including fast-growing pioneer trees for early protection and slower-growing natives for permanent structure. What layout typically uses 2-5 rows: row 1 (windward) with tall fast-growing trees for initial drag; row 2-3 with medium-height trees and shrubs to break turbulence; row 4 with dense low shrubs and grasses to reduce near-surface wind. What spacing guidance aims for 40-60% porosity to lower wind speed without creating excessive turbulence; porosity is controlled by plant spacing, crown overlap, and pruning. What placement rules place the windbreak perpendicular to prevailing winds and at a distance less than 10 times the mature height from the crop edge to ensure protection across the target zone (USDA NRCS 2018).
Examples of functional traits and species choices
What traits to choose: deep roots, wind-firm stems, year-round density, and flowering for pollinators. What temperate options may include native conifers or broadleaved evergreens for year-round screening and fast-growing deciduous pioneers for early height. What subtropical and Mediterranean contexts benefit from drought-tolerant shrubs and nitrogen-fixing species to improve soil fertility. What urban or small-plot options prioritize compact species and multiuse hedgerows. What matters most is choosing species suited to soil, water, and pest context; local extension services often have lists of recommended natives (FAO agroforestry guides).
How to design sensor-managed layout and placement?
How to design: perform a site assessment, map prevailing winds and microclimates, select sensor network density, and set management rules aligned to crop vulnerability and farm goals. How to begin includes mapping wind roses and microclimate zones using short-term field sensors or historical weather data. How to decide sensor density uses one anemometer per 1-5 hectares for field-scale wind mapping, added soil moisture sensors at representative points every 50-200 meters along the break, and temperature/humidity sensors at canopy and crop height to capture vertical gradients. How to integrate data uses a central gateway or cloud platform to stream sensor data into dashboards where thresholds trigger alerts or automated actions. How to define management rules sets numeric triggers – for example, reduce porosity when measured gusts exceed threshold X, or irrigate tree rows when soil moisture at 20-cm depth drops below Y% of field capacity.
Design checklist

- How to assess site: wind rose, topography, soil type, salinity, and groundwater depth.
- How to map: place sensor transects perpendicular to wind direction across intended windbreak alignment.
- How to size: aim for a mature height that protects the crop zone 2-10 times the tree height downwind depending on crop sensitivity.
- How to set porosity: design for 40-60% overall porosity across the multi-row section.
How to implement phased planting and management?
How to implement phased planting: install in staggered stages so early rows provide protection while later rows establish, and use sensors to time supplemental irrigation and reinforcement plantings. How to stage plantings generally starts with quick-establishing outer rows in year to 2, then fills inner rows with slower-growing but denser species in years 2 to 5. How to prepare soil includes deep ripping if compacted, adding compost to build organic matter, and installing root barriers where necessary to prevent crop competition. How to protect seedlings uses temporary tree guards and mulches, and how to prioritize watering uses moisture sensors to allocate scarce irrigation to the most stressed zones. How to thin and prune uses sensor-driven schedules: maintain porosity targets by removing selected stems when canopy density exceeds the design threshold.
How to maintain and monitor windbreaks using sensors?
How to maintain: perform seasonal checks informed by sensor alerts, conduct pruning to manage porosity, replace failed plants detected by imagery or ground sensors, and monitor pests and disease with leaf wetness and thermal alerts. How to set maintenance frequency typically follows quarterly inspections plus event-driven checks after storms. How to use remote sensing includes drone NDVI or RGB surveys twice annually to spot gaps and stress before they become large problems. How to act on sensor data includes replacing dead plants in the next planting window, installing targeted irrigation where soil probes report chronic deficits, and applying integrated pest management if leaf-wetness and temperature patterns indicate disease risk (Smart Agriculture literature 202).
What agroecological and economic benefits should you expect?
What to expect: measurable reductions in wind speed, lower crop water demand, reduced erosion, improved yields near protected edges, enhanced pollinator habitat, and long-term carbon sequestration. What studies report includes yield increases of 5-25% at protected edges depending on crop and region, irrigation savings of 10-30% in wind-exposed fields, and significant reductions in soil loss (FAO 2013; USDA NRCS assessments). What economic benefits include diversified income streams if windbreak species produce fruit, timber, forage, or biomass, and potential additional revenue from carbon credits or ecosystem service payments (soil carbon programs and carbon-smart crop initiatives). What to account for is that benefits accumulate: protection and microclimate improvements grow as trees mature, so payback horizons are commonly 5-15 years with long-term value beyond that.
How to integrate windbreaks into crop rotations and farm planning?
How to integrate: place windbreaks within rotation maps and adaptive rotation plans so they complement crop sequences, reduce edge-related losses, and serve as living infrastructure for polycultures and agroforestry mosaics. How to include windbreaks operationally uses rotation planning to map shaded zones, modify row crops adjacent to the shelterbelt, and integrate orchard or perennial strips where appropriate. How to coordinate with rotations links windbreak placement to cover crop timing and residue management to reduce competition and boost soil cover. How to apply adaptive rotation methods from crop planning resources enhances resilience by aligning shorter-season crops near edges and longer-term perennials where protection is strongest. How to read more about rotation planning and adaptive low-input systems consults practical guidance such as the adaptive rotation plans for small farms which provide frameworks for integrating permanent features like windbreaks into seasonal cycles. Explore rotation strategies adapted for integrated windbreaks.
What are common problems and how do you solve them?
What problems arise: competition for water, shading of adjacent crops, pest reservoirs, and initial establishment failures; solve with species choice, root management, irrigation prioritization, and sensor-based early warnings. What mitigations work include installing root barriers or buffer strips to limit root competition, pruning to control shade cast on sensitive crops, and selecting low-host species for major crop pests. What operational fixes include targeted irrigation to tree rows during establishment to avoid crop stress, and deploying leaf-wetness sensors and pheromone traps to manage pest outbreaks early. What long-term prevention includes regular rotation of understory plants and maintaining plant health to reduce disease reservoirs.
How much do sensor-managed windbreaks cost and what funding exists?
How much they cost: establishment costs vary widely – expect $5 to $30 per linear meter for plants and site prep and $200 to $10,000+ for a basic sensor network depending on coverage and connectivity; maintenance and replacement add recurring costs. How to budget includes seedling and labor costs, irrigation infrastructure, sensors and gateways, and data platform subscriptions. How to reduce upfront costs explores phased planting, use of volunteer labor, and low-cost sensor platforms. How to fund projects looks to public conservation programs, agroforestry cost-share grants, and emerging carbon-credit mechanisms for on-farm trees; programs vary by country and region. How to evaluate return on investment compares reduced crop losses, lower irrigation costs, and potential revenue from windbreak products and carbon credits (soil carbon credit pilots and farm-level carbon programs).
How to scale and adapt sensor-managed windbreaks for small and urban farms?
How to scale for small and urban farms: use compact, multiuse hedgerows, container trees, and modular sensor kits to create protective belts scalable to rooftops, microplots, and community gardens. How to adapt species selection favors dwarf or columnar forms, wind-tolerant shrubs, and perennial herbs for small spaces. How to deploy sensors uses low-cost soil moisture sensors, micro-anemometers, and simple temperature/humidity loggers with LoRa or Wi-Fi gateways to a central dashboard. How to combine windbreak design with microclimate zoning practices uses fine-scale mapping to place seasonal crops in favorable thermal niches; consult microclimate mapping practices to tune windbreak orientation and density for urban plots. See microclimate mapping methods for small-scale placement.
How do windbreaks fit into sensor-guided polyculture and regenerative systems?
How they fit: windbreaks act as structural elements in sensor-guided polycultures by buffering crops and supporting companion species that improve soil, pollination, and pest regulation. How to integrate includes positioning windbreaks to create microclimate corridors that allow staged polyculture planting and to host beneficial insects. How to coordinate with sensor-guided polyculture systems uses the same sensor networks to manage both crop and windbreak health, optimizing water and nutrient flows. How to learn practical design examples aligns with resources on sensor-guided polyculture to replicate effective field-level systems on family farms. Read about sensor-guided polyculture designs useful for windbreak integration.
Where can you find further technical support and resources?
Where to find support: consult local extension services, national conservation agencies, agroforestry research centers, and guides on funding and carbon programs to plan and finance windbreak projects. Where to look includes USDA NRCS windbreak guides, FAO agroforestry manuals, regional agroecology teams, and peer-reviewed literature on shelterbelt performance. Where to consider funding and revenue streams includes exploring soil carbon credit programs that recognize tree and soil carbon accumulation on farms. Investigate soil carbon credit options that can support windbreak investments.
Which monitoring metrics should you track?
Which metrics to track: wind speed and direction, gust frequency, soil moisture at multiple depths, canopy density, crop microclimate at canopy height, plant stress indices, and gap size in the windbreak. Which thresholds to set depend on crop risk profiles – e.g., trigger reinforcement planting if dead-plant gaps exceed 5% of total length, or schedule pruning when porosity deviates from 40-60% target. Which analytic outputs to use include time-series charts, heat maps of moisture or temperature, and alerts for rapid changes such as storm damage or disease onset.
What are quick-start steps for a first pilot?
What to do first: perform a one-season wind and microclimate survey, install a minimal sensor transect, plant a pilot 2-3 row mixed-height strip, and use data through the first two years to refine layout and species choices. What tasks to prioritize include mapping prevailing wind direction, selecting native species for the first trial strip, and building simple dashboards to visualize wind and moisture. What to measure over year 1-3 includes seedling survival, microclimate shifts at crop height, and impacts on adjacent crop performance. What to refine uses iterative adjustments to porosity and planting density based on measured outcomes.
Implement sensor-managed mixed-height windbreaks as living infrastructure: combine ecological design principles, regional species selection, phased establishment, and a sensor-informed management loop to protect crops, conserve water, sequester carbon, and diversify farm outputs. Use local support networks and adaptive planning to tune designs to your site and goals.
No-Till Farming Builds Microbial Highways for Soil Health
No-till farming improves soil health by preserving structure, increasing organic matter, and enabling connected microbial networks that move carbon, nutrients, and signals across the field.
What is No-Till Farming and how does it differ from conventional tillage?

No-till farming is a practice that eliminates routine soil inversion and reduces mechanical disturbance to preserve soil structure and living networks. No-till leaves crop residues on the surface and uses planting equipment that opens narrow furrows rather than plowing or moldboard turning.
No-till contrasts with conventional tillage where repeated digging, turning, and pulverizing break aggregates, disrupt fungal hyphae and soil pores, and accelerate organic matter loss.
Soil science reviews show that reduced disturbance increases aggregate stability and pore continuity within 3-5 years compared with continuous moldboard plowing (Lal 2015; FAO 2017).
How does No-Till Farming build microbial highways for soil health?
No-till farming creates continuous pore networks and preserves fungal hyphae and root channels that act as microbial highways for nutrient and water flow. These living and physical conduits allow bacteria, fungi, and microfauna to move, exchange metabolites, and form spatially connected consortia.
Physical pores formed by roots and earthworms remain intact under no-till, increasing connectivity between the surface residue layer and deeper mineral soil so microbes can transport carbon and nitrogen more efficiently.
Mycorrhizal fungi extend meters from host roots; when tillage stops, those hyphal networks persist and link plants across seasons, enabling nutrient sharing and signaling (Smith and Read review; Soil Biology & Biochemistry studies).
Research shows no-till increases fungal biomass relative to bacteria, favoring networks that stabilize aggregates and mediate water retention (meta-analyses in Nature Plants and Global Change Biology).
What physical soil improvements does No-Till Farming provide?
No-till preserves soil structure, increases water infiltration, and maintains stable aggregates that reduce erosion and compaction risk over time. Surface residues cushion raindrop impact, lowering surface crusting and runoff.
- Infiltration: No-till fields often show 10-30% higher infiltration rates within 2-4 years due to intact macropores.
- Aggregate stability: Organic binding agents from roots and fungi increase aggregate strength, reducing susceptibility to erosion (USDA NRCS reports).
- Bulk density: No-till can lower surface bulk density where macropores and biopores are maintained, improving root penetration.
- Water-holding: Organic matter increases available water capacity, providing drought resilience for crops.
How does No-Till Farming affect soil carbon and climate mitigation?
No-till farming promotes soil carbon accumulation by reducing oxidation of organic matter and promoting particulate and mineral-associated carbon pools. Reduced soil disturbance lowers CO2 emissions from oxidation and encourages formation of stable organo-mineral complexes.
Multiple long-term trials report increased soil organic carbon in surface horizons under no-till, especially when combined with cover crops and diverse rotations (meta-analysis findings, 2018-202).
Soil carbon accrual under no-till varies by climate, soil type, and management; cooler, wetter soils and clay-rich mineral matrices often show larger gains.
Integrating no-till with practices such as cover cropping and agroforestry enhances carbon storage and can create verifiable credits for small farms (USDA, IPCC guidance; see Soil Carbon Credits research).
What microbial processes improve under No-Till Farming?
No-till enhances mycorrhizal networks, aerobic decomposition pathways at the soil surface, and microbially mediated nutrient cycling. These processes increase nutrient retention, lower leaching losses, and improve plant access to immobile nutrients like phosphorus.
Surface residues feed decomposer communities that cycle carbon into microbial biomass and then into stable soil organic matter via microbial necromass.
Preserved fungal networks reduce nutrient hotspots and distribute mineralized nitrogen and phosphorus along hyphal pathways, assisting neighboring plants during scarcity (multiple field studies, Soil Biology & Biochemistry).
Which crop management practices maximize microbial highways in No-Till Farming?
Integrate cover crops, diverse rotations, and minimal disturbance seeding to maximize microbial connectivity in no-till systems. These practices supply continuous carbon inputs, root exudates, and varied substrates that support diverse soil food webs.
Use of cover crops
Plant cover crops between cash crops to maintain living roots year-round and support mycorrhizal continuity. Legumes contribute nitrogen, grasses add root carbon, and brassicas can break disease cycles.
Cover crops increase aggregate formation and provide food for earthworms and macrofauna that build channels for microbial movement.
Rotation diversity
Rotate crops across functional groups to avoid pathogen buildup and to supply diverse exudates that feed different microbial guilds. Adaptive rotation planning reduces pest pressure and improves nutrient cycles.
See adaptive rotation approaches for small farms that work with no-till transitions in practice for specific cropping sequences and timing here.
Residue management
Manage surface residues to balance seedbed conditions and microbial habitat without removing protective cover. Retain residues where climate permits; in cool, wet soils reduce compaction risks with strategic residue distribution.
How should small farms transition to No-Till Farming?
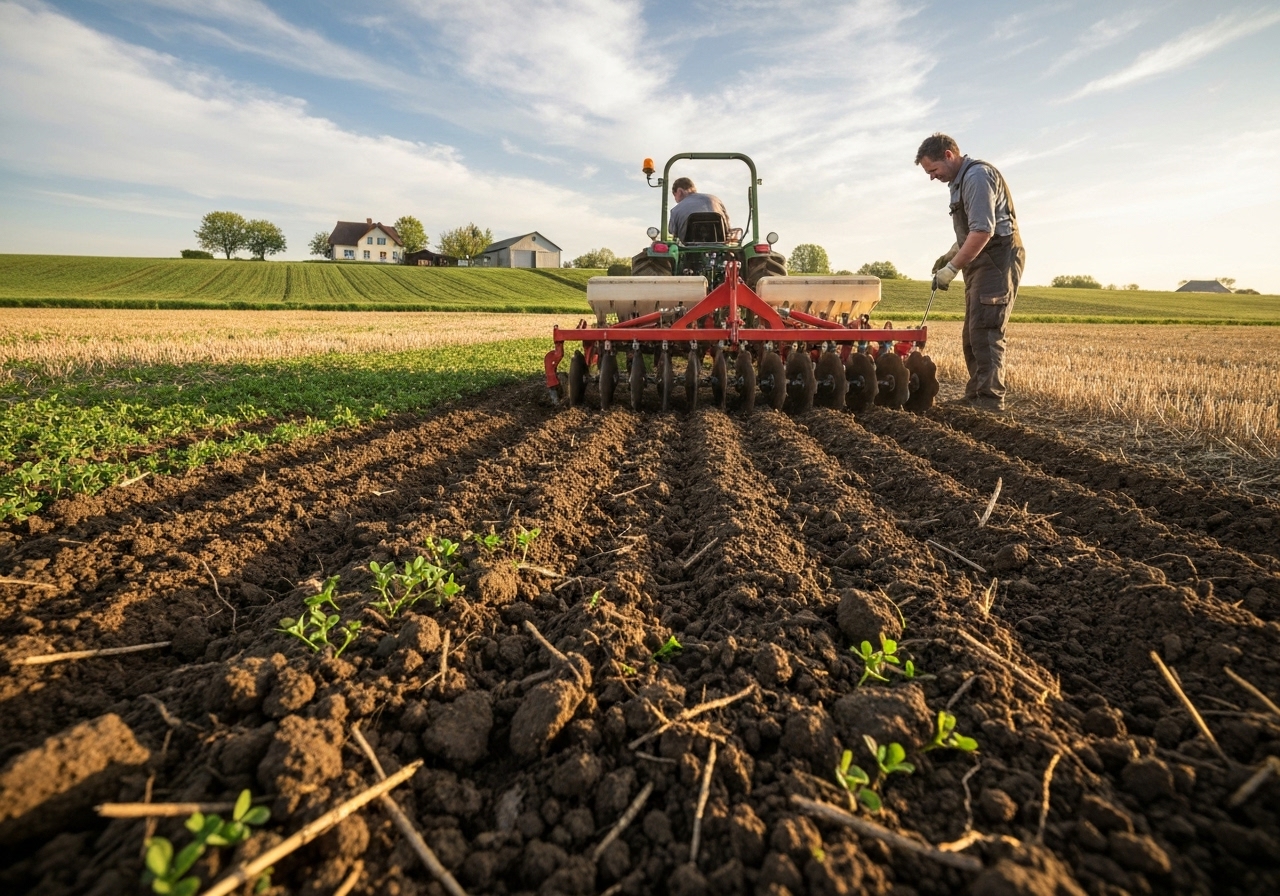
Make a phased transition: start with one field, implement cover crops, and adopt direct-seeding equipment while monitoring soil indicators. Phased adoption reduces risk and allows learning about pest dynamics and compaction management locally.
Begin by reducing the intensity and frequency of tillage rather than halting it abruptly when compaction or residue challenges require initial remediation.
Combine no-till with low-input rotation planning to maintain yield and soil health. Practical plans for small farms with limited capital can be found in adaptive rotation resources that pair well with no-till strategies Adaptive low-input crop rotation plans.
What tools and equipment support No-Till Farming implementation?
Adopt narrow opener planters, coulter systems, and residue-managing seeders designed for direct seeding into high-residue conditions. Consider roller-crimpers for terminating cover crops without tillage.
- Planters with row cleaners and downforce control protect seed placement in heavy residue.
- Strip-till tools can provide targeted soil loosening in a no-till framework when surface compaction limits root growth.
- Precision seeding and seed coatings with beneficial microbes can enhance early establishment in cool no-till seedbeds.
What pest, weed, and disease trade-offs occur with No-Till Farming?
No-till reduces erosion and preserves microbes but can increase surface weed pressure and certain residue-borne diseases if not managed with rotation and cover crops. Successful no-till systems use integrated weed management rather than relying on additional tillage.
Strategies include cover crop suppression of weeds, stale seedbed techniques, targeted herbicide use when necessary, and mechanical weed control that does not invert soil.
Disease dynamics change: some foliar diseases rise from residues, while soilborne pathogen pressure often declines as microbial diversity improves; monitor and adapt locally (extension trials and peer-reviewed field studies).
How can soil monitoring show improved microbial highways and soil health under No-Till Farming?

Monitor indicators such as aggregate stability, water infiltration, earthworm counts, mycorrhizal colonization, and soil organic carbon to track progress. Simple field tests yield actionable data for farmers during transition.
- Aggregate stability tests show structural improvement from lab or DIY wet-sieving.
- Infiltration rings measure per-minute infiltration and changes through seasons.
- Earthworm counts and casts indicate biological activity and pore creation.
- Soil organic carbon sampling at -10 cm and 10-30 cm tracks carbon accrual trends over time; deeper sampling helps detect vertical redistribution.
- Molecular or microscopy assays can quantify mycorrhizal hyphae and microbial community shifts when available.
What role do microbial inoculants and consortia play with No-Till Farming?
Microbial inoculants complement no-till by accelerating beneficial community establishment and filling functional gaps created by prior degradation. When applied correctly they can speed nutrient cycling and support plant establishment in early transition years.
Design inoculants to match local soils, crops, and desired functions; field-tested microbial consortia map strategies have improved success rates in regenerative systems (research and on-farm trials).
See practical guidelines on designing on-farm microbial consortia that integrate with minimized disturbance management for improved soil function Designing on-farm microbial consortia to enrich soil.
How does No-Till Farming interact with carbon markets and farm revenue opportunities?
No-till can contribute to measurable soil carbon gains that, combined with verification, enter carbon credit markets and produce new revenue streams for farmers. Market viability depends on additional practices such as cover cropping and robust monitoring protocols to meet verification standards.
Small farms can access emerging carbon-smart programs if they document baseline soil carbon and follow recognized measurement frameworks (protocols from voluntary markets and government programs).
Linking no-till with verifiable carbon management strategies may increase farm resilience and provide payouts tied to long-term sequestration (industry reports and pilot programs).
What case studies and field trials demonstrate No-Till Farming benefits?
Long-term field trials across North America, Europe, and South America show reduced erosion, improved aggregation, greater fungal:bacterial ratios, and surface SOC gains under no-till with cover crops. Results vary by climate, but patterns of improved water infiltration and biological connectivity are consistent.
Examples from conservation agriculture networks and university experiments document yield parity or gains when no-till is combined with rotations and cover cropping for 3-7 years (peer-reviewed trials, extension bulletins).
What common management pitfalls should farmers avoid when adopting No-Till Farming?
Avoid abrupt full-scale adoption without planning for weed management, residue handling, and compaction mitigation. Underestimating the need for crop rotation, cover crop selection, and appropriate seeding equipment leads to early frustration and failed transitions.
Monitor soil moisture and temperature effects on seedling emergence in high-residue no-till seedbeds. Use strip-till or zonal tillage only where targeted loosening is necessary to restore function.
How can No-Till Farming integrate with broader regenerative systems on small farms?
No-till combines effectively with diversified rotations, agroforestry, microclimate zoning, and sensor-guided management to maximize resilience and yield per area. Integration fosters year-round living roots, perennial components, and habitat corridors for beneficial fauna.
For small-farm implementation, pair no-till with microclimate-adapted cropping calendars and diversified mapping that account for field-scale variation and microclimates to optimize placement of crops and practices; see diversified crop mapping for microclimates for planning guidance Diversified small-farm calendar.
What future research and innovation will improve No-Till Farming outcomes?
Advances in soil microbiome mapping, AI-guided seeding, and microbial consortia design will refine no-till practices and speed transitions to resilient soils. Field-scale microbial consortia maps and sensor networks will help match practices to zones within fields for precision regenerative management.
Ongoing research into microbial necromass stabilization, root trait selection, and cover crop mixes will clarify how to maximize long-term soil carbon under minimal disturbance (recent studies in soil ecology journals).
No-till farming establishes the physical and biological highways that allow soil life to move, store carbon, cycle nutrients, and support crop resilience. When combined with cover crops, species rotations, targeted equipment, and informed monitoring, no-till becomes a cornerstone practice for regenerative, climate-smart agriculture.
References and further reading
Key sources include FAO reports on conservation agriculture, USDA NRCS technical notes, meta-analyses in Nature Plants and Global Change Biology, and field trials published in Soil Biology & Biochemistry. For practical on-farm microbial design and rotation planning that integrate with no-till systems, consult farm-focused guides and case studies.
Siphon-Slash Microfurrows: Manual Irrigation for Small Farms
Siphon-Slash Microfurrows: Manual Irrigation for Small Farms
Siphon-slash microfurrows provide a low-cost, labor-managed way to deliver water precisely to crop rows on small farms. This manual irrigation method uses shallow, short furrows with simple siphon control to optimize infiltration, reduce evaporation, and match water delivery to crop needs without pumps or pressurized systems. The following practical guide explains design, construction, scheduling, soil and crop considerations, labor planning, costs, and links to complementary regenerative practices for resilient small-farm systems.
What are siphon-slash microfurrows and how do they work?

Siphon-slash microfurrows are short, shallow channels placed alongside crop rows that are filled and drained by manual siphon or bucket delivery to concentrate water at the root zone. Siphon-slash microfurrows use surface gravity flow into microfurrows roughly 2 to 10 meters long and 3 to 6 cm deep to move water from a source to the plant line. The siphon or bucket fills the furrow rapidly and stops when the furrow is saturated or the siphon breaks, limiting deep percolation and surface runoff.
Siphon-slash microfurrows focus on delivering 10-50 liters per row per irrigation event for vegetables and small grains depending on soil texture and crop stage. Siphon control is achieved with simple plastic tubing, a hand-sucked priming method, or by lifting and lowering the bucket to start and stop flow.
When should small farms use siphon-slash microfurrows?
Use siphon-slash microfurrows on small plots where water is limited, labor is available, and pressurized micro-irrigation is impractical or too expensive. Siphon-slash microfurrows suit family farms, market gardens, community plots, and remote smallholder plots that rely on cisterns, gravity-fed tanks, or resource-constrained water sources. Implement this method when soils are moderately permeable, the slope is gentle (-3 percent), and crop spacing allows row-based furrows.
Siphon-slash microfurrows perform well during establishment and critical growth stages when targeted wetting prevents crop stress. Siphon-slash microfurrows are less effective on very steep land or on highly impermeable crusted surfaces without pre-treatment to improve infiltration.
What soils and slopes suit microfurrow irrigation?
Sandy loam to silty loam soils provide the best balance between infiltration and water-holding for microfurrows; heavy clays require special adjustments and very coarse sands need more frequent applications. Sandy soils accept water quickly but drain fast, so apply 1 to 2 smaller fills per irrigation. Clay soils resist infiltration; make furrows shorter, deeper, and add surface amendments such as compost to increase infiltration and avoid ponding.
Slope recommendations: microfurrows work on flat to gently sloping land (-3 percent). On slopes above 3 percent, shorten furrows, add cross-vanes, or use check dams to prevent channel erosion and uneven distribution. For steeper terraces, combine microfurrows with contour berms and soil-binding vegetation.
What materials and tools do you need to build siphon-slash microfurrows?
Required materials: shovel or hoe, measuring stick, garden-level or line level, siphon tubing (PVC or polyethylene), buckets or barrels, sandbags or stones for temporary weirs, and mulch for infiltration control. Optional materials: cut plastic pipe (20-32 mm) for fixed siphon heads, small hand-operated siphon priming pumps, wooden stakes for marking, and low-cost tape measures for spacing.
- Tools: 1 hoe or shovel per 50 m of furrow length
- Water delivery: buckets, gravity tank with outlet, or small barrel elevated .5-1.5 m
- Siphoning: 6-10 mm flexible tubing for hand-siphons; 20-32 mm pipe for higher flow rates
How do you design microfurrows for different crops?
Design microfurrows to match crop spacing and root-zone depth: for shallow-rooted vegetables place microfurrows 10-20 cm from plant line; for deeper-rooted crops place microfurrows 20-40 cm away to encourage lateral root growth. For single-row beds, place microfurrows along the planting line. For multi-row beds, use inter-row microfurrows that run between rows and release water into adjacent root zones.
Design parameters by crop type:
- Row vegetables (tomato, pepper, eggplant): furrow length 2-8 m, volume 15-40 L per row per fill
- Leafy greens (lettuce, spinach): furrow length 1-4 m, volume 5-15 L per row per fill
- Legumes and cereals: furrow length 5-10 m, volume 30-80 L per row per event depending on density
How do you construct siphon-slash microfurrows step-by-step?
Step 1: Mark planting rows and measure distances accurately to maintain uniform irrigation zones. Step 2: Using a hoe or small shovel, cut shallow channels 3-6 cm deep and 6-10 cm wide alongside the planting line. Step 3: Smooth furrow beds to remove clods and create a continuous channel that will allow rapid filling without turbulence.
Step 4: Install siphon tubing or position a bucket at the head of each furrow. Prime siphons by hand or use an inexpensive priming pump to start flow. Step 5: Monitor fill to stop flow when furrows reach target wetting depth or when runoff begins to appear. Step 6: Add mulch or stone checks where needed to prolong infiltration and reduce evaporation.
Construction tips to prevent erosion
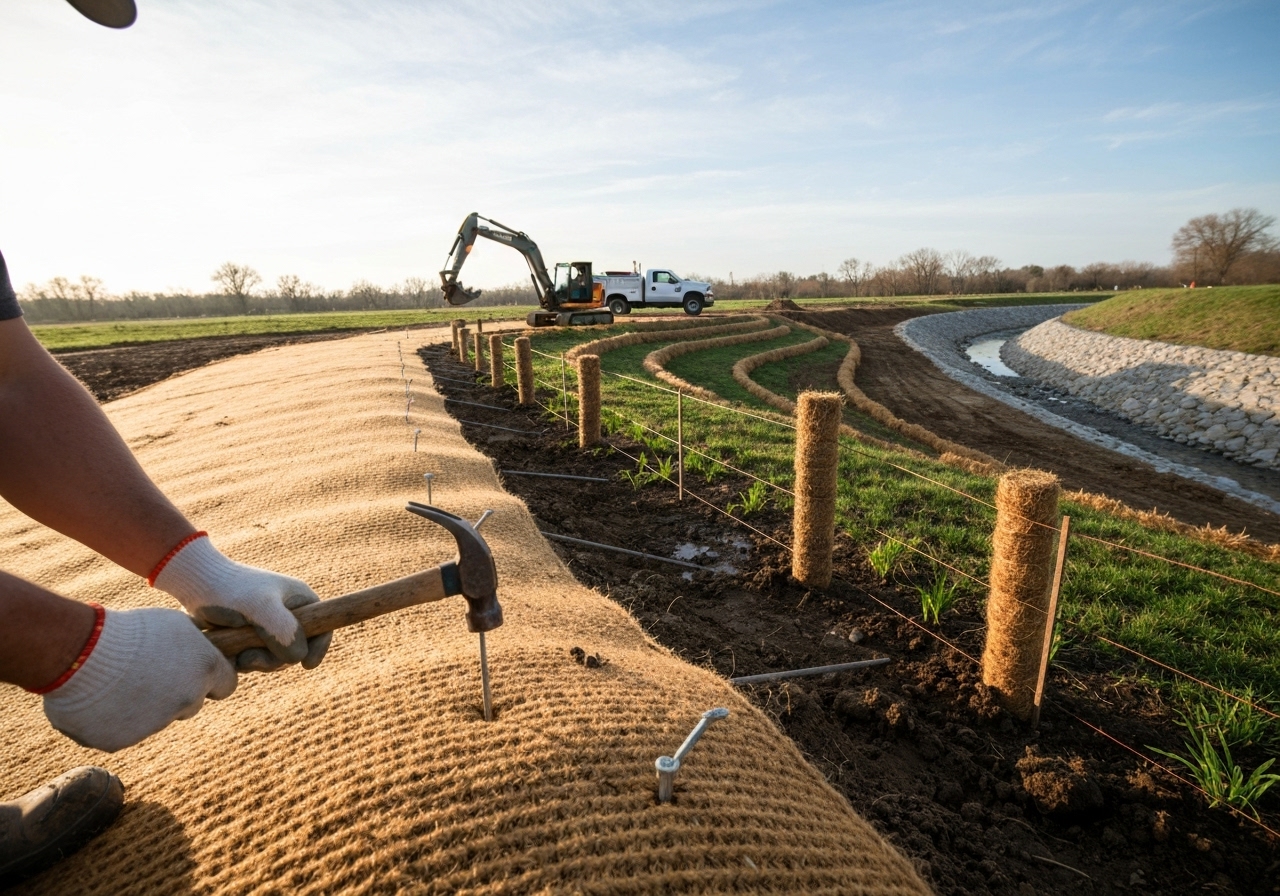
Place small stones or organic checks every 1-2 meters on slopes and use short furrow segments to slow flow velocity. Compact furrow edges lightly with the back of the shovel to reduce edge collapse. On erodible soils, add grass strips or living barriers downslope to trap sediment and re-infiltrate overflow.
How do you manage siphon control and dosing?
Control dosing by furrow length, flow rate (tube diameter), and fill duration; aim to deliver the target volume per plant or row without causing runoff. Use flow tables: a 6 mm tube delivers around 2-4 L/min under small head differences, while a 20 mm pipe can deliver 20-60 L/min. Measure the output into a calibrated container to set fill times.
Operate siphons in staggered batches to match labor availability: fill 5-10 furrows per worker before moving to the next set. Use manual closing by lifting the tube end above the water line or by breaking the siphon at a higher point to stop flow.
How often should you irrigate with microfurrows?
Irrigation frequency depends on soil texture, crop stage, evapotranspiration, and rainfall; typical schedules range from daily for sandy soils and young transplants to every 4-7 days for loam soils and established vegetables. Monitor soil moisture via simple hand-probing or a portable soil moisture meter to decide when to irrigate. Target 50-80 percent of available water depletion for most vegetables and 30-50 percent for young seedlings.
Example schedule: in warm season conditions, irrigate leafy greens every 1-3 days, fruiting crops every 3-5 days, and root crops every 4-7 days depending on rainfall. Adjust after heavy rain to avoid over-watering.
How much water does a microfurrow event apply?

Calculate applied volume by multiplying furrow flow rate by fill time and dividing by the number of plant rows served; typical per-row doses range 5-80 L per event for small farms. Example: a 10 mm pipe delivering 15 L/min that runs for 2 minutes delivers 30 L; if that furrow serves 3 tomato plants, each plant receives roughly 10 L that event.
Measure actual infiltration losses and adjust: record pre- and post-irrigation soil moisture at 10, 20, and 30 cm depths to determine effective wetting and refine volumes over time.
How do microfurrows integrate with crop rotations and soil health practices?
Integrate microfurrows with low-input rotations to protect soil structure, retain organic matter, and reduce erosion by aligning irrigation with cover crop termination and planting windows. Use rotations that reduce the number of successive shallow-root crops to minimize compaction in the plant line. Combine microfurrows with surface compost bands and microbial amendments to enhance infiltration and nutrient cycling.
Plan microfurrow layouts seasonally using crop maps and microclimate knowledge to place water where it returns best value. For planning, consult resources on crop maps by microclimates to match irrigation timing and varieties to site conditions; see diversified small-farm crop mapping for guidance.
What labor and time commitments are required?
Labor varies with field size: expect .5-2 worker-hours per 100 m of furrow for construction and .2-1 worker-hour per irrigation cycle for filling and monitoring depending on tools used. Use labor estimates to scale: a 200 m bed system with 2 m furrow segments needs 1-3 person-days to lay out and build, and daily run times require 1-2 hours per day of filling across the farm when staffed by two people.
Use time-saving measures: pre-marked furrow guides, shared barrels with multiple outlets, and simple siphon manifolds to serve several rows from one fill point.
What are the costs and financing considerations?
Initial costs for a basic siphon-slash system are low: typically $20-200 for tubing, buckets, hand tools, and small tanks depending on scale; recurring costs are labor and occasional replacement of tubing and mulch. Compare costs versus drip systems: while drip provides automation and efficiency, siphon-slash systems present lower capital outlay and simpler repairability. Consider small grants, community tool banks, or low-interest microloans to cover a tank or raised water storage investment.
Record costs and yields to evaluate return on investment over seasons. When water savings and yield gains are documented, small farms can justify incremental upgrades such as low-cost pressure-compensating emitters or solar-powered pumps later.
What are common problems and how do you troubleshoot them?
Problem: uneven distribution and runoff. Fix by shortening furrow length, adding checks, and smoothing furrow beds. Problem: siphon failure. Fix by replacing cracked tubing, ensuring proper priming head, or switching to a bucket-lift starting method. Problem: surface crusting reduces infiltration. Fix by applying compost, mulches, or shallow mechanical scarification before irrigation.
Problem: pest or weed flush in wetted zones. Fix by targeting timing to avoid peak weed emergence, applying mulches, and combining with manual weeding or mechanical cultivation in dry periods.
Which case studies and research support microfurrow methods?
Research by the FAO and several CGIAR centers documents that small, targeted surface irrigation methods can save 20-50 percent of water use compared with basin flooding while maintaining yields on smallholder vegetables and cereals. Trials published in Agricultural Water Management (2016-202) show microfurrow and surge irrigation techniques reduce evaporation and deep percolation losses in semi-arid conditions. USDA Natural Resources Conservation Service field guides provide practical templates for furrow dimensions and scheduling for varied soils.
Field reports from community gardens and market farms indicate that manual microfurrows increase labor demand but lower input costs and complexity, making them a resilient choice where energy or supply chains limit drip system access.
How do you combine microfurrows with regenerative practices and modern tools?
Combine microfurrows with microbial soil amendments, cover crops, and microclimate mapping to maximize water use efficiency and soil resilience. Use microbial consortia and seed coatings to improve plant water uptake and drought resilience; see strategies on designing microbial consortia for on-farm use to enrich soil function. Integrate microclimate mapping and crop zoning to place more irrigation where microclimates need it most and reduce wasted water on less productive microplots.
Where appropriate, use low-cost sensors or simple tensiometers to inform irrigation timing. Link irrigation records to adaptive rotation plans to keep soil structure healthy; a rotation guide can help reduce compaction and align irrigation windows with crop needs.
Examples of complementary content: on-farm microbial consortia, and adaptive low-input crop rotation plans.
How do you monitor and record irrigation performance?
Monitor by recording the number of fills, duration, delivered volumes, post-irrigation soil moisture at 10-30 cm, and plant stress observations. Keep a simple logbook or spreadsheet with fields for date, field, furrow length, flow rate, fill time, and weather. Use these data to calculate effective water applied per crop unit and refine schedules.
Conduct seasonal audits comparing yield per unit water across beds to identify where microfurrows return the greatest value and where investments in retention, infiltration amendments, or system upgrades would pay off.
What are the environmental benefits and limitations?
Benefits: low energy input, reduced infrastructure needs, targeted wetting that lowers evaporation, and compatibility with soil-building regenerative practices. Limitations: higher labor demand, less precision than pressurized drip systems, and reduced suitability for very large farms or highly uneven topography.
Siphon-slash microfurrows support resilience by enabling smallholders to manage water locally during supply disruptions and to adjust irrigation manually in response to crop cues and rainfall events.
Undervalued Microclimate Crops for Small Farm Diversification
Undervalued Microclimate Crops for Small Farm Diversification
Small farms increase resilience and revenue by matching niche crops to on-farm microclimates. This guide identifies undervalued species, explains selection and management, and gives step-by-step actions to convert marginal patches into profitable production zones. Use the recommendations that follow to map microclimates, choose crops, integrate soil biology, and build markets that reward locality and specialty.
What are undervalued microclimate crops for small farm diversification?
Undervalued microclimate crops are niche or specialty species that perform well in unique on-farm microclimates, deliver higher per-area returns, and are often overlooked by mainstream commodity production.
Undervalued microclimate crops include herbs, specialty greens, minor grains, fruiting perennials, mushrooms, halophytes, and fiber or medicinal species that fit small, variable sites. They require less land to generate income, adapt to marginal soils or localized temperature and moisture patterns, and open direct-market channels such as restaurants, markets, and value-added products. Evidence of small-scale premium markets exists in regional extension reports and farmer case studies (USDA extension analyses; regional university trials).
Why should small farms diversify with microclimate-adapted crops?
Small farms should diversify with microclimate-adapted crops to increase income per square foot, reduce market risk, improve ecological function, and use on-farm heterogeneity as an asset.
Small farms realize 1) higher gross margins on specialty crops versus bulk commodities, 2) more stable income across seasons by staggering harvests, and 3) ecological benefits from diversified rooting patterns and lowered input needs. Diversifying into microclimate niches lowers risk from pests and disease that spread in monocultures. Extension research and market surveys indicate consumers pay premiums for provenance and specialty quality (regional extension reports; market research summarized by ATTRA and local food marketers).
Which undervalued crops perform well by microclimate?
Choose undervalued crops based on specific microclimate conditions such as warm slopes, cool shady hollows, saline edges, wet depressions, frost pockets, or protected structures.
Which undervalued crops perform well by microclimate is the practical question. Below are crop groups linked to common small-farm microclimates with short cultivation notes and market ideas.
Warm, well-drained south-facing slopes
Warm, well-drained slopes favor drought-tolerant, high-value crops that ripen early and concentrate sugars and flavors.
- Saffron crocus: Planting depth 10 cm; harvest dried stigmas; very high retail value per area. Trials show profitability at micro-scale when labor is managed (regional bulb trials).
- Hot peppers and specialty chiles: Use terraces or raised beds to amplify warmth; sell to hot-sauce producers and ethnic markets.
- Olive and hardy Mediterranean herbs: Establish as small-scale orchard edges; cut-and-come-again thyme, rosemary and lavender for dried bundles and essential oil markets.
- Carbon-smart millet and fonio on marginal dry slopes: Low input grains with local demand and climate resilience (see low-input grain research).
Cool, shaded north-facing hollows and wind-protected valleys
Cool, shaded hollows suit shade-adapted vegetables, woodland crops, and specialty mushrooms that prefer stable humidity and lower light.
- Leafy Asian greens: Mizuna, komatsuna, and mustard greens extend harvest windows in spring and fall.
- Hardy perennial fruits: Pawpaw and serviceberry perform well in cool microclimates and bring unique farm-direct demand.
- Shiitake and oyster mushrooms: Use logs or substrate in protected lanes; high per-tray yields and year-round markets.
- Edible flowers and microgreens: Grow in shaded tunnels for restaurants and chefs seeking unusual garnishes.
Saline or alkaline edges, tidal marsh margins
Saline or alkaline edges support halophytic vegetables and forage that tolerate salt, converting marginal acreage to marketable products or feedstock.
- Salicornia and other glassworts: Harvest for niche restaurants and specialty brined products. Trials show good yields on saline soils when managed properly.
- Sea kale and samphire analogs: Provide high-value seasonal harvests for chefs specializing in coastal cuisine.
- Salt-tolerant barley or millet: Use as low-input cover or grain crops where traditional cereals fail.
Wet depressions, riparian strips, and seasonally flooded lowlands
Wet depressions support rice alternatives, water-loving herbs, and wetland perennials that can become specialty food and fiber crops.
- Water spinach and taro in warm regions: Intensive, high-yield production that sells to ethnic markets.
- Cattail shoots and arrowhead tubers: Local niche markets; require careful processing to remove tannins.
- Wetland-adapted herbs: Mint family species can be high-value for essential oil and culinary markets when managed to prevent invasiveness.
Frost pockets and microclimate cold traps
Frost pockets benefit cold-hardy crops that can cash in on early spring or late fall windows where others cannot.
- Pawpaw and hardy kiwifruit: Use frost pockets to grow fruits that benefit from cool winters and warm summers.
- Hardy brassicas for overwintering harvest: High-value kale and collards for winter markets.
- Jerusalem artichoke (sunchoke): Tolerates cold and poor soils; sell tubers for specialty cooking and fermentation.
Protected structures: greenhouses, high tunnels, and sun spaces
Protected structures let small farms produce tropical or off-season crops like vanilla, specialty tomatoes, and herbs in temperate zones.
- Saffron, heated greenhouse tomatoes, basil, and microgreens: Off-season supply to restaurants commands premium prices.
- Vanilla and other vine crops in controlled humidity: Long-term investment for very high-value returns in niche markets; requires climate control.
- Heirloom peppers and eggplants for seed saving and local sale.
How to select the right undervalued microclimate crops for your small farm?
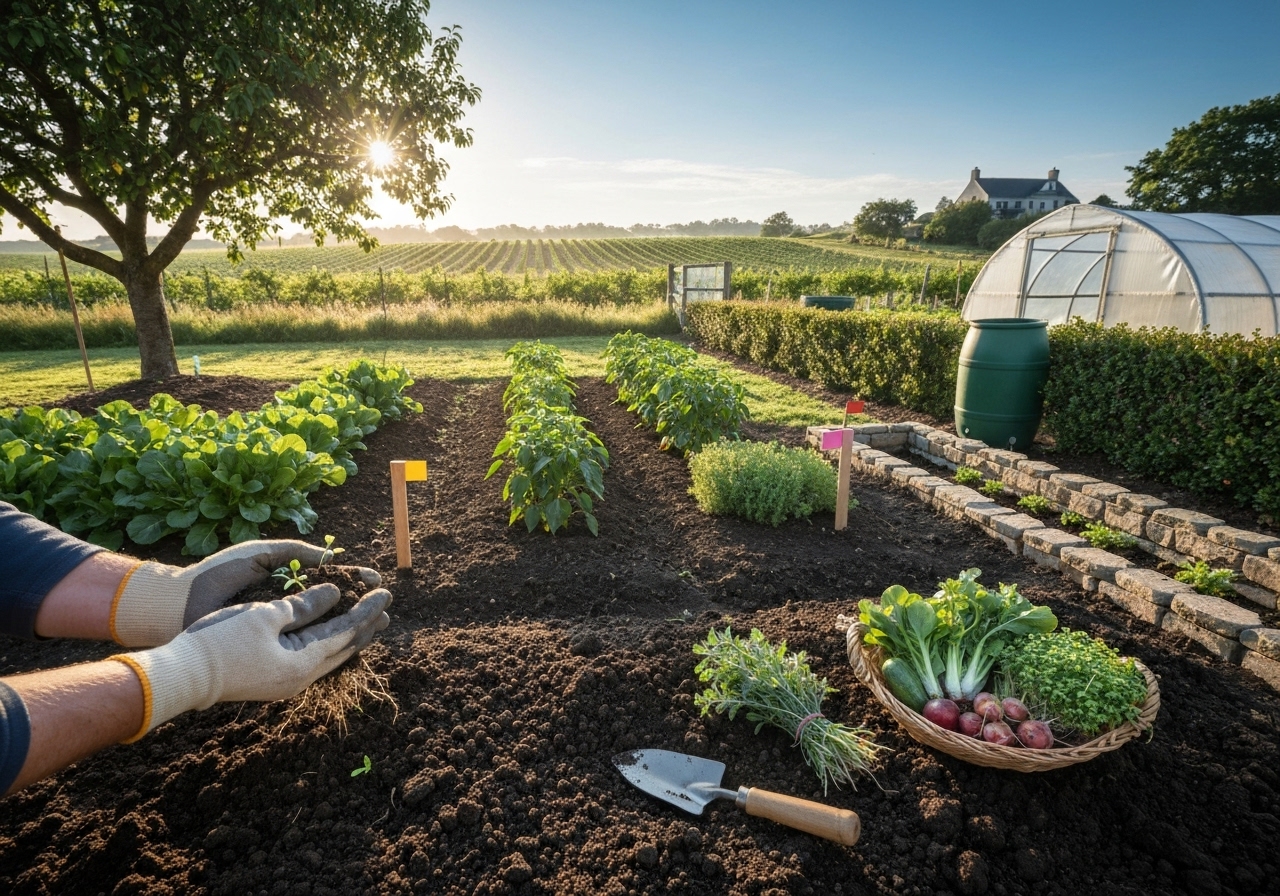
Select crops by mapping microclimates, evaluating soil and water conditions, matching crop seasonality to local markets, and testing at small scale first.
Select the right crops by following a structured decision process: 1) Map microclimates across slopes, exposures, and shelter belts. 2) Test soils with pH and salinity checks and basic nutrient analysis. 3) Audit water availability and irrigation cost. 4) Identify local market demand by surveying chefs, CSAs, farmers markets, and processors. 5) Run 1- to 4-row trials in year one to validate performance and labor needs.
Select farm planning tools such as microclimate mapping and calendar overlays to align planting and harvest with demand. For mapping approaches, refer to diversified small-farm calendars and crop maps that help allocate crops by site characteristics.
How to design low-input rotations and soil strategies for undervalued microclimate crops?
Design rotations to control pests, build organic matter, and maintain nutrient balance while keeping low external inputs through cover crops and microbial management.
Design low-input rotations by pairing shallow- and deep-rooted crops, alternating solanaceae and brassica families, and inserting legume phases to fix nitrogen. Add perennial phases where possible to stabilize soil and spread labor over seasons. Use cover crops such as crimson clover, buckwheat, and mixed grasses to protect soil between specialty plantings.
Design microbial strategies to accelerate nutrient cycling and stress tolerance. For on-farm soil biology, apply tailored inoculants, compost teas, and organic amendments. See applied methods in adaptive low-input crop rotation plans and in research on designing microbial consortia to enrich soil. Field trials indicate microbial consortia can boost nutrient uptake and support cash crop yields under low fertilizer regimes.
How to manage irrigation, season extension, and micro-irrigation for niche crops?
Manage irrigation by matching water delivery to crop demand, prioritizing drip or micro-spray systems, and using season extension to lengthen high-value windows.
Manage irrigation with 1) drip micro-lines for localized water delivery, 2) soil moisture sensors for scheduling, and 3) mulches to conserve water and moderate soil temperature. Protect tender crops with low tunnels, shade cloth, and high tunnels for early or late market windows. Use low-tech thermal mass such as water barrels inside tunnels to moderate night temperatures.
How to market and monetize undervalued microclimate crops?
Monetize undervalued crops through direct sales to chefs, specialty retailers, CSA subscriptions, value-added processing, and targeted wholesale contracts.
Monetize crops by identifying buyers that value uniqueness: ethnic grocers, high-end restaurants, craft distillers, artisanal bakers, and fermentation producers. Monetize also through small-batch processing: dried herbs, infused oils, pickles, botanical syrups, and candied flowers. Price per-unit area often exceeds common vegetables by 2 to 10 times for well-branded specialty items.
Monetize further by telling the microclimate story. Use farm tours, tastings, and social media to explain why the south-facing slope saffron or the tide-edge salicornia are unique. Restaurants respond to dependable small-batch supply. For examples of farm-to-table support that lifts local agriculture, consult regional case studies such as how recommended restaurants support local producers in Morocco (local food partnership studies describe these dynamics).
What are postharvest handling and value-add options for specialty microclimate crops?
Implement simple postharvest systems: cooling, drying, and gentle handling to preserve quality; apply value-add to increase margins.
Implement postharvest handling by planning immediate cooling for tender greens, quick drying for flowers and herbs, and clean processing for mushrooms. Implement value-adding through small-batch drying, salting, fermenting, distilling, and packaging in chef-friendly formats. Implement traceability and labeling that emphasizes microclimate origin to capture premium prices.
What are pest, disease, and labor strategies for small-scale microclimate crop production?
Manage pests and disease with cultural controls, biologicals, sanitation, and diversified planting; plan labor by batching tasks and using season extension to spread work.
Manage pests using crop rotation and trap crops, release beneficial insects, and apply targeted organic-approved products only when thresholds are reached. Manage disease by optimizing airflow in tunnels, rotating families, and using disease-free planting material. Manage labor by processing harvests in small batches, scheduling weekly delivery routes, and co-op labor sharing with neighboring farms for peak seasons.
What are economic and risk considerations for adopting undervalued microclimate crops?
Evaluate start-up cost, labor intensity, expected price per unit, and market access; mitigate risk by trialing small plots and diversifying buyer types.
Evaluate economics by calculating per-plot gross margin: estimate yield per square meter, expected farmgate price, variable costs, and labor time. Expect specialty herbs and mushrooms to yield high per-square-foot returns but require careful labor management. Evaluate risk by establishing multiple sales channels and short-term contracts with chefs or buyers. Evaluate crop insurance options where available and keep records to support certification or claims if needed.
What supporting practices increase success with undervalued microclimate crops?
Adopt microclimate mapping, soil testing, microbial enrichment, targeted irrigation, and active market research to boost success rates.
Adopt mapping and scheduling tools to sync crop windows to labor and demand. Adopt soil tests annually and apply amendments guided by lab results. Adopt microbial tools such as compost inoculants and seed coatings to improve germination and salt tolerance where applicable. Adopt small-scale trials and scale successful tests. For mapping practices and sensor guidance see work on microclimate zoning and mapping that helps boost yields on small farms.
What are real-world examples of small farms using undervalued microclimate crops?
Examples include a hillside farm producing saffron and hot peppers, a riparian property growing wetlands herbs and water chestnuts, and a shaded orchard integrating shiitake logs and pawpaw understory fruit.
Examples show that a .1 hectare saffron patch can pay for seed and labor in a single season if marketed to specialty buyers. Examples from extension case studies describe mushroom enterprises yielding consistent monthly income from small log blocks. Examples of saline-edge conversion to glasswort have replaced low-value pasture with a seasonal high-value harvest sold to coastal restaurants.
How to pilot undervalued microclimate crops in year one?
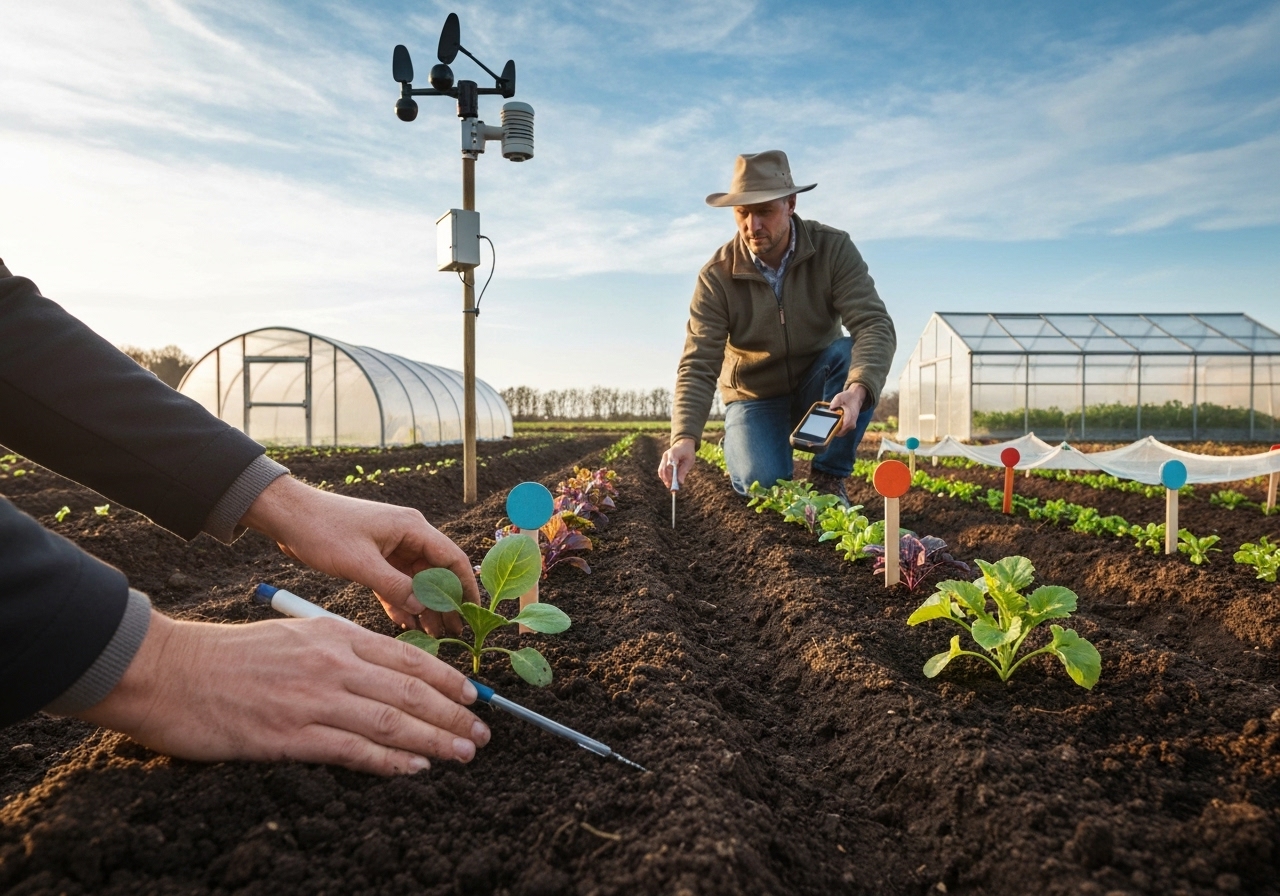
Pilot by mapping, choosing 2 to 4 test plots, running small trials, recording inputs and yields, and validating markets through pre-sales.
Pilot steps: 1) Map microclimates using simple tools: thermometer loggers, moisture probes, and solar exposure checks. 2) Choose 2 to 4 crops that match distinct sites. 3) Plant small experimental beds (10 to 50 square meters) and monitor performance. 4) Pre-sell to buyers or arrange trials with chefs. 5) Record labor hours, yields, and margins and decide which plots scale in year two.
What metrics should small farms track to evaluate microclimate crop success?
Track yield per square meter, labor hours per kilogram, gross margin per crop, buyer retention, and soil health indicators.
Track metrics each season. Track soil organic matter, pH, and microbial activity annually to detect changes from rotations and amendments. Track buyer feedback and price realization monthly. Use these metrics to scale high-performing plots while dropping low-return experiments.
What partnerships and resources help scale undervalued microclimate crops?
Partner with extension services, chefs, regional processors, and cooperative marketing groups to scale specialty production and share risk.
Partner with university extension programs for trial design and disease diagnostics. Partner with chefs and restaurants for development of unique product lines. Partner with neighboring farms to aggregate product for wholesale buyers. Use cooperative branding to maintain local identity while meeting volume demands. For on-farm microbial strategies and cooperative approaches consult materials on microbial consortia and regenerative microclimate farming practices.
What step-by-step checklist converts microclimates into profitable crop niches?

Follow this checklist: map microclimates, test soils, pick 2 to 4 crops, run pilot plots, secure buyers, optimize soil biology, track metrics, and scale gradually.
- Map microclimates with simple loggers and observations for 2 to 12 months.
- Test soils: pH, salinity, organic matter, macronutrients.
- Choose crops that match microclimate and local market demand.
- Run 10-50 m2 pilot plots and record yields and labor.
- Pre-sell or trial with one or two local buyers.
- Use cover crops and microbial amendments to build fertility.
- Install micro-irrigation and season extension where needed.
- Scale successful plots and diversify buyer channels.
What long-term strategies make undervalued microclimate crops sustainable?
Build soil health, plant perennial niches, develop stable buyer relationships, and integrate carbon and ecosystem services into business planning.
Build long-term sustainability by adding perennial hedgerows and agroforestry elements that increase structural diversity, stabilize soils, and provide secondary income streams. Build relationships with buyers to smooth price volatility. Build ecosystem service accounting into farm planning; explore opportunities in soil carbon credits for diversified, low-input systems backed by local measurement methods (see soil carbon project analyses for small farms).
Where to find technical references and local support?
Use university extension publications, regional farmer networks, specialty crop associations, and demonstration farms for technical protocols and marketing templates.
Use local extension bulletins for region-specific pest control and planting dates. Use specialty crop organizations for variety selection and postharvest handling. Use farmer-to-farmer networks and online forums for peer troubleshooting. For mapping and sensor-guided practices explore resources on microclimate mapping and sensor-guided polyculture to optimize site choices.
Suggested next actions
Map two microclimates on your farm this season, choose one high-value pilot crop to test on 25 m2, contact two local chefs or markets with samples, and track time and gross income to evaluate viability for year two.
For related planning and implementation tools see practical guides on microclimate calendars and mapping to allocate crops by site and season through the seasons (use diversified small-farm calendar maps). For rotation templates that reduce inputs while protecting yields, consult adaptive low-input rotation plans that fit small-farm scale (integrate adaptive rotations). To accelerate soil recovery and nutrient cycling for specialty plots, refer to frameworks on designing on-farm microbial consortia to enrich soil and improve crop stress tolerance (apply microbial consortia methods).
Implement these steps, iterate on small experiments, and use microclimate variability as a competitive advantage. Track yields and buyer feedback and expand the most profitable niches. Small farms that capture microclimate value convert marginal areas into consistent revenue while strengthening farm resilience.
Engineering Root-Scaffold Crops to Break Soil Compaction
Engineering Root-Scaffold Crops to Break Soil Compaction
Engineering root-scaffold crops uses crop selection, mixtures, rotation timing, and microbial partnerships to physically fracture compacted layers and restore pore networks. This practical guide explains which species work, how to design rotations and mixtures, when to include mechanical interventions, how to monitor progress, and what economic tradeoffs farmers should expect.
What are root-scaffold crops and how do they reduce soil compaction?
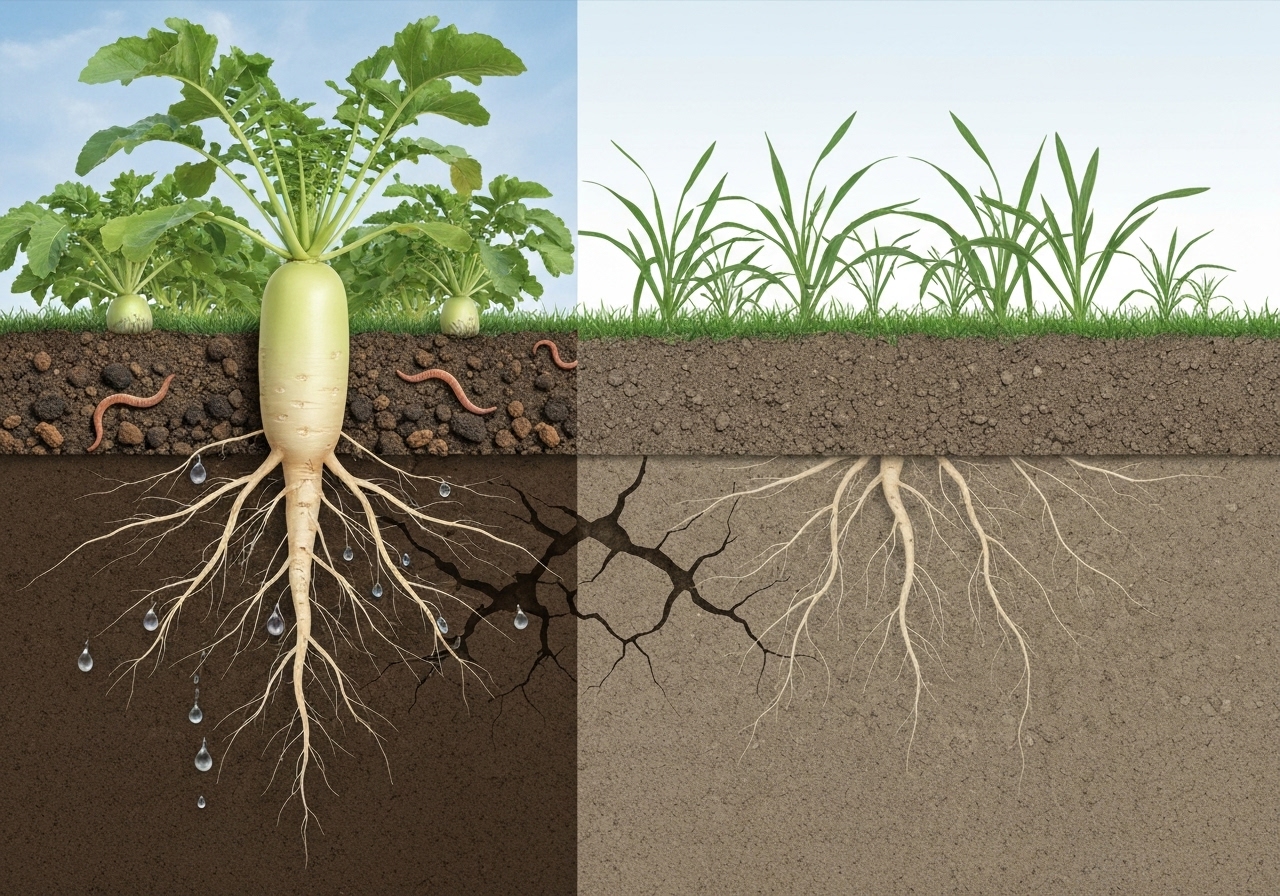
Root-scaffold crops are plants chosen or bred for root traits that penetrate, loosen, or stabilize compacted soil layers. Research and conservation practice demonstrate that deep, stiff taproots and dense fibrous root mats create channels and aggregate soil, increasing porosity and water infiltration.
Root-scaffold crops reduce compaction by four mechanisms: 1) physical penetration of dense layers (bio-drilling); 2) root-induced aggregate formation that resists reconsolidation; 3) increased biopores from decayed roots that persist for subsequent crops; 4) stimulation of microbial communities that bind particles and produce glues (exopolysaccharides) that improve structure.
Which species serve as effective root-scaffold crops?
Effective root-scaffold crops include species with strong taproots, woody or fibrous architectures, or persistent root systems. Examples: tillage radish (Raphanus sativus var. longipinnatus), forage radish, chicory (Cichorium intybus), summer deep-rooting brassicas, sainfoin, alfalfa, deep-rooting cover grasses like perennial ryegrass and tall wheatgrass, and certain brassica-perennial mixes.
Select species for local climate and soil type. In cool temperate zones, winter-active tillage radish creates large biopores before spring planting. In warm climates, sunn hemp and pigeon pea supply deep penetration and biomass. Perennial legumes and forage crops provide multi-year root scaffolds for chronic compaction problems.
How should farmers choose species for local soils and objectives?
Choose species by matching root traits to the compaction depth and farm goals. First, measure compaction depth and severity using a penetrometer or spade test. Then, choose plants with rooting depth greater than the compacted layer and root stiffness sufficient to penetrate it.
For short-term mitigation use annual deep-rooters like tillage radish or sunn hemp. For long-term structural recovery use perennials (alfalfa, sainfoin) or multi-year grass-legume mixtures. Combine a taprooted species with fibrous-rooted grasses to create both vertical channels and lateral stabilizing networks.
How to design crop mixtures and rotations to maximize compaction reversal?

Design mixtures and rotations to sequence root functions: first, penetrate; second, stabilize and build porosity; third, exploit channels. A common sequence is: year 1 deep-rooted annual (bio-drill), year 2 fibrous grass-legume mix, year 3 cash crop following improved soil structure.
Follow these steps to design rotations: 1) map compaction zones across the field; 2) assign deep-rooters where compaction is deepest; 3) follow deep-rooters with high-root-mass stabilizers; 4) integrate low-disturbance cash crops to preserve newly formed pores. Use adaptive low-input rotation principles to fit labor and markets; see adaptive rotation plans for templates that small farms can adapt.
When should farmers use mechanical tillage in combination with root-scaffold crops?
Use mechanical tillage selectively and only when biological measures alone are insufficient. Mechanical loosening can immediately restore trafficability but risks surface sealing and organic matter loss if overused.
Combine mechanical and biological methods this way: 1) apply shallow mechanical tillage to disturb the compacted layer without pulverizing soil; 2) plant root-scaffold crops immediately to occupy created pores; 3) avoid repeated deep inversion tillage that destroys root channels. Research from conservation agriculture programs recommends minimal, strategic tillage coupled with continuous cover to sustain gains.
What management practices preserve root-created porosity?
Preserve root-created porosity by minimizing wheel traffic, using controlled trafficking lanes, and timing field operations when soils are dry enough to avoid reconsolidation. Reduce repeated tillage passes and adopt no-till or minimum-till for subsequent cash crops.
Adopt the following operational practices: 1) maintain permanent headlands or traffic lanes; 2) use flotation tires or track systems to lower contact pressure; 3) schedule fieldwork based on soil moisture sensors to avoid working wet soils; 4) keep continuous living roots or surface residue to prevent soil collapse.
How do microbial consortia support root-scaffold function?
Microbial consortia improve root-scaffold performance by accelerating organic matter turnover, producing binding agents, and promoting root growth. Specific microbes increase root penetration by reducing root-path impedance and by mobilizing nutrients that support deeper rooting.
Integrate microbial strategies by using seed coatings, compost teas, or site-tailored inoculants that promote root health and aggregate formation. Design microbial inputs around the chosen crops; see methods for designing and applying on-farm consortia in on-farm microbial consortia.
What monitoring indicators show that compaction is improving?
Monitor soil compaction using a mix of simple field tests and quantitative measures. Direct indicators: decreased penetrometer resistance in the plow layer and subsoil, increased macroporosity, and greater root penetration depth for subsequent crops.
Use these monitoring methods: 1) static penetrometer readings across years at fixed locations; 2) shovel or spade profile to observe root distribution and biopores; 3) infiltration tests (double-ring) to detect faster water entry; 4) yield and rooting depth of follow-up cash crops as functional indicators. Combine several methods for robust assessment.
How long does biological compaction reversal take?
It varies by severity, soil texture, climate, and management. Light compaction may show measurable improvement in 1 growing season with aggressive deep-rooters. Moderate to severe subsoil compaction typically requires 2 to 5 years of strategic rotations and reduced trafficking to restore structure.
Expect multi-year timelines where heavy clay subsoils and high wheel loads are present. Persist with follow-up stabilizing phases and avoid high-pressure traffic to prevent reversal. Consider combining a single mechanical fracture with multi-year biological follow-up when time-to-recovery must be accelerated.
What are the economic tradeoffs and benefits of using root-scaffold crops?
Root-scaffold systems incur seed and establishment costs and may require foregone cash income during cover phases. Benefits include reduced fuel and repair costs from fewer tillage passes, improved yields over time from better rooting and water access, and potential eligibility for soil carbon or conservation incentive programs.
Estimate costs and returns by: 1) calculating seed and planting costs; 2) valuing reduced tillage or improved yields; 3) adding potential payments from carbon or conservation programs. Use local extension services and producer networks to confirm assumptions. Programs that monetize soil carbon can further improve the business case; see background on soil carbon markets in soil carbon credits.
How to implement a field-level plan step-by-step?
Implement a field plan in five clear steps: diagnose, prioritize, design, implement, monitor.
1) Diagnose: use penetrometer, spade tests, and field history to map compaction zones. 2) Prioritize: treat the most productive or traffic-impacted zones first. 3) Design: select species, mixtures, and rotation timing with specific rooting depth targets. 4) Implement: seed deep-rooters at optimal dates and densities, manage residues, and limit traffic. 5) Monitor: measure penetrometer resistance, infiltration, and root depth annually and adapt the plan.
How to measure compaction precisely in the field?
Measure compaction with a cone penetrometer for quantitative resistance (kPa) values and with spade profile checks to observe mechanical impedance layers. Use consistent moisture conditions when measuring; penetrometer readings are sensitive to soil water content.
Record penetrometer data at fixed sampling points and depths (-30 cm, 30-60 cm, 60-90 cm) and compare over seasons. Supplement with bulk density cores for laboratory confirmation when needed.
Which root traits are most effective for breaking hardpans?

Key root traits: high tensile strength and stiffness, large root diameter, positive root thigmomorphogenesis (ability to respond to resistance with increased strength), and a combination of taproot and lateral proliferation. Persistence of root channels after decay is critical to long-term benefits.
Breeding and selection should emphasize a mix of mechanical penetration traits and biomass production. Poly-cropping and mixture design accomplish trait complementarity without waiting for new cultivars.
Can breeding and genetic selection speed up root-scaffold effectiveness?
Yes. Breeding for root diameter, depth, and root-soil interface traits can accelerate compaction reversal. Plant breeders and root phenotyping labs are increasingly selecting for deeper, stiffer roots suitable for challenging soils.
Adopt improved cultivars as they become available and consider on-farm selection by saving seed from individuals that demonstrate superior rooting on compacted plots. Combine genetic advances with management for the fastest results.
What risks or unintended consequences should farmers watch for?
Risks include shallow rooting if species are sown at the wrong time, nitrogen tie-up under high carbon residue loads, and pest or volunteer crop issues. Overreliance on a single species can create disease carrying risks.
Mitigate risks by staggering planting dates, integrating legumes to supply nitrogen, rotating species to reduce disease pressure, and monitoring pest presence. Maintain diversity in mixtures to avoid single-point failures.
How can technology and precision tools improve implementation?
Use precision mapping, remote sensing, and soil moisture sensors to target interventions. Autonomous or drone seeders can place cover crops in narrow bands for targeted compaction zones. AI-guided soil sensors can track changes in moisture, resistivity, and compaction over time.
Combine mapping with farm-scale management by using variable-rate seeding of deep-rooters only where needed. That reduces seed cost and concentrates benefits where compaction constrains yields most.
Which complementary practices maximize long-term soil resilience?
Complement root-scaffold crops with reduced tillage, continuous cover, diversified rotations, organic matter additions (compost or manure), and targeted grazing to maintain structure. Integrate microbial practices that enhance aggregate stability and root growth.
Adopt regenerative microclimate and polyculture approaches to increase root diversity and functional redundancy. For small farms, refer to diversified crop calendars and microclimate zoning that align rotations and species choices with local conditions; resources on planning can help adapt deployments to microclimates and labor windows.
Practical on-farm checklist
- Map compaction: use penetrometer and spade tests.
- Select species: match roots to compaction depth.
- Design sequence: bio-drill followed by stabilizers.
- Minimize traffic: create permanent lanes and use low-pressure tires.
- Integrate microbes: seed coatings or tailored consortia.
- Monitor: penetrometer, infiltration, and root depth annually.
Key references and practice guides
Follow technical advice from national conservation agencies (USDA NRCS, FAO) and academic reviews on deep-rooted cover crops and compaction management. Peer-reviewed literature in journals such as Soil & Tillage Research and Soil Biology & Biochemistry summarizes mechanisms and trials of bio-drilling and long-term structural recovery.
Adopt adaptive planning from crop rotation frameworks and local extension resources to scale efforts across fields and years. See adaptive rotation templates in adaptive low-input rotation plans to link compaction mitigation with farm revenue goals.
Implementing root-scaffold systems offers durable improvements in infiltration, rooting depth, and crop performance when executed as part of an integrated soil health strategy that includes traffic management, microbial support, and careful monitoring.
DIY Farm Soil Testing: Pocket Field Methods for Beginners
DIY farm soil testing helps beginners learn simple pocket-field methods to make management decisions, track soil health, and plan amendments. This practical guide explains when and where to test, what tools to carry, how to collect representative samples, quick field tests to run, which lab tests to order, and how to turn results into on-farm actions. The steps below follow recommendations from USDA Natural Resources Conservation Service and university extension services to give reliable, low-cost workflows for small farms.
What is farm soil testing and why should beginners do it?
What is farm soil testing: it is the process of measuring chemical, physical, and biological soil properties so you can make evidence-based fertility and management decisions. What is farm soil testing helps you identify pH imbalances, nutrient shortages, salinity issues, compaction, and biological activity. What is farm soil testing matters because corrected problems raise yields, cut input costs, reduce environmental losses, and enable targeted practices such as cover cropping, lime application, and microbe amendments (USDA NRCS; Cooperative Extension).
When and where should I test my fields?
When and where to test: test before major amendments or planting, sample by field unit or uniform management zone, and collect samples at consistent depth and season. When and where to test depends on crop goals: perform baseline tests in fall or spring during the dormant window; run nitrate tests in-season for high-N crops. When and where to test requires mapping your acreage into uniform zones by soil type, slope, wetness, crop history, or microclimate. When and where to test is more accurate if you separate sandy strips, low-lying areas, and previously amended beds. Use field maps or microclimate crop maps to guide sample zones.
What basic tools do beginners need for pocket-field soil testing?
What tools you need: a soil probe or trowel, clean bucket, sample bags, marker, pH test kit or handheld pH meter, EC meter or salinity strips, and a small field notebook. What tools you need are inexpensive: a basic soil probe costs $30–$120; pH test strips or a meter range $10–$200; an EC/salinity pen is $25–$150. What tools you need also include a 1-gallon zip bag per sample, permanent marker for labeling, gloves, and a hand lens for aggregates. What tools you need should be complemented with a simple field thermometer and stopwatch when doing infiltration or respiration checks.
How do I collect representative soil samples?
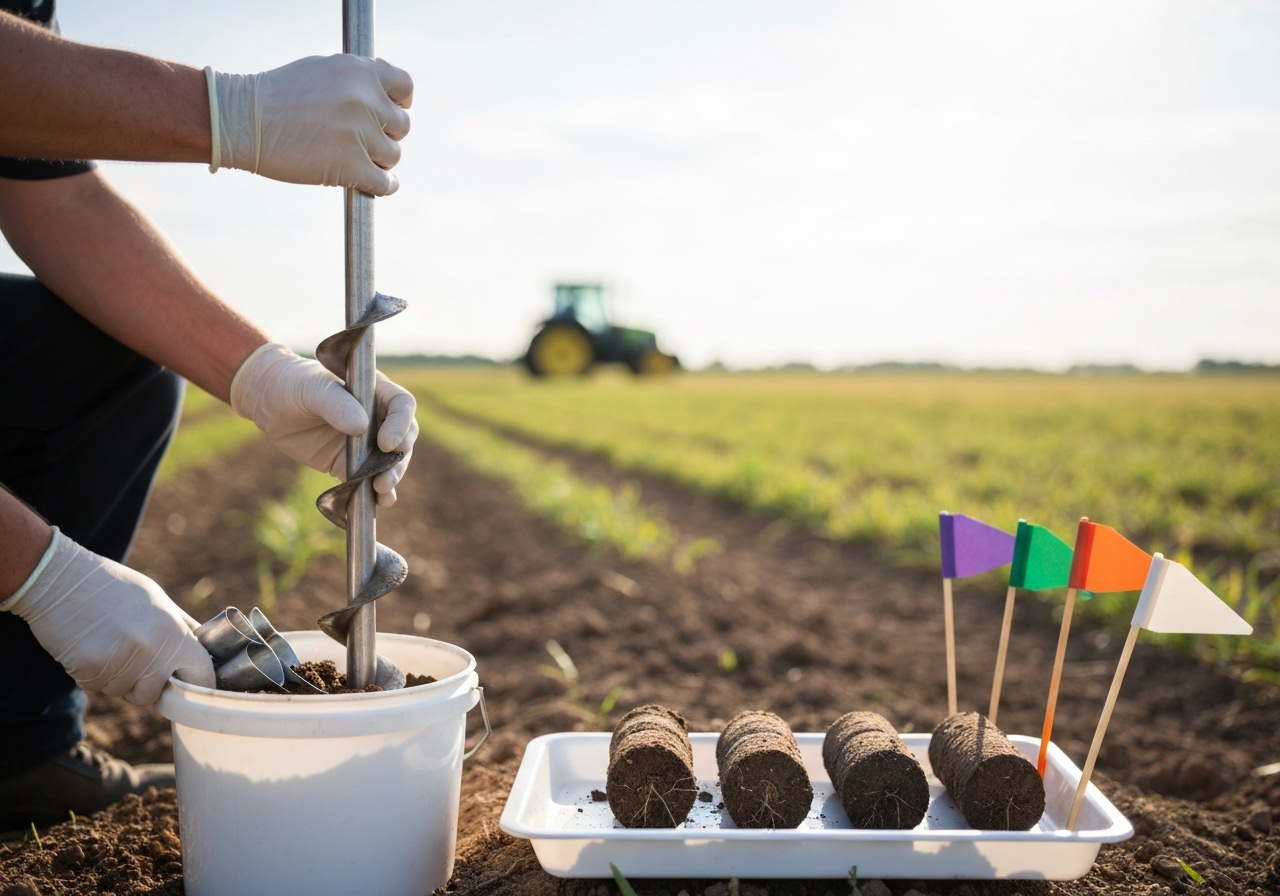
How to collect representative samples: collect 10–20 cores from each management zone, mix into one composite sample, record depth and location, and avoid atypical spots. How to collect representative samples follows this step-by-step process: 1) How to collect representative samples: define zones of uniform crop and soil; 2) How to collect representative samples: use a clean probe or trowel and take cores at a consistent depth (–6 inches for vegetables and –8 inches for pastures and tilled fields); 3) How to collect representative samples: take 10–20 cores per composite sample, spaced in a zig-zag pattern; 4) How to collect representative samples: exclude fence lines, manure piles, old compost, and wheel tracks; 5) How to collect representative samples: mix cores in a clean bucket, fill the sample bag with 1–2 cups of the mixed soil, label with field ID, depth, and date, and keep samples cool and dry before shipping to the lab. How to collect representative samples is the most important step to avoid misleading recommendations (state extension lab guidelines).
What pocket-field tests give useful quick data?
What quick field tests work: pH strips or meter, electric conductivity (EC) for salinity, jar texture test, ribbon test for texture, simple nitrate color kits, earthworm counts, infiltration test, and slake/aggregate stability checks. What quick field tests work include these practical procedures: 1) What quick field tests work: pH with strips or a calibrated handheld meter (pH indicates lime needs); 2) What quick field tests work: EC pens or salinity strips show salt stress risk and fertilizer salt buildup; 3) What quick field tests work: jar test (soil texture) by shaking 1:2:3 soil:water settling layers to estimate sand/silt/clay percentages; 4) What quick field tests work: ribbon and feel test to refine texture estimate; 5) What quick field tests work: simple nitrate color kits (test strips or color comparators) to estimate available inorganic N in soil extracts for in-season decisions; 6) What quick field tests work: earthworm counts per shovelful and visual aggregate stability (slake test) to judge biological activity and structure. What quick field tests work are low-cost and informative; pair them with periodic lab results for calibration (Cooperative Extension recommendations).
How can beginners estimate organic matter and soil biology in the field?
How to estimate organic matter and biology: use visual cues (soil color and structure), earthworm counts, aggregate stability jar test, residue decomposition rate, and simple CO2 burst kits for respiration. How to estimate organic matter and biology relies on multiple indicators: How to estimate organic matter and biology: dark brown soils with granular structure and abundant roots usually indicate higher organic matter; How to estimate organic matter and biology: count earthworms per spadeful as an activity index (higher counts mean more biological activity); How to estimate organic matter and biology: perform an aggregate stability jar test—stable aggregates that resist slaking show better soil health; How to estimate organic matter and biology: use field respiration quick tests (CO2 burst kits such as Solvita) to measure microbial activity in ppm CO2. How to estimate organic matter and biology provides directional data, but lab LOI organic matter and biological assays give precise quantification (university extension guidance).
When should I send samples to a lab and which lab tests should I order?

When to send samples: send a baseline lab test before major changes and repeat chemical tests every 2–4 years; order a full nutrient panel plus organic matter, CEC, and pH; order season-specific nitrate tests if needed. When to send samples, choose a reputable cooperative extension or certified soil-testing lab. When to send samples, typical lab panels include pH, buffer pH (lime requirement), phosphorus (Bray or Olsen depending on soil), potassium, calcium, magnesium, sulfur, micronutrients (Zn, Mn, Cu, B), percent organic matter (loss-on-ignition), and cation exchange capacity (CEC). When to send samples, for biological insight request a soil health package (respiration, active carbon, aggregate stability, or Haney/PLFA tests) if available. When to send samples, specify the crop or target so the lab provides crop-specific fertilizer recommendations (state extension labs like Cornell, Penn State, and others provide standardized reports).
How do I interpret lab results and convert them into amendments?
How to interpret results: compare lab numbers to the lab’s target ranges, prioritize pH correction first, adjust phosphorus and potassium according to soil test categories, and build organic matter and biology through practices rather than large single-dose organic amendments. How to interpret results follows these rules: How to interpret results: correct pH first because pH controls nutrient availability and microbial activity; How to interpret results: use the lab’s rating table (low, medium, high, very high) to determine P and K application rates; How to interpret results: calculate lime needs from buffer pH or lime index the lab provides; How to interpret results: reduce P and K if tests show high or very high values to avoid over-application and environmental losses; How to interpret results: increase organic matter and microbial diversity with compost, cover crops, reduced tillage, and targeted microbial consortia rather than relying solely on synthetic inputs. How to interpret results often requires field context—use soil texture and CEC to modify recommended rates because sandy soils have lower nutrient-holding capacity and require split, smaller applications.
What inexpensive sensors and apps help with pocket-field testing?
What sensors and apps help: handheld pH and EC pens, smartphone colorimetric apps for nitrate/pH strips, low-cost infrared thermometers, and data-logging probes connectable to phone apps for mapping results. What sensors and apps help include off-the-shelf tools: What sensors and apps help: low-cost Bluetooth soil probes that log moisture and temperature for mapping microclimates; What sensors and apps help: simple color-compare apps turn paper strip readings into numeric values; What sensors and apps help: AI-integrated sensors and local data platforms can accelerate field decisions (see research and examples in AI-enabled soil sensors). What sensors and apps help reduce human error and create digital records for monitoring trends season to season.
How often should I monitor and what schedule should beginners follow?
How often to monitor: perform baseline chemical tests every 2–4 years, check pH every 3–5 years, run annual nitrate tests for intensive vegetable and grain systems, and use quick field tests seasonally for management decisions. How often to monitor varies by management intensity: How often to monitor: high-input vegetable systems should test more frequently (yearly nitrate, 2-year P/K), low-input pastures and orchards can test less often (every 2–4 years). How often to monitor: map and label fields to track long-term trends and monitor microclimate zones separately using field maps or cropping calendars like those used for crop planning and microclimate mapping (diversified small-farm crop maps). How often to monitor ensures that corrective actions are measured and adjusted over time.
What simple checklist should beginners use in the field?
What checklist to use: tools, zone map, sample bags, labels, probe, bucket, pH/EC meters, nitrate strips, clipboard with sample log, and cool box for transport. What checklist to use simplifies sampling: What checklist to use: pack 1) field zone map and labels, 2) soil probe or trowel, 3) clean bucket, 4) 1-gallon sample bags and marker, 5) pH strips or meter and EC pen, 6) nitrates color kit if doing on-site N checks, 7) camera or phone to geotag anomalies, and 8) lab submission form if sending samples. What checklist to use keeps sampling efficient and consistent.
What common mistakes should beginners avoid?
What mistakes to avoid: sampling from non-representative spots, mixing different soil types, failing to note depth, contaminating samples, and making large corrective actions without lab confirmation. What mistakes to avoid include: What mistakes to avoid: do not sample next to compost piles, manure piles, or fence lines; What mistakes to avoid: avoid sampling after recent fertilizer spills or heavy rainfall that may skew soluble nutrient readings; What mistakes to avoid: do not assume soil biology will respond quickly to a single amendment—track changes over multiple seasons; What mistakes to avoid: consult extension or lab advisors when interpreting unusual numbers to avoid miscalculated lime or fertilizer doses (Cooperative Extension guidance).
What management practices should follow soil testing?
What management to follow: prioritize pH correction, optimize fertilizer based on test categories, build organic matter with cover crops and compost, use crop rotation, and monitor impacts over time. What management to follow includes low-input strategies: What management to follow: adopt adaptive crop rotations to reduce disease and balance nutrient removal (adaptive low-input rotation plans); What management to follow: incorporate cover crops (legumes for N, grasses for biomass) to build organic matter; What management to follow: apply lime at the rate the lab recommends and split large applications when soil buffer indicates slower change. What management to follow links soil testing to practical, regenerative steps that improve long-term farm resilience (USDA and university extension resources).
What records and metrics should beginners track?
What to track: baseline soil test reports, sampling dates and locations, amendment rates and dates, crop yields, and visual soil health indicators. What to track matters because long-term data reveals trends: What to track: keep scanned PDFs of lab reports, spreadsheet logs of sample IDs, and geotagged photos of sampling locations. What to track: record yield and quality metrics alongside soil data to measure return on soil improvement investments and to prepare for potential carbon or ecosystem service programs.
What are quick next steps to start DIY soil testing this season?
What next steps: map your fields into zones, buy or borrow a soil probe and pH/EC pen, collect baseline composite samples, run a few pocket-field tests, and send one full composite per zone to a cooperative extension lab. What next steps to do this season: 1) What next steps: allocate time for sampling in the dormant window; 2) What next steps: order a standard lab soil test and, if interested in biology, add a soil health package; 3) What next steps: use field tests to refine in-season decisions and track progress over the year. What next steps create a low-cost, practical monitoring program that pays back through better fertilizer use and healthier crops.
For beginners, consistent, simple sampling paired with targeted lab tests and ongoing field checks provides the fastest route to creating a soil-informed management plan. Combine test results with rotation planning, cover cropping, and microbe-enhancing practices to get the best results; consider resources on designing microbial inoculants and adaptive rotations to close the loop between testing and regenerative action (on-farm microbial consortia, adaptive rotation plans).
Quick reference: pocket-field sampling protocol
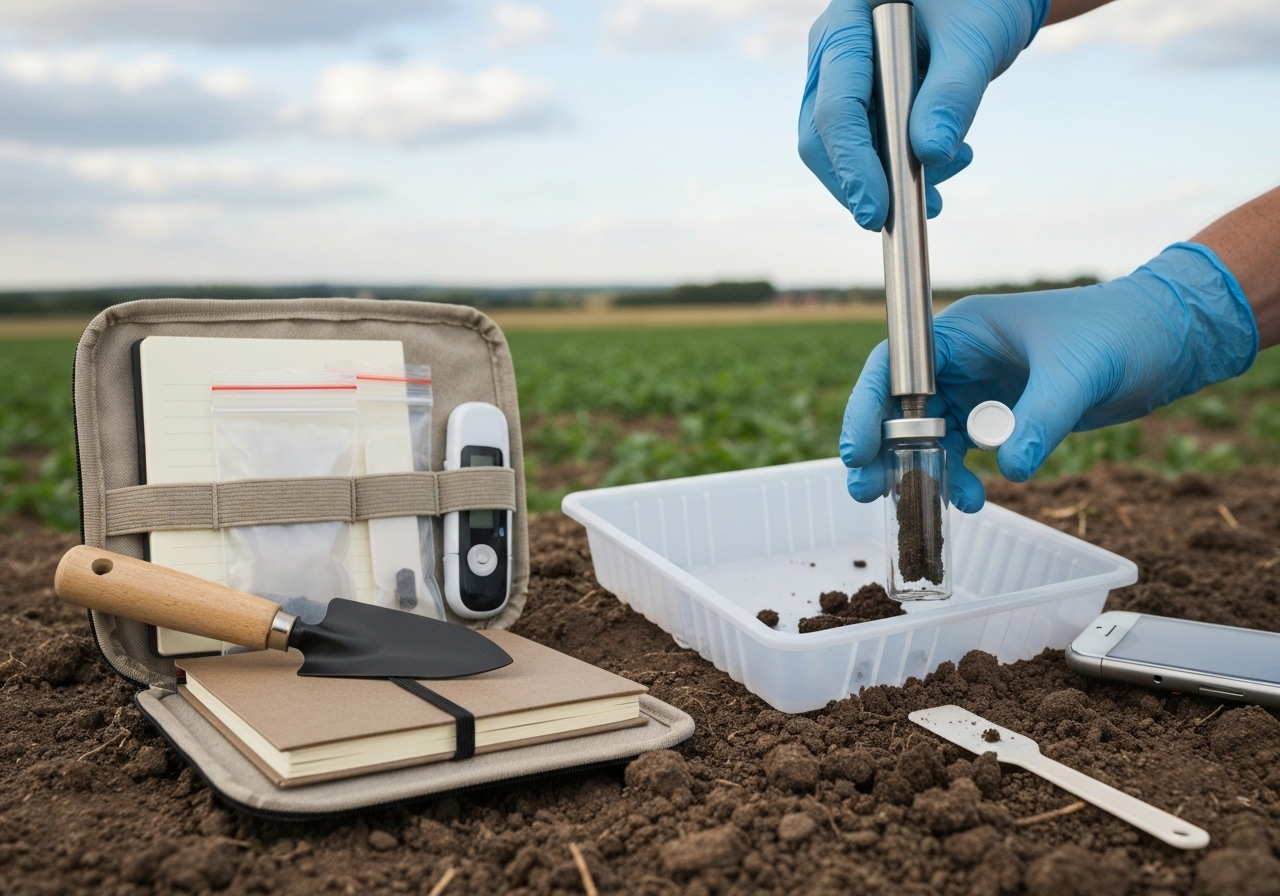
- Define uniform zones by soil type and management.
- Collect 10–20 cores per zone at consistent depth (–6 or –8 in).
- Mix cores in a clean bucket and place mixed subsample in labeled bag.
- Run pH and EC or nitrate strips in the field for immediate decisions.
- Send composite sample to extension lab for full analysis.
- Record results and plan amendments based on lab targets and CEC.
Resources and recommended references
Resources include USDA NRCS soil testing guidance, local Cooperative Extension soil testing labs (state university extensions), and soil health toolkits from reputable university programs. Use extension lab reports for interpretation and contact extension agronomists for site-specific advice.
Begin your DIY farm soil testing program with small, repeatable steps: sample smartly, run a few pocket tests, and use a trusted lab for baseline chemistry. Monitor change, adopt regenerative practices, and integrate results into crop maps and rotation plans to improve productivity and soil health year after year.
Solar-Scalding and Nurse Crops: No-Chemical Weed System
Solar-Scalding and Nurse Crops: No-Chemical Weed System
Use solar-scalding, nurse crops, mulches, and targeted mechanical strategies to control weeds without herbicides. Learn step-by-step field methods, timing, tool selection, and how to integrate these tactics with crop rotations and soil biology to suppress weeds while building soil health.
What is solar scalding and how does it suppress weeds?

Solar scalding is the practice of using clear plastic tarps to heat the soil to temperatures that kill weed seedlings, weed seed near the surface, and soil-borne weed propagules.
Place clear plastic over moist, weed-free soil to raise soil temperatures to 45-70 degrees Celsius at the surface for several days. Research from university extension programs shows that transparent tarps transmit sunlight and trap heat more effectively than black tarps for weed seed mortality (University of California Agriculture and Natural Resources; USDA studies).
When should you solar scald?
Use solar scalding during the hottest part of the year. Schedule tarping for 4-8 weeks in midsummer where peak sunlight and air temperatures are highest.
Pre-irrigate soil 1-3 days before laying plastic. Moisture conducts heat downward and improves seed mortality rates.
How to set up solar scalding step by step
Prepare soil by removing large debris and major weed flushes. Rake smooth and firm soil slightly to reduce air pockets.
Lay clear polyethylene plastic 1-2 mil thick and seal edges with soil, rocks, or landscape staples. Ensure the sheet is taut to maximize heat transmission.
Punch a few tiny holes only when drainage or gas exchange is necessary; fewer holes increase heat retention and efficacy.
What results to expect from solar scalding
Expect near-complete control of small-seeded annual weeds in the upper 2-5 cm of soil after 4-8 weeks of effective solarization in hot climates. Perennial root fragments may survive deeper than thermal penetration; combine scalding with follow-up tactics for perennials.
What are nurse crops and how do they reduce weeds?
Nurse crops are temporary, quickly establishing companion plants sown to outcompete weeds, protect seedlings, and provide biomass for mulch or green manure.
Choose nurse crops with rapid germination and dense canopy traits. Examples include oats, buckwheat, millet, and rye depending on climate and cropping plan.
When to use nurse crops
Sow nurse crops in new beds, after solar scalding, or during fallow windows to prevent weed establishment. Terminate nurses before they set seed to avoid becoming volunteers.
How nurse crops work to suppress weeds
Nurse crops suppress weeds by shading, rooting density, and rapid nutrient uptake that deprives weeds. Certain species like buckwheat suppress weeds via canopy closure within 4-6 weeks.
Cut or roll nurse crops at flowering to create a mulch layer on the soil, killing the nurse while leaving weed-suppressive residue.
Which non-chemical tactics should you combine for a robust system?
Combine solar scalding, nurse crops, stale seedbed preparation, mulching, targeted mechanical tools, and crop rotation to reduce weed pressure and seedbank over time.
Why combine tactics?
Combine tactics because no single method eliminates all weeds. Integrated approaches reduce selection pressure and manage different weed life histories: small-seeded annuals, larger-seeded annuals, and perennials.
Stale seedbed technique

Prepare a fine, firm seedbed and allow a weed flush to emerge. Kill the flush with shallow cultivation, flame weeding, or solar scalding before planting the cash crop.
Plant crop immediately after final weed kill to prevent re-infestation.
Organic mulches and living mulches
Apply 5-15 cm of straw, wood chips, leaf mulch, or composted yard waste to block light and prevent germination. Use nitrogen-rich mulch sparingly on young transplants to avoid nitrogen tie-up.
Plant living mulches (clover, vetch) between rows to occupy niche space and suppress weeds while providing nitrogen and cover.
Targeted mechanical and thermal tools
Use wheel hoes, flame weeders, tine weeders, and finger weeders for precise control in rows. Use shallow cultivation to cut weed roots and prevent seed burial.
Use flame weeding for small-seeded annuals shortly after emergence; apply when seedlings are at the cotyledon to one-leaf stage for best kill rates and lower fuel use (Rodale Institute and multiple extension trials).
How to design a seasonal calendar for non-chemical weed control?
Design a seasonal weed calendar by mapping microclimates, expected weed flushes, and crop windows. Adjust tactics for each season to align with weed biology.
Use crop-specific timing: solar scald during high-sun months; cover crops in fallow seasons; stale seedbeds immediately before planting crops with narrow planting windows.
Plan rotations and cover crop sequences based on microclimate and field history. For help linking crop timing to microclimate, consult diversified small-farm crop maps by microclimates to align weed control actions with local conditions.
Monthly action checklist
- Spring: Prepare stale seedbed; solar scald late springs in hot regions; sow early nurse crops.
- Summer: Implement solar scalding peak months; terminate nurse crops; mulch transplanted beds.
- Fall: Plant winter cover crops (rye, vetch); manage perennials with mowing or grazing.
- Winter: Plan rotations and soil biology interventions; avoid deep tillage that brings new weed seed to the surface.
How should you select nurse crops and cover crops for weed suppression?
Select nurse and cover crops by canopy speed, root architecture, allelopathy, and biomass production. Use mixes to capture complementary traits.
High-performing species
- Rye: High biomass, winter-hardy, suppresses many weeds and produces allelopathic compounds.
- Buckwheat: Fast canopy closure in 4-6 weeks, excellent summer smothering crop.
- Oats: Quick spring growth, good for early-season suppression and easy termination.
- Millet and sorghum-sudangrass: Deep roots, high summer biomass, good for organic no-till mulch.
Plant cover crop mixtures with legumes (clover, vetch) to add nitrogen and grasses for biomass. Terminate mixtures by cutting, rolling, or mowing to create a mulch that reduces weed emergence.
How to integrate soil biology and microbial practices with weed control?
Integrate soil biology by minimizing soil disturbance, using cover crops, and inoculating beneficial microbes to support competitive cash crops and healthy root systems.
Design on-farm microbial consortia to improve nutrient cycling and plant vigor. Healthier crops shade soil and outcompete weeds more effectively. Consult research on microbial consortia for guidance on compatible inoculants and seeding rates in your region (guidance on designing on-farm microbial consortia).
Practical soil biology actions
- Reduce inversion tillage to preserve fungal networks and reduce weed seed burial.
- Use cover crop residues to feed microbes and create physical barriers to weed emergence.
- Time organic amendments to favor cash crop establishment rather than promoting weed growth.
How should you manage perennial weeds without chemicals?
Manage perennial weeds by depleting root carbohydrate reserves across seasons, combining mechanical, cultural, and biological tactics.
Seasonal depletion strategy
Year 1: Solar scald or deep cultivation to damage shoots, then plant a competitive nurse or cover crop.
Year 2: Repeat termination and maintain living mulch or dense crop stands. Consider competitive perennials such as timothy or clover for pasture situations.
Targeted tools for perennials
- Repeated mowing or grazing to prevent photosynthesis and weaken roots.
- Shallow rotary cultivation timed to cut regrowth before roots replenish energy.
- Solar scalding on exposed patches during hottest months to heat surface roots; follow with planting of competitive cover crops.
How do crop rotation and field design limit weed pressure?
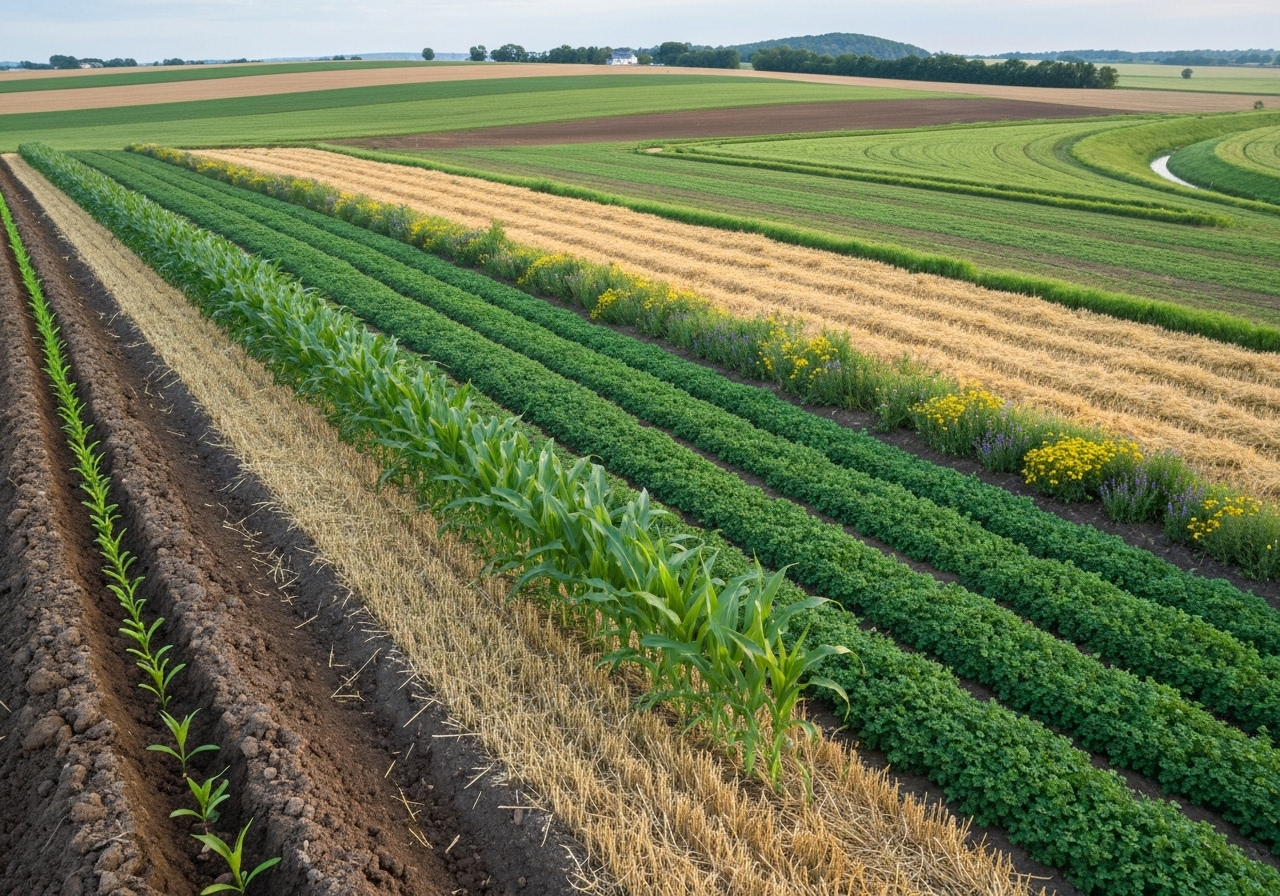
Use diverse rotations to interrupt weed life cycles. Rotate between broadleaf and grass crops, include high-density smothering cover crops, and avoid repeating the same planting dates and row spacings.
Design fields in strips or patches to concentrate interventions and reduce the spread of weed seed. For rotation templates and practical sequences for small farms, refer to adaptive rotation planning resources such as adaptive low-input rotation plans.
Rotation strategies that reduce weeds
- Alternate shallow-rooted and deep-rooted crops to disrupt perennial weed normals.
- Follow cash crops with a smothering cover crop for 6-12 weeks during the fallow window.
- Use allelopathic cover crops (rye, sorghum-sudangrass) strategically to suppress specific weed species.
Which mechanical tools are most efficient in no-chemical systems?
Choose tools for precision, low fuel use, and minimal soil disturbance. Prioritize wheel hoes, row cultivators, tine weeders, and flame weeders based on crop spacing and weed stage.
Tool use guidelines
- Wheel hoes: Use for early-season inter-row and intra-row weeding where transplants are spaced.
- Tine weeders: Use in cereals and some broadleaf crops to remove small seedlings right after emergence.
- Finger weeders: Use for delicate transplants to remove small weeds near stems.
- Flame weeders: Use for contact thermal control of small seedlings; operate when targets are at cotyledon to one-leaf stage for best results.
How to measure success and track weed seedbank changes?
Measure success by tracking weed counts per square meter, recording seedling emergence after interventions, and monitoring crop yields. Use seedbank assays from soil cores to estimate long-term changes.
Collect 10-20 soil cores per field to 5 cm depth and germinate samples in trays under standardized greenhouse conditions to estimate viable seed density. Repeat annually to quantify trends.
What are common mistakes and how to avoid them?
Common mistakes include relying on a single tactic, failing to follow up on survivors, burying seed with deep tillage, and using poorly timed interventions.
Avoid mistakes by sequencing tactics: solar scalding or stale seedbed, then nurse crops or direct seeding, then mulches and mechanical weeding. Maintain records and adapt annually.
Which case examples show success without herbicides?
Case 1: A market garden applied midsummer solar scalding for 6 weeks, followed by buckwheat nurse crop and straw mulch. Annual weed emergence dropped by 80% the following season (Extension trials, multiple small-farm case studies).
Case 2: A small grain farmer used rye cover crops, reduced tillage, and tine weeding. Blackgrass and other annuals declined after three rotations, while soil organic matter increased (university and farmer-led research programs).
How to customize a no-chemical plan for small plots or urban farms?
Customize using space-efficient tactics: container mulches, potted nurse plants, solar scalding on beds with clear sheeting, and hand-tools for precision. Use microclimate mapping to place sensitive crops in cooler pockets and high-light crops where solar scalding is feasible.
Apply microclimate data to plan timing and crop placement; see practical microclimate mapping methods for small plots in the microclimate resources available on farm mapping (microclimate crop maps and related guides).
What monitoring and adaptive steps should you plan each year?
Record weed species, density, interventions used, and crop outcomes. Adjust species selection, timing, and termination methods based on observed responses.
Implement small trials: test one bed with solar scalding and another with a different method. Compare weed reductions and crop yields to refine approaches.
Summary of best-practice checklist
- Map fields and microclimates; choose seasonal windows for interventions.
- Use solar scalding in hottest months with clear plastic and moist soil.
- Sow fast-establishing nurse crops and terminate before seed set.
- Apply mulches and living mulches to cover exposed soil.
- Use targeted mechanical and thermal tools at critical weed stages.
- Design diverse rotations that interrupt weed life cycles.
- Support soil biology with reduced tillage and microbial consortia strategies (soil microbial consortia guidance).
- Monitor weed seedbanks and adapt annually.
What are the costs and labor considerations?
Estimate equipment and material costs: plastic sheeting (low cost per m2), wheel hoes and push seeders (one-time purchases), mulches (variable), and fuel for flame weeders (operational cost). Labor is front-loaded for tarping and mulch application; follow-up weeding remains necessary but reduced over time.
Balance costs by scaling tactics: use small-area solarization for high-value beds and cover crops for larger acreage.
Where to find further technical resources and extension support?
Consult local extension services for climate-specific solarization data and cover crop recommendations. Review university extension publications for flame weeding calibration and tine weeder settings. Use farmer networks and demonstration trials for regionally adapted tactics.
Adopt an iterative approach: test, measure, adapt. Use the integrated tactics described here to develop a resilient, no-chemical weed system that builds soil health and reduces long-term labor and input costs.
Top Green Manure Crops for Small Farms and Microplots
Top Green Manure Crops for Small Farms and Microplots
Green manure crops are short- to medium-term plantings grown primarily to build soil fertility, add organic matter, suppress weeds, and improve soil structure on small farms and microplots. This guide identifies the most effective green manure species and mixes for small-scale growers, gives seeding rates and timing tailored to microplots, explains establishment and termination methods, and links practical management to rotation and soil biology strategies for resilient, low‑input farms.
What are green manure crops and why should small farms use them?
Green manure crops are cover crops grown to be incorporated or terminated to enrich soil rather than harvested for food.
Green manure crops deliver six direct benefits useful to small farms and microplots:
- Fix atmospheric nitrogen (legumes) and increase nutrient availability.
- Build organic matter and improve soil structure and water infiltration.
- Suppress weeds and reduce erosion by rapid canopy closure.
- Break pest and disease cycles when used in rotation.
- Support soil biology and microbial diversity that increase nutrient cycling (see research from NRCS and university extensions for regional evidence).
- Provide floral resources for pollinators and beneficial insects when flowering species are used.
Which green manure crops are best for small farms and microplots?
Here are the top green manure crops and why each fits micro-scale systems.
Hairy vetch (Vicia villosa)
Hairy vetch is a winter-hardy legume that fixes notable nitrogen and produces dense biomass; it is a go-to winter cover for small farms.
- Seeding rate: 20-30 lb/acre (.5-.7 lb per 1,000 sq ft).
- Planting window: late summer to early fall for overwintering; can be interseeded with cereal rye.
- Benefits: fixes N, reduces erosion, smothers weeds in spring; pairs well with cereal rye to improve cover persistence.
- Notes: termination can be harder if allowed to set seed; crimping/mowing at flowering is effective.
Cereal rye (Secale cereale)
Cereal rye is a versatile winter cereal used for biomass, weed suppression, and erosion control on small plots.
- Seeding rate: 60-90 lb/acre (1.4-2. lb per 1,000 sq ft).
- Planting window: late summer to late fall for best winter growth.
- Benefits: extensive root system, effective weed suppression, scavenges nutrients, adds carbon to soil.
- Notes: mixes well with legumes to supply both carbon and nitrogen; roller-crimp works at anthesis.
Sunn hemp (Crotalaria juncea)
Sunn hemp is a fast-growing warm-season legume that produces large biomass and significant nitrogen in 8-12 weeks.
- Seeding rate: 30-60 lb/acre (.7-1.4 lb per 1,000 sq ft).
- Planting window: late spring to early summer for warm-season growth.
- Benefits: quick N contribution, deep rooting, nematode suppression in some soils, excellent for fallow replacement.
- Notes: does not tolerate frost; ideal for long warm seasons or summer windows.
Cowpea (Vigna unguiculata)
Cowpea is a drought-tolerant warm-season legume suitable for short rotations on microplots.
- Seeding rate: 30-40 lb/acre (.7-1. lb per 1,000 sq ft).
- Planting window: late spring through summer; tolerates heat and low moisture.
- Benefits: fixes nitrogen, suppresses weeds, useful where sunn hemp is not established.
- Notes: good under low-input irrigation regimes.
Buckwheat (Fagopyrum esculentum)
Buckwheat is a rapid, short‑duration broadleaf used for quick biomass, weed smothering, and phosphorus mobilization.
- Seeding rate: 40-60 lb/acre (1.-1.4 lb per 1,000 sq ft).
- Planting window: spring to late summer for 6–10 week covers.
- Benefits: fast canopy closure, great for smothering annual weeds and attracting pollinators.
- Notes: winter-kills in cool climates — useful for short-term fertility boosts without mechanical termination.
Sorghum-sudangrass (Sorghum bicolor x S. sudanense)
Sorghum-sudangrass is a warm-season grass that builds bulk organic matter and develops deep roots, helpful on degraded microplots.
- Seeding rate: 30-40 lb/acre (.7-1. lb per 1,000 sq ft).
- Planting window: late spring to early summer under warm conditions.
- Benefits: suppresses nematodes, produces high biomass, improves soil structure with deep roots.
- Notes: mow before seedhead to prevent reseeding; residue breaks down slower than legumes.
Crimson clover and red clover (Trifolium spp.)
Clovers are adaptable legumes for spring and fall plantings providing steady N and floral resources for beneficial insects.
- Seeding rate: crimson 8-10 lb/acre (.2 lb per 1,000 sq ft); red clover 8-12 lb/acre.
- Planting window: crimson for fall/winter in mild climates; red clover for spring or longer-term stands.
- Benefits: stable N contribution, good companion to small grain cereals, supports pollinators.
Phacelia and buckwheat mixes for pollinators
Phacelia and buckwheat flower quickly and provide nectar for bees while covering soil fast.
- Seeding rate: phacelia 4-8 lb/acre combined with buckwheat 40 lb/acre for quick flowering.
- Benefits: excellent pollinator support and short-term weed suppression.
Mustard and brassicas (biofumigant covers)
Mustard species can suppress soil-borne pests and act as biofumigants when incorporated at flowering.
- Seeding rate: 4-8 lb/acre for oilseed radish or mustards.
- Benefits: nematode suppression potential, quick growth, can be used ahead of brassica cash crops with attention to allelopathy timing.
How do seeding rates and row arrangements change for microplots?
Scale seeding rates down geometrically and adapt spacing for hand tools and small seeders.
For microplots use these conversions as starting points:
- Per 100 sq ft: multiply lb/acre rate by .0023 (for example 50 lb/acre => .115 lb ~ 1.8 oz per 100 sq ft).
- Broadcast thinly and rake for small plots, or use a hand-driven seeder for more uniform stands.
- Plant shallower for small seeded species (1/8″–1/4″) and deeper for larger seeds (1/2″–1″).
How should small farmers choose the right green manure for their goals?
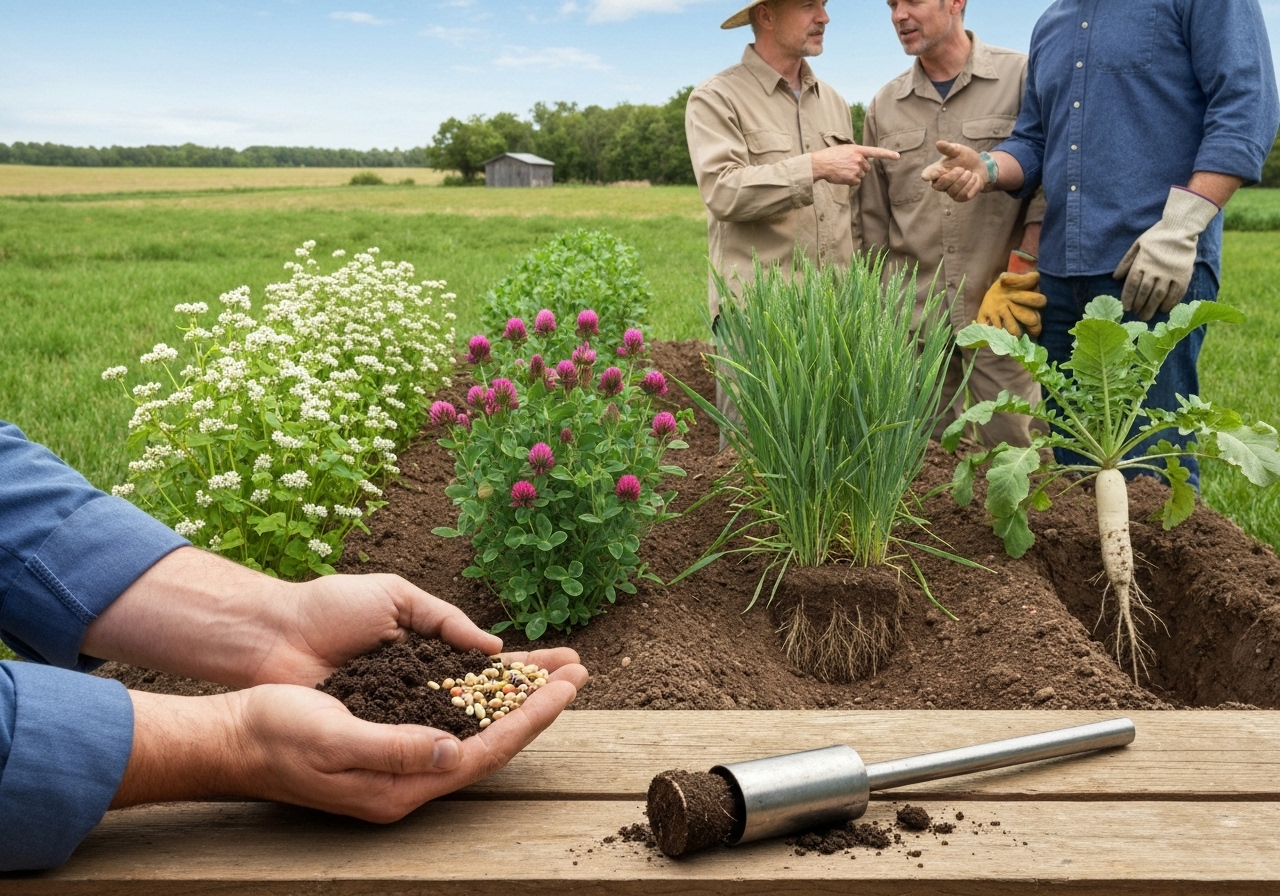
Choose based on your primary goal: nitrogen, biomass, weed control, soil structure, or pollinator habitat.
Use this decision checklist:
- If nitrogen is priority, choose legumes (hairy vetch, sunn hemp, clovers).
- If quick weed suppression is needed, choose buckwheat or cereal rye for fast canopy closure.
- If soil rebuilding and deep-rooted structure is required, choose sorghum-sudangrass or sunn hemp.
- If nematode suppression is a problem, consider mustard or sunn hemp.
- If you need winter cover, choose winter-hardy species like cereal rye and hairy vetch.
- Consider microclimate and frost dates; use a local crop map or calendar to refine timing (diversified small-farm crop maps).
How to establish green manures on small plots?
Establish green manures by matching seedbed preparation, sowing depth, and inoculation to the crop.
- Prepare a firm, weed-free seedbed or broadcast into standing crop residues; light till or rake for small plots to ensure seed-soil contact.
- Inoculate legumes with the correct Rhizobium strain before seeding; follow label directions. For small farms, mix inoculant on-seed or use commercially coated seed. See guidance on microbial consortia when designing inoculant blends (on-farm microbial consortia).
- Sow at recommended depth and rate; firm the soil to ensure contact and consistent emergence.
- Manage moisture — irrigate newly sown microplots if in a dry window; many warm-season covers are drought tolerant after establishment.
When and how should small-scale growers terminate green manures?
Terminate at peak biomass or at the start of flowering to maximize benefits and ease incorporation.
Termination options for small farms:
- Rolling/crimping followed by direct seeding of no-till beds where feasible.
- Mowing or flail mowing then incorporating residues with shallow tillage or hand tools.
- Allow winter-kill in climates with reliable frost to avoid mechanical termination.
- Use undercutting or cut-and-leave techniques to retain mulch on the surface.
Wait times after incorporation depend on residue C:N ratio: low C:N legumes often allow planting within 2–3 weeks for transplants; high C grasses may need 4–6 weeks to mineralize enough nitrogen for sensitive seedlings. University extension guides and NRCS publications provide region-specific wait times.
Which green manure mixes work best in small-scale rotations?
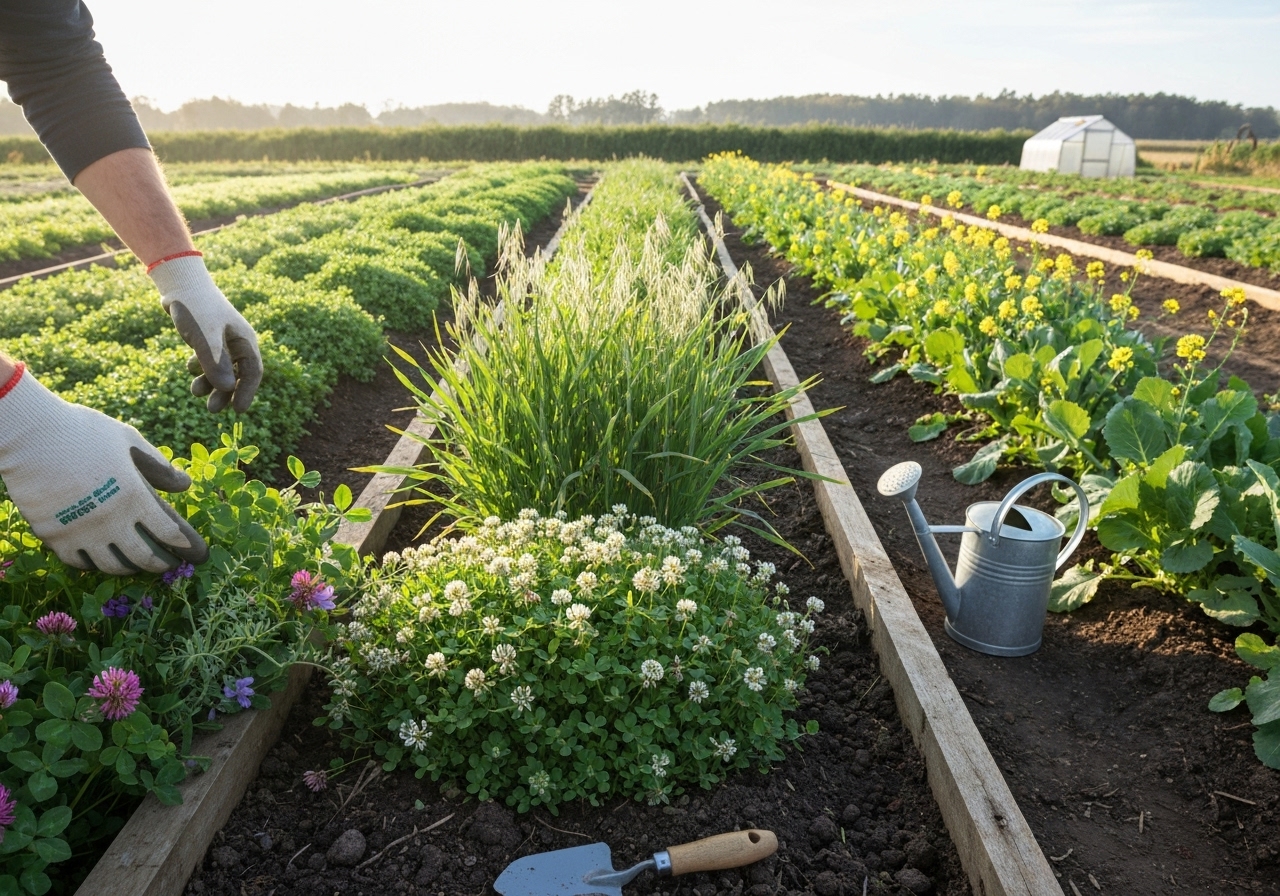
Use mixes tailored to season and rotation needs.
Recommended microplot mixes with seed rates per 1,000 sq ft:
- Winter N-builder: cereal rye 1. lb + hairy vetch .25 lb — long winter cover that supplies N in spring.
- Quick summer biomass: buckwheat 1.2 lb + cowpea .8 lb — 6–10 week summer cover that suppresses weeds and flowers for pollinators.
- Deep organic matter: sorghum-sudangrass .9 lb + sunn hemp .6 lb — heat-season bulk for rebuilding compacted plots.
- Biofumigant/preceding brassicas: oilseed radish .1 lb + mustard .05 lb + buckwheat 1. lb — rotation before sensitive vegetables, manage allelopathy timing.
- Pollinator corridor: phacelia .1 lb + crimson clover .05 lb — short-term flowering strips between beds.
How can small farms integrate green manures into adaptive low-input rotations?
Integrate green manures as fallow replacements, in-row intercrops, or between cash crop cycles to maintain continuous living roots and soil cover.
Plan rotations with these rules:
- Insert a green manure after heavy-feeding crops (e.g., brassicas, solanums) to rebuild nitrogen and organic matter.
- Use a short, fast cover (buckwheat) between quick vegetable crops to reduce weed pressure.
- Alternate legumes and deep-rooting grasses to balance N and carbon inputs and avoid species-specific pests.
- Follow adaptive rotation templates and tailor to seasonal conditions (adaptive low-input rotation plans).
What management tips maximize green manure benefits on microplots?
Manage timing, seed placement, inoculation, and termination to convert green manure into measurable soil improvements.
- Inoculate legumes and consider microbial seed coatings in saline or marginal soils to improve establishment.
- Match sowing date to growth window — late sowings reduce biomass and benefits.
- Use mowing or crimping to terminate while retaining mulch that conserves moisture and suppresses weeds.
- Rotate termination methods to reduce compaction and pathogen carryover from repeated tillage.
- Measure changes in soil organic matter and bulk density annually to document improvements and support regenerative outcomes.
Can green manures help small farms access soil carbon credits or other revenue streams?

Yes, incorporating green manures increases soil carbon and ecosystem services, which can support participation in carbon programs and conservation incentives when documented properly.
Documented practices, including continuous cover and legume-based rotations, are frequently recognized by conservation programs and credit systems; for program specifics consult local NRCS or soil carbon program providers. Articles on soil carbon markets for small farms provide pathways to quantify and monetize these benefits (small farm soil carbon credits).
What are common troubleshooting issues and how to avoid them?
Address establishment failures, weed competition, pest attraction, and allelopathy proactively.
- Poor establishment: improve seed-soil contact, check planting depth, and ensure moisture at sowing.
- Weeds: choose fast-closing species like buckwheat or rye in high-weed-pressure plots; manage seedbanks over multiple seasons.
- Pests and diseases: use diverse mixes and rotate families; avoid repeated brassica covers when brassica cash crops follow immediately.
- Residue allelopathy: allow 2–3 weeks after incorporation of brassicas or juglone-producing plants before planting sensitive crops; test on a small bed first.
What quick-reference green manure plan should a small farmer use this season?
Use a three-step microplot plan: plan, plant, and terminate.
- Plan: pick species based on season and rotation goal; consult microclimate maps and frost dates to set sowing dates.
- Plant: prepare seedbed, inoculate legumes, sow at microplot rates, and water if needed for establishment.
- Terminate: cut or crimp at flowering or peak biomass; incorporate or leave as mulch and time cash crop planting based on residue C:N.
For scheduling by microclimate and bed mapping, use diversified crop calendars tailored to small-farm maps and zones (diversified small-farm calendar).
Frequently asked questions (short answers)
Do legumes always add usable nitrogen?
Legumes fix nitrogen but the crop that follows receives N only after decomposition; timing of termination and C:N ratio determine release speed.
Can I use green manures in raised beds and containers?
Yes; use smaller seed rates, shallow-rooted species like clovers or buckwheat, and incorporate or cut as mulch to avoid root-bound residues.
Are green manures compatible with no-till or reduced-till systems?
Yes; roller-crimping and cut-and-leave methods allow no-till cash crop planting into terminated green manures where equipment and timing allow.
How long before I see measurable soil improvements?
Soil biology and infiltration can improve within one season; measurable organic matter increases typically require 3–5 years of consistent cover cropping and reduced disturbance (as documented by extension studies and NRCS guidance).
Where to learn more and next practical steps?
Read regional extension publications and NRCS cover crop guides for local seeding rates and termination windows. Integrate green manures with microbial management and seed coating strategies to improve establishment and resilience; see resources on designing microbial consortia for on-farm soil enrichment and consider linking green manure plans to low-input rotations for resilient yields.
Start small: test one species or mix on a single bed this season, track biomass and cover persistence, and adapt seed rates and timing the next season. Combining green manures with careful rotation planning and microbial management creates durable soil improvements on small farms and microplots.
References and resources
Guidance and data referenced throughout this article are based on NRCS and university extension cover crop guides, Rodale Institute studies on cover cropping, and multiple extension publications on green manures and small-scale rotations.
Microbial Tea: Reviving Depleted Soil With Ferments
Microbial Tea: Reviving Depleted Soil With Ferments
Microbial tea provides a low-cost, scalable way to restore depleted soil by reintroducing beneficial microbes, soluble nutrients, and labile carbon. This article explains what microbial teas are, how they work, step-by-step recipes for aerobic and anaerobic ferments, safe brewing and application methods, tests to track progress, and how to integrate teas into broader regenerative practices on small farms and gardens.
What is microbial tea and why use ferments to restore soil?
Microbial tea is a liquid extract of organic matter and microbial populations used as a soil drench or foliar spray to increase biological activity. Farmers brew tea by fermenting compost, plant materials, or microbial starters in water with a carbon source to multiply beneficial bacteria, fungi, protozoa, and other microbiota that drive nutrient cycling.
Use microbial teas to: 1) jump-start microbial communities in depleted soils; 2) provide readily available signaling compounds and enzymes; 3) supply short-term nutrient boosts; and 4) suppress soil-borne pathogens through competitive colonization. Researchers in Soil Biology & Biochemistry and applied-extension literature highlight microbes as the primary drivers of soil health and nutrient availability (Soil Biology & Biochemistry; Teruo Higa’s Effective Microorganisms work).
Which microbes matter in microbial teas?
Beneficial teas typically contain four functional groups: 1) aerobic heterotrophic bacteria that mineralize organic matter; 2) plant-growth-promoting rhizobacteria (PGPR) such as Pseudomonas and Bacillus species; 3) saprophytic and mycorrhizal fungi that mobilize phosphorus and carbon; and 4) protozoa and nematodes that regulate bacterial biomass and release mineralized nutrients. Scientific reviews show that balanced consortia improve nutrient cycling and structure in degraded soils (Soil Biology & Biochemistry; Applied Soil Ecology).
How do microbial teas restore depleted soil biologically?
Microbial teas restore soil through three mechanisms. First, they reintroduce living organisms that break down organic matter and create humus. Second, they bring enzymes and organic acids that dissolve mineral-bound nutrients. Third, they re-establish food-web dynamics—bacteria feed protozoa and nematodes, which release plant-available nitrogen. Studies of microbial inoculants and compost extracts document measurable increases in microbial respiration, aggregate stability, and nutrient mineralization rates in depleted soils (Journal of Environmental Quality; Applied Soil Ecology).
How to make on-farm microbial tea: recipes and step-by-step
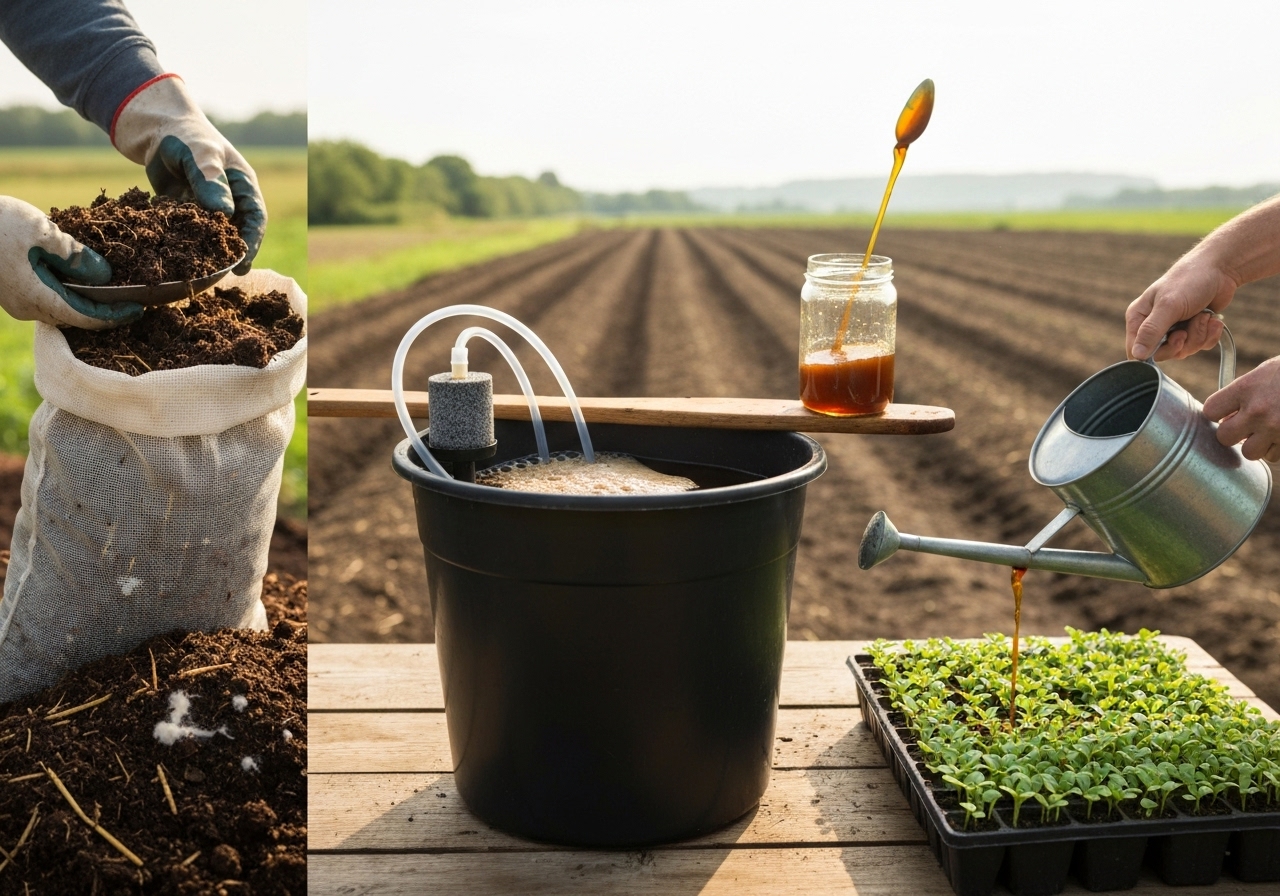
Follow hygiene, measurements, and timing to brew predictable, safe teas. Begin with clean containers and non-chlorinated water. Choose aerobic brewing for pathogen suppression or anaerobic/EM ferments to build specific anaerobic consortia and plant hormones.
Essential materials and equipment
- Container: 20–200 liter food-grade plastic or barrel
- Aerator: aquarium pump with stones for aerobic compost tea
- Mesh bag or fine screen to hold solids
- Non-chlorinated water: rainwater, well water, or dechlorinated municipal water
- Carbon sources: molasses, sugar, or bran (for anaerobic ferments)
- Compost or inoculant: well-matured compost, EM-1, or cultured starter
- Protective gear: gloves, eye protection when handling concentrates
Recipe 1: Aerated Compost Tea (ACT)
Use ACT to multiply aerobic bacteria and beneficial fungi while minimizing pathogens. ACT is best for foliar sprays and soil drenches in vegetable and orchard systems.
Ingredients and volumes for 100 liters of tea:
- 30 liters high-quality, fully cured compost (low soluble salts)
- 100 liters non-chlorinated water
- 100–200 grams kelp meal or 100 ml liquid seaweed concentrate
- 100–200 ml fish hydrolysate or amino-acid-based feed (optional)
- Aeration system running continuously
Procedure:
- Put compost into a porous mesh bag and submerge in the container of water.
- Add kelp and any soluble inputs; start aerator immediately.
- Brew for 12–24 hours; monitor temperature—keep below 25 Celsius to favor beneficial aerobes.
- Stop aeration, let solids settle briefly, then strain and apply the liquid within 2–6 hours.
Application rates: 10–50 liters per hectare for field crops; 5–20 liters per square meter for high-value crops when applied as soil drench. For foliar spray, dilute 1:5 with water. Research indicates short, well-aerated brews deliver consistent beneficial bacterial increases while reducing pathogen risk (Extension publications on compost tea).
Recipe 2: Anaerobic EM-style ferment

Use anaerobic ferments to build lactic acid bacteria, yeast, and fermentation products that can suppress pathogens and provide plant hormones. These ferments require strict anaerobic conditions and are best used in low-dosage soil drenches or seedbed applications.
Ingredients and volumes for 20 liters:
- 1 kg brown rice bran or wheat bran
- 1 liter molasses (blackstrap preferred)
- 100 ml EM starter or 200 ml mature fermented tea
- 20 liters non-chlorinated water
Procedure:
- Dissolve molasses in warm water, mix bran to form a slurry.
- Add EM starter; pour into an airtight bucket or jar leaving minimal headspace.
- Seal and ferment in shade at 20–30 Celsius for 7–14 days until bubble activity decreases.
- Open carefully; strain and dilute 1:20 to 1:100 with water before soil application.
Safety note: Maintain strict anaerobic conditions and avoid applying raw animal manure in anaerobic ferments without pasteurization to prevent pathogen amplification. Teruo Higa’s EM research documents plant-growth benefits when used properly.
Recipe 3: Bokashi and bokashi tea
Use bokashi to ferment kitchen and green wastes into a nutrient-rich, microbially active amendment. Bokashi tea made from leachate can be used as a starter or soil drench.
Procedure for bokashi leachate:
- Bokashi-ferment kitchen waste in a sealed bokashi bucket with bran inoculated with lactic acid bacteria for 2–4 weeks.
- Collect the leachate (dark liquid) every few days; dilute 1:50–1:100 for foliar spray or 1:20 for soil drench.
Use caution: bokashi leachate can be acidic; avoid overuse on sensitive seedlings.
Recipe 4: Worm leachate (vermi-tea)
Use worm leachate to provide microbially-rich, nutrient-dense liquid. Worm tea promotes root development and is effective in potting mixes and vegetable beds.
Procedure:
- Collect leachate from worm bins in clean containers.
- Optionally aerate collected leachate for 12 hours before use to increase aerobic bacterial populations.
- Apply diluted 1:10–1:30 as a soil drench every 2–4 weeks during the growing season.
How and when to apply microbial teas for best results?
Apply microbial teas strategically to maximize colonization and avoid stress to plants. Timing, dilution, and method determine success.
When to apply
Apply as follows: 1) during transplanting to coat roots and encourage colonization; 2) early vegetative growth to boost nutrient cycling; 3) before or after light irrigation or rainfall so microbes enter the rhizosphere; and 4) in rotation with cover crops and organic amendments for cumulative effects. Coordinate tea applications with crop schedules using local microclimate maps and crop calendars to hit sensitive windows—see diversified small-farm crop maps by microclimates for timing guidance.
How to apply
- Soil drench: pour along planting rows or around the drip line; prefer early morning or late afternoon.
- Foliar spray: dilute 1:5 to 1:20; spray in cool, wind-free conditions to avoid leaf burn and improve uptake.
- Seed treatment: soak seeds in diluted tea for 1–12 hours depending on seed size and sensitivity.
- Irrigation injection: inject low concentrations into irrigation for steady delivery; ensure lines are flushed to prevent clogging.
Frequency and rates
Frequency depends on goals and soil condition. For active restoration on severely depleted soils, apply 4–8 times across a growing season. For maintenance, apply 1–3 times per season. Use conservative volumes for concentrated anaerobic ferments; dilute according to recipes above.
Safety, quality control, and testing
Manage risk by controlling inputs, temperatures, oxygen, and brew length. Test teas and soil to measure progress.
How to avoid pathogens and odors
Avoid using fresh manure, untreated sewage, or high-salt amendments in teas. Use cured compost with a stable temperature profile. Keep aerobic brews oxygenated and short (12–36 hours). For anaerobic ferments, use clean containers and established EM starters. If a brew smells rotten like sewage, discard it; a sweet, earthy smell indicates a healthy ferment.
Simple on-farm tests
Perform quick checks: 1) smell test—pleasant earthy or sour for ferment; 2) microscope check—look for bacteria, protozoa, and fungal hyphae if you have equipment; 3) respiration test—place soil in a sealed jar with moistened substrate and measure CO2 with a handheld meter; and 4) standard soil tests for organic matter, pH, nitrate, phosphorus, and microbial biomass provide baseline and progress measurements. Extension services and lab publications provide testing protocols.
Integrating microbial teas into regenerative systems
Combine microbial teas with complementary practices to achieve long-term soil restoration. Teas are a tool, not a silver bullet.
Combine teas with organic amendments and rotations
Apply teas alongside compost, cover crops, and diverse rotations to sustain microbial food webs. Rotate crops to provide a continual supply of root exudates and plant residues. See adaptive low-input crop rotation plans for rotation schedules that pair well with microbial applications.
Use teas to seed designed consortia and map field zones
Design inoculant blends targeted to field zones: high-salt patches need salt-tolerant microbes; compacted areas need cellulolytic and aggregate-forming microbes. For guidance on building tailored microbial mixes and mapping consortia across fields, see research-based design frameworks and the practical guide to designing on-farm microbial consortia.
Link teas to irrigation and carbon management
Coordinate tea application with regenerative micro-irrigation and carbon-building practices. Teas are most effective when soils have available moisture and fresh carbon inputs such as mulches or cover crop residues. Combine with micro-irrigation designs to localize benefits to root zones and reduce off-target loss (see regenerative micro-irrigation approaches in extension literature).
Measuring success: indicators that soil is recovering
Track short- and long-term indicators to confirm that teas are improving soil health.
Short-term indicators (weeks to months)
- Increased soil microbial respiration or CO2 flux
- Richer, darker topsoil with improved moisture retention
- Faster seedling establishment and reduced transplant shock
- Reduced incidence of some root pathogens in treated areas
Long-term indicators (seasons to years)
- Rising soil organic matter percentage
- Improved aggregate stability and reduced compaction
- Higher yield stability and reduced fertilizer needs
- Enhanced native earthworm and arthropod populations
Peer-reviewed meta-analyses and long-term trials indicate that microbiological interventions combined with organic matter inputs and rotational design produce durable improvements in soil function (Agriculture, Ecosystems & Environment; Applied Soil Ecology).
Common questions about microbial teas
Do microbial teas replace compost and organic matter?
No. Microbial teas complement but do not replace bulk organic inputs. Teas supply living organisms and labile compounds that accelerate the benefits of compost, mulches, and cover crops.
Will teas work on saline, compacted, or polluted soils?
It varies. Teas can assist remediation when paired with tolerant plant species, salt-leaching, gypsum applications, and designed microbial consortia. For saline fields, consider seed coatings or consortia proven for salt tolerance (see research on microbial seed coatings for saline fields). For compaction, combine teas with mechanical or biological loosening and deep-rooted cover crops.
Can I make microbial tea at home for a garden?
Yes. Small-scale ACT or worm leachate is easy to brew in buckets. Follow recipes above, avoid raw manures, and apply diluted brews to avoid scorching plants.
Practical on-farm schedule for reviving depleted soil

Follow this template over one season to revitalize a depleted plot:
- Pre-season: Test soil for organic matter, pH, and nutrients.
- Early spring: Apply aerobic compost tea at planting and inoculate seedlings with diluted verimi-tea.
- Mid-season: Use bokashi teas or light anaerobic ferments in patches showing poor vigor; apply cover crops post-harvest.
- End of season: Apply high-carbon mulches and a last ACT application to seed the overwinter microbiome.
- Repeat annually with rotating inoculants and monitoring.
Evidence and references
Evidence supporting microbial tea use comes from extension trials, soil microbiology journals, and practitioner case studies. Key sources include field trials summarized in Agriculture, Ecosystems & Environment and Soil Biology & Biochemistry; EM research by Teruo Higa; and applied-extension guides on compost tea safety. For practitioners, extension publications provide protocols and safety guidance, while peer-reviewed journals document mechanisms and long-term effects.
Final practical checklist before brewing
- Use non-chlorinated water and clean containers
- Source mature compost or verified inoculants
- Choose aerobic or anaerobic method appropriate to risk and objective
- Control temperature and oxygen during brewing
- Test on a small area before wider application
- Record batch details: inputs, time, temperature, smell, and field response
Revive depleted soils by combining microbial teas with organic matter, cover crops, and deliberate rotation. Teas can accelerate biological recovery, improve nutrient cycling, and reduce reliance on synthetic inputs when used as part of a system. Use the recipes, safety checks, and integration strategies above to design an on-farm program that rebuilds soil life and resilience.
Best gravity-fed microdrip systems for small potato farms
Best gravity-fed microdrip systems for small potato farms: This guide explains gravity-fed microdrip design, component selection, pressure and flow calculations, emitter types, installation, maintenance, fertigation options, cost estimates, and crop-specific scheduling for potatoes.
What are gravity-fed microdrip systems and why choose them for small potato farms?
What are gravity-fed microdrip systems? Gravity-fed microdrip systems deliver water by gravity from an elevated reservoir to low-flow emitters along rows.
Why choose them for potatoes? Gravity-fed systems cost less, require no pumps, reduce fuel and electricity needs, and provide gentle, localized soil moisture suited to potato tuber development.
Why potatoes benefit: Potatoes need consistent soil moisture during tuber bulking. Microdrip minimizes surface wetting and limits disease pressure compared with overhead irrigation.
Which small farms are best suited? Farms under 5 hectares with reliable water sources and gentle slopes benefit most.
What are the main components of a gravity-fed microdrip system?
What are the main components? A gravity-fed microdrip system includes an elevated water tank, inlet filter, mainline, pressure regulator or orifice, lateral lines, emitters, fittings, and end caps.
Which tank options work? Use plastic IBC tanks, polyethylene cisterns, or small concrete reservoirs elevated on stands or terraces to provide head.
Which filters are required? Use screen filters (120-200 mesh) and disc filters to protect emitters from sand and biofilm growth.
Which emitters are used? Use low-flow inline drippers, pressure-compensating drippers, or spaghetti tubing with 1-4 L/h emitters depending on required flow.
How much head and pressure does a gravity-fed microdrip system need?
How much head is required? Desired pressure depends on emitter type. Many microdrippers need 10-30 kPa. 1 meter of water head gives about 9.81 kPa.
How to calculate head: Multiply reservoir height in meters by 9.81 to get kPa. For bar, divide kPa by 100.
What reservoir heights are typical? Raise tanks 2-4 meters for 20-40 kPa (.2-.4 bar). Use higher elevation for longer lateral runs.
When to use pressure regulators: Use a simple orifice plate or low-cost regulator when head exceeds emitter optimal range to avoid emitter blowouts.
Which emitter types work best for gravity-fed potato irrigation?
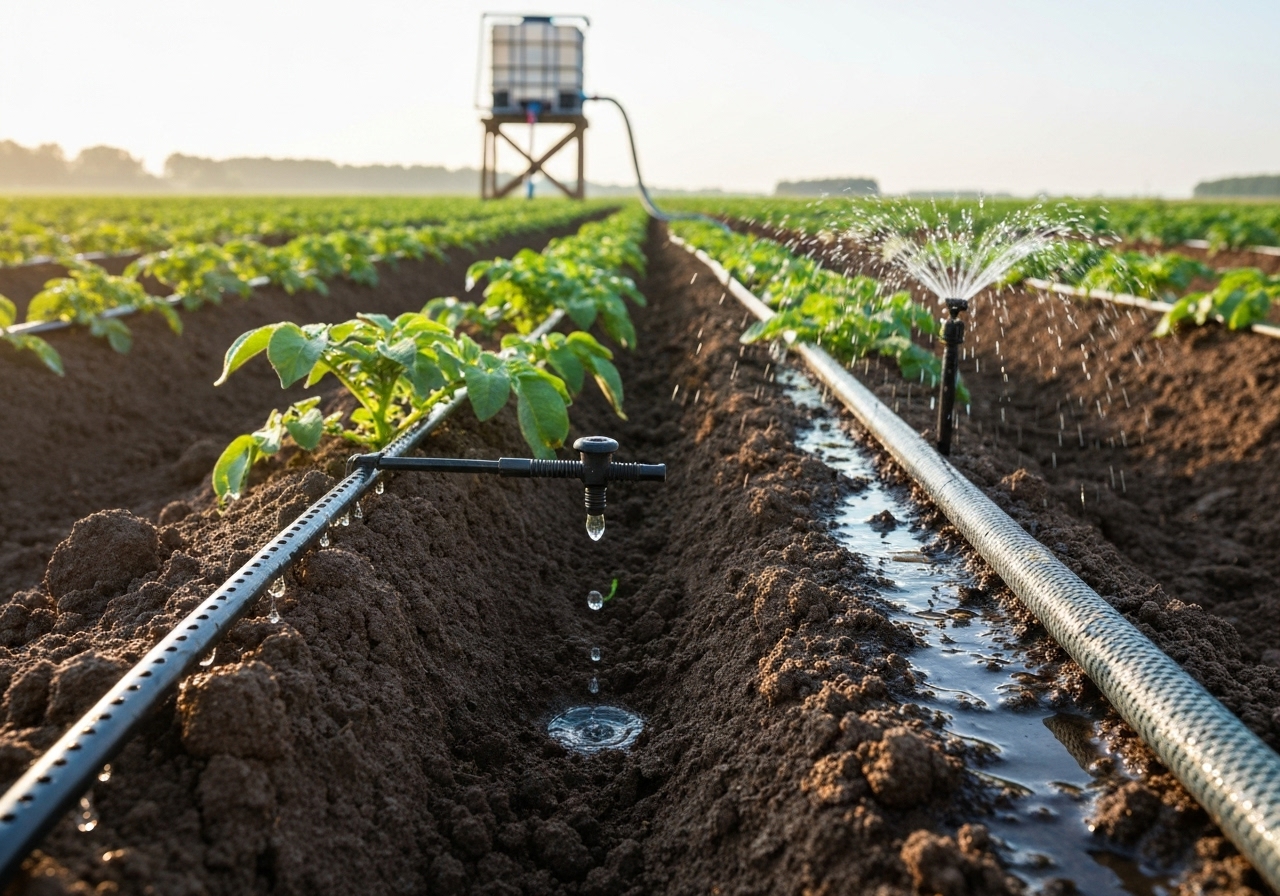
Which emitter types suit gravity systems? Use emitters with low operating pressure like .02-.4 bar. Choose one of these options:
- Inline pressure-compensating drippers at 1-4 L/h per emitter for even flow across slopes.
- Non-compensating inline drippers at 2-8 L/h for very uniform fields and short laterals.
- Spaghetti tubing with point emitters at .5-2 L/h for flexible localized wetting.
- Drip tape with integrated emitters when shallow subsurface wetting is acceptable.
Which emitter to prefer for potatoes? Choose pressure-compensating drippers or spaghetti tubing with small emitters for row spacing and tuber depth control.
How to size lateral lines, flow, and run lengths for a small potato plot?
How to size laterals? Size laterals by target crop application rate, emitter flow, and row length. Calculate total emitters per lateral and desired application depth.
Which steps to follow:
- Define crop water use. Potatoes often need 4-7 mm per day during peak growth (source: FAO and regional irrigation guides).
- Choose emitter flow. Use 2 L/h emitters for moderate flow and uniformity.
- Calculate irrigation duration: Required volume per plant divided by emitter flow gives hours per cycle.
- Limit lateral length to maintain uniformity: 50-100 meters for low-pressure gravity systems depending on pipe diameter and head.
How to estimate peak flow: Multiply emitter flow by number of emitters operating simultaneously on the system.
What filtration and anti-siphon measures are necessary?
What filtration is necessary? Install a primary sediment filter (mesh 120-200) and a secondary disc filter for fine particles and biofilm control.
Why anti-siphon devices are important? Use vacuum breakers or air vents to prevent backflow when using fertiliser tanks or non-potable sources.
How to maintain filters? Backflush or clean filters weekly during irrigation season. Replace filter elements per manufacturer guidance or when flow decreases.
How to layout emitters and schedule irrigation for potatoes?
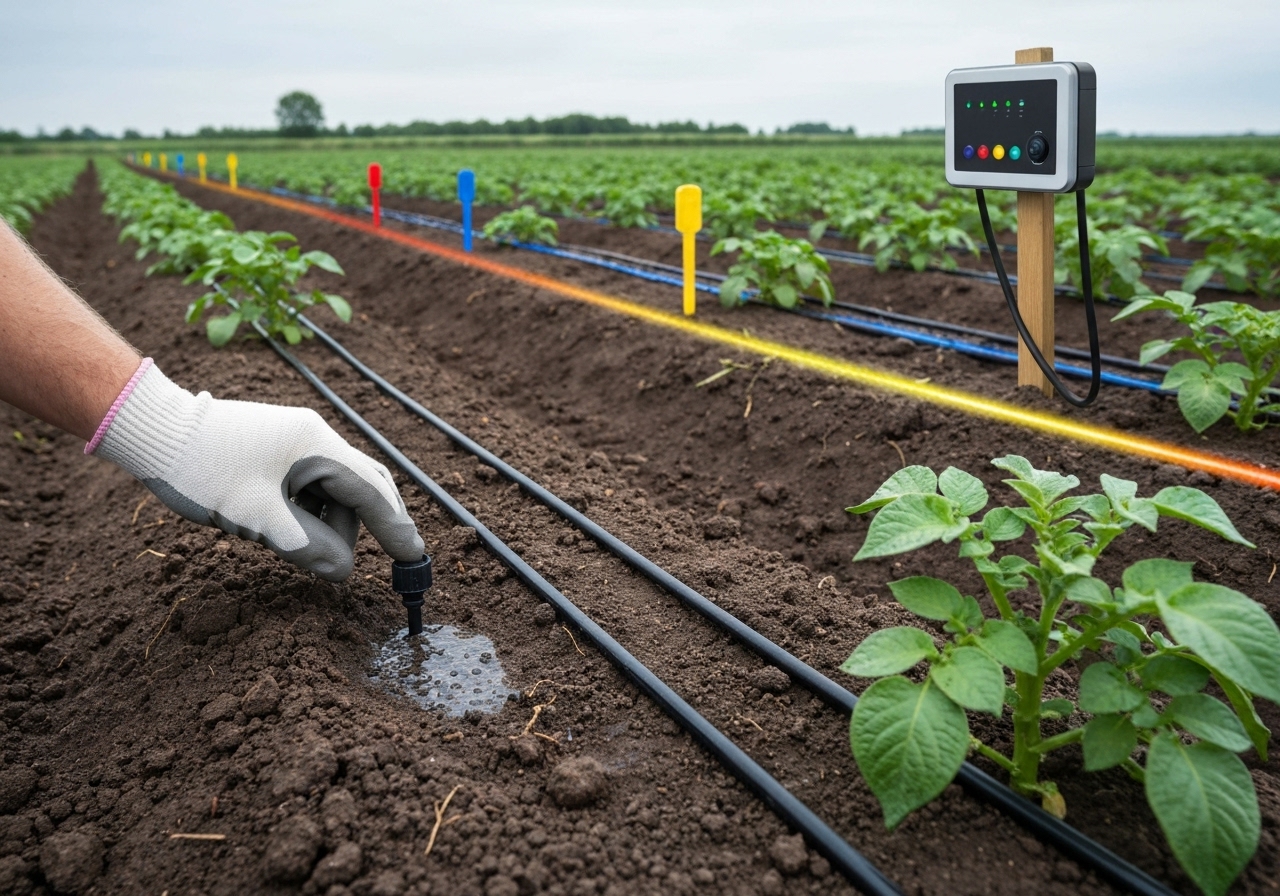
How to layout emitters? Place emitters 10-30 cm from each plant row and 20-30 cm between emitters along rows to concentrate moisture in the root zone.
How to schedule irrigation? Increase frequency and reduce duration during tuber initiation and bulking. Target soil moisture of 60-80 percent of field capacity in the root zone.
Which scheduling tools help? Use tensiometers or low-cost soil moisture probes to trigger irrigation. Consider simple calendars based on degree-days and rainfall.
How to integrate fertigation and microbial inoculants safely?
How to apply fertilizer through gravity-fed systems? Use venturi injectors or proportioners designed for low pressure. Maintain secondary tanks above injectors to prevent contamination.
Which fertilizers work best? Use soluble fertilizers and adjust concentrations to avoid emitter clogging.
How to add microbial consortia? Add microbial seed coatings or soil inoculants through fertigation only after compatibility testing and using inline filters to protect emitters.
What agronomic caution applies? Follow guidance from on-farm microbial consortia research for soil health compatibility, similar to practices in Designing On-Farm Microbial Consortia to Enrich Soil.
What are the common installation steps?
What are the installation steps? Follow this sequence for reliable setup:
- Install and level the tank stand and secure the reservoir.
- Fit a screened inlet and shutoff valve to the tank outlet.
- Install primary filter, pressure regulation or orifice, and mainline.
- Lay lateral lines along rows and attach emitters or spaghetti tubing at desired spacing.
- Flush laterals to purge debris, then cap ends and test for uniformity.
- Record run times and mark emitter positions for maintenance.
Which testing is required? Conduct a single lateral uniformity test by measuring output at emitters across the run and adjust emitter spacing or head accordingly.
How to maintain gravity-fed microdrip systems to prevent clogging and failures?
How to maintain systems? Perform weekly filter checks and monthly lateral flushing during the season.
Which chemical maintenance helps? Use mild acid or chlorine treatments periodically to remove mineral scale and biofilm, following safety and environmental rules.
How to winterize? Drain and store removable components in freezing climates. Seal lines or bury deeper where frost is a risk.
What are typical costs and payback for small potato farm gravity systems?
What are typical upfront costs? Expect tank and stand: $200-1,200; filtration and fittings: $100-600; lateral tubing and emitters: $300-2,000 depending on area and emitter density.
What are operating costs? Operating costs are minimal without pumps: mainly maintenance filters, replacement emitters, and occasional chemicals.
How to estimate payback? Compare to tanker or overhead irrigation. Savings on fuel and labor often payback within 1-3 seasons for small, intensive potato enterprises.
Which design variations improve performance in sloped or uneven terrain?
What to change on slopes? Use multiple smaller reservoirs at contour benches to provide consistent head across zones.
How to handle pressure variation? Install simple pressure-compensating emitters or inline orifices at lateral inlets to equalize flow.
Which layout works on steep land? Emphasize shorter laterals and multiple manifolds to limit hydraulic variability.
Which environmental and crop-health benefits follow from microdrip use on potatoes?
Which environmental benefits apply? Microdrip reduces runoff, lowers evaporation losses, and saves water relative to furrow or sprinkler systems (FAO irrigation data).
Which crop-health benefits apply? Microdrip reduces leaf wetness, thereby lowering risk of late blight and other foliar diseases common to potatoes.
What tests and performance checks should be done after installation?
What tests to perform? Measure emitter flow uniformity, check pressure at the reservoir outlet, and quantify application depth per cycle.
How to measure emitter uniformity? Capture output from representative emitters for a fixed time and compute coefficient of variation. Aim for CV under 20 percent for reliable systems.
Which suppliers, kits, and DIY options are recommended for small farms?
Which supplier types to consider? Choose from drip irrigation manufacturers, local agricultural suppliers, or DIY kits using PVC and polyethylene tubing for low-cost installs.
How to evaluate kits? Review included filter quality, emitter types, guarantee terms, and spare parts availability.
Which DIY parts offer the best value? Use quality inline emitters, UV-resistant lateral tubing, and standard 1-inch mainline pipe to balance cost and durability.
How to adapt system design across different potato planting densities and varieties?
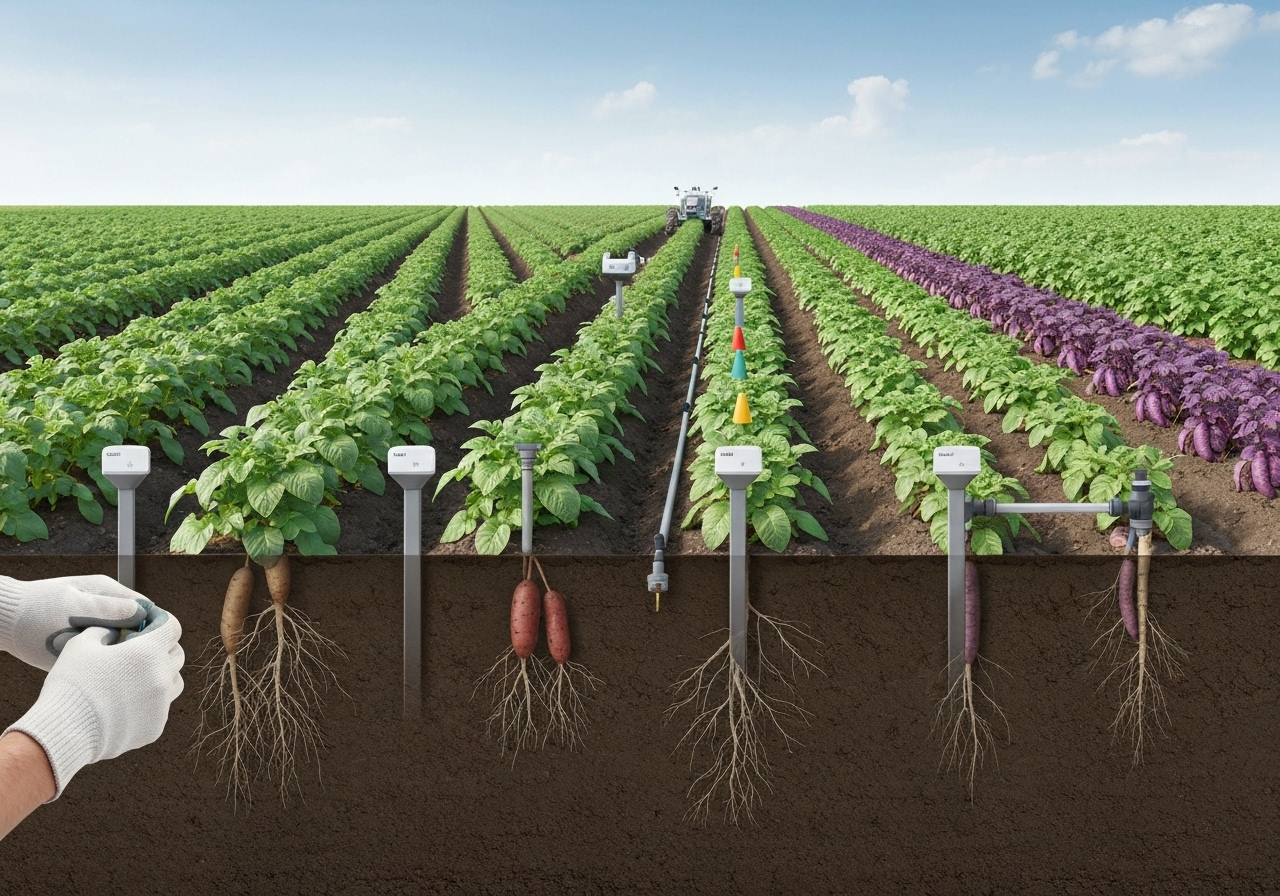
How to change emitter spacing? Use closer emitter spacing (10-20 cm) for high-density planting and farther spacing (25-40 cm) for lower density.
Which emitter flow changes are needed? Increase emitter flow or cycle time for large-tuber varieties that demand higher water volumes during bulking.
Which monitoring and automation options are viable with gravity-fed systems?
Which monitoring is simple and effective? Use soil moisture sensors, simple float valves for reservoir refill, and low-cost data loggers to record cycles.
How to automate without pumps? Use solenoid valves powered by solar controllers to run zones on a timer using gravity head.
How to integrate gravity-fed microdrip with regenerative and rotation practices?
How to pair irrigation with rotation? Pair irrigated potato beds with adaptive low-input rotation plans to prevent disease buildup and manage nutrients.
Which regeneration practices complement microdrip? Use targeted fertigation combined with soil microbial strategies to boost soil health, as discussed in Designing On-Farm Microbial Consortia to Enrich Soil.
Where to learn about micro-irrigation principles? Explore applied techniques in Regenerative Micro-Irrigation for Urban Smallholder Farms and related case studies.
Which troubleshooting checklist helps fix common gravity-fed problems?
Which quick checks to run? Verify reservoir height, clean filters, inspect for kinks, flush laterals, and test emitter outputs.
How to address low pressure? Raise reservoir, shorten lateral runs, or install a smaller-diameter orifice to concentrate head at emitters.
How to fix uneven output? Replace degraded emitters, check for airlocks with air vents, and rebalance manifold flow.
What are recommended best practices summary for small potato farms?
What best practices to follow? Use proper filtration, maintain a 2-4 meter tank head, choose low-pressure pressure-compensating emitters, limit lateral runs, and monitor soil moisture frequently.
How to plan system scaling? Start with a test block, refine emitter spacing and schedules, then expand manifolds as production demands increase.
Which resources and learning paths help? Train farm staff on flushing, filter cleaning, and simple pressure checks. Use supplier technical sheets and irrigation manuals for emitter-specific guidance (FAO; USDA NRCS).
Where to find further reading and related practical guides?
Where to find more on rotation and irrigation integration? See Adaptive Low-Input Crop Rotation Plans for Small Farms for rotation guidance that pairs with irrigation strategies.
Where to read on microclimate mapping and water planning? Consult microclimate mapping and farm calendar resources for planting and irrigation timing in different zones.
What final advice for implementing gravity-fed microdrip on small potato farms?
What final advice applies? Begin with a compact test system, monitor performance closely, and prioritize filtration and maintenance to keep emitters functioning throughout the season.
Which community practices help? Share field reports with nearby growers and adapt designs to local water quality and soil types for best outcomes.
Designing Perennial Vegetable Beds by Root Depths and Yield
Designing perennial vegetable beds by root depths and yield organizes your homestead planting for long-term productivity and lower labor. This guide explains how to assess site conditions, map rooting zones, choose perennial vegetables by depth and expected yield, plan bed geometry and access, build soil and microbial life, and track outputs so perennial beds contribute reliably to household food supply.
What is a perennial vegetable bed and why plan by root depth and yield?
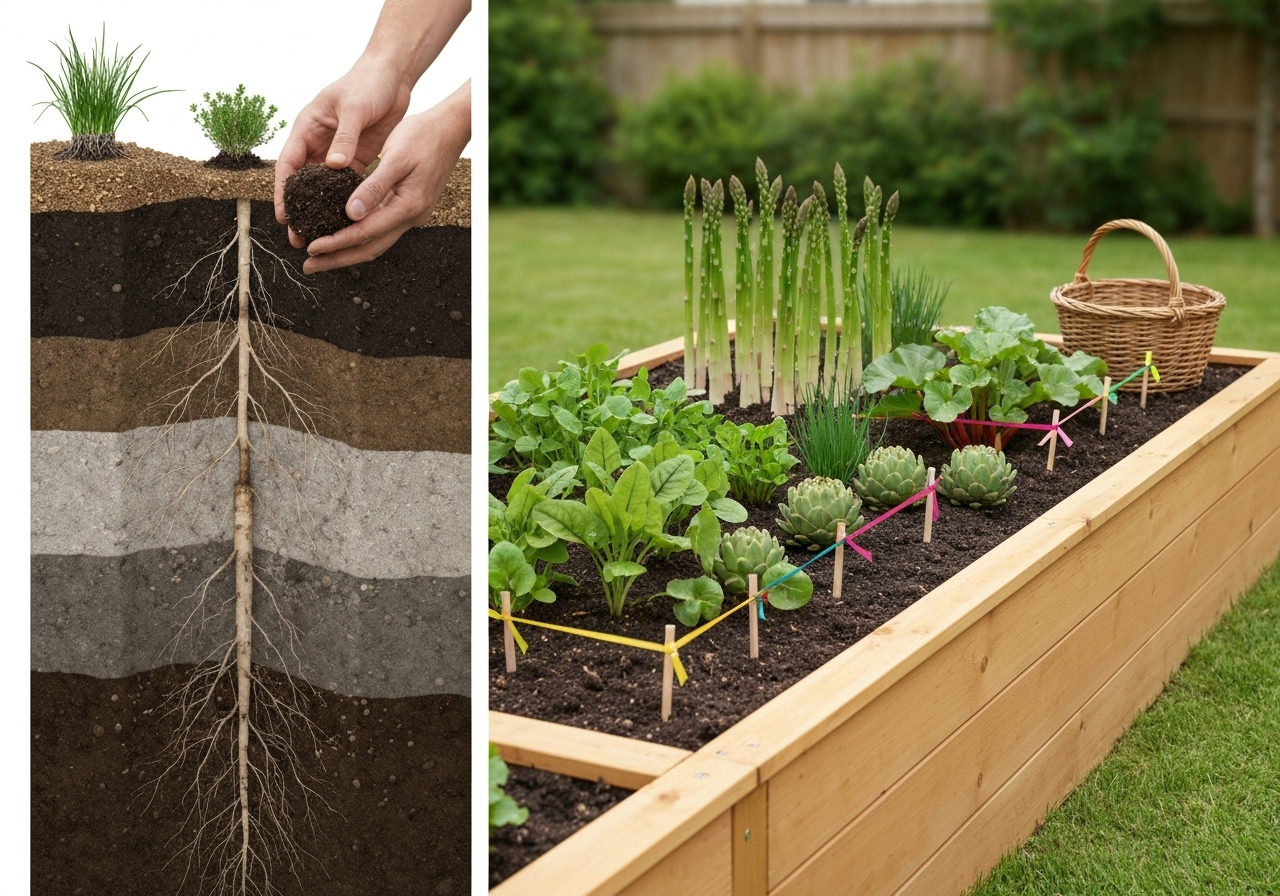
Designing perennial vegetable beds by root depth and yield groups crops into compatible rooting zones and productivity roles to reduce belowground competition, improve water and nutrient use, and maximize harvestable calories per square meter. Planning beds this way stabilizes soil life, simplifies irrigation, and lets you layer annuals and perennials for stacked yields.
How do I assess site conditions before mapping perennial beds?
Start with light, slope, soil texture, drainage, and microclimate mapping to decide bed placement and species choices. Measure sun hours in summer and winter, note prevailing wind, mark frost pockets, and map seasonal water flow. Test soil for pH, organic matter, available phosphorus and potassium, and texture. Record existing trees and roots that will compete or provide shade.
Begin site assessment by using microclimate maps to fine tune placement; consult local crop calendars and microclimate practices to match species to exposures (see microclimate crop maps for small farms).
What are practical root depth zones for perennial vegetables?
Use three practical root-depth zones: shallow (-30 cm / -12 in), medium (30-60 cm / 12-24 in), and deep (>60 cm / >24 in). Design beds so shallow-rooted perennials occupy topsoil pockets, medium-rooted occupy mid zones, and deep-rooted occupy dedicated strips or borders.
Define root zones precisely: shallow-rooted herbs and leafy perennials exploit -30 cm; medium-rooted tap- or clump-formers reach 30-60 cm; deep-rooted perennial tubers, rhizomes and shrubs access below 60 cm. Matching roots to soil volume reduces competition.
How do I choose perennial vegetable species by root depth and expected yield?
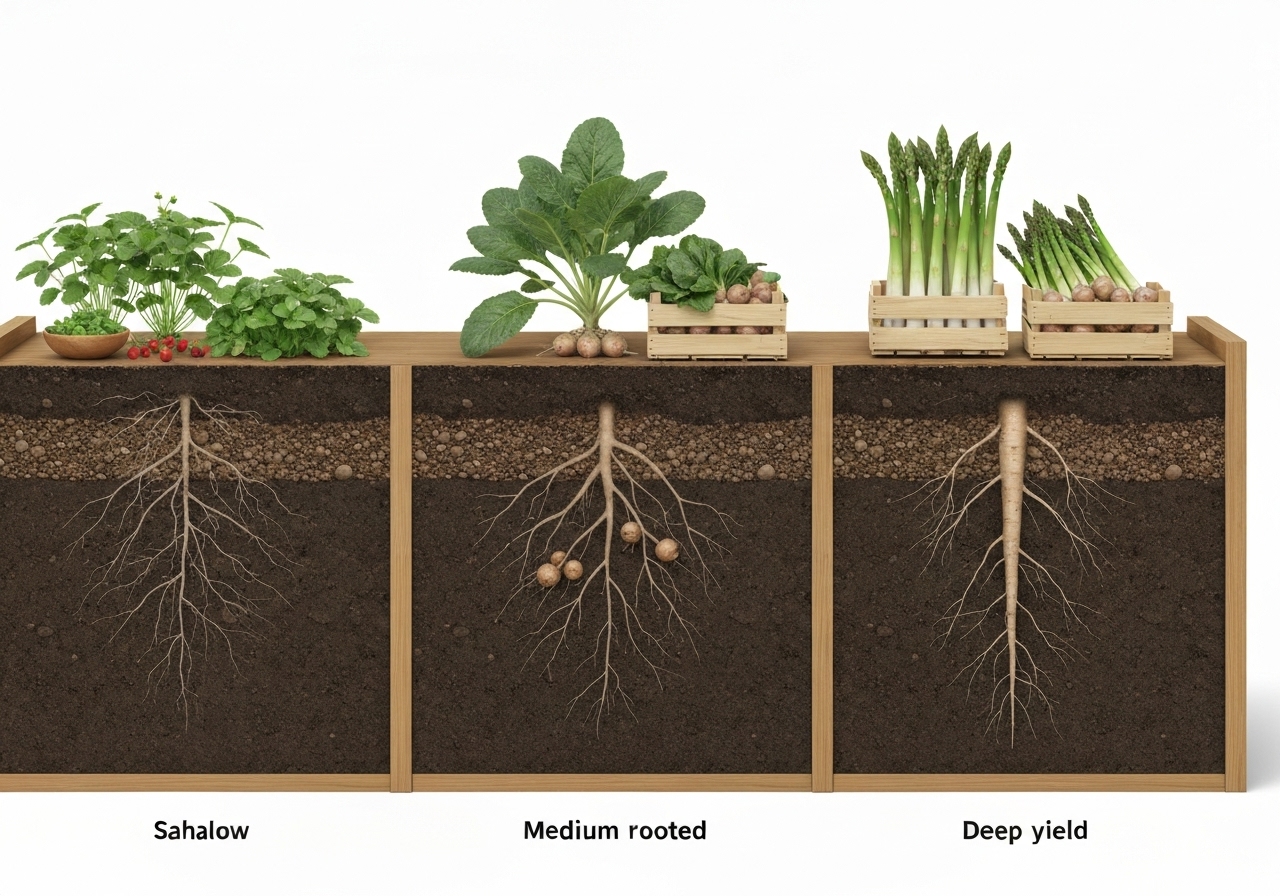
Choose species for each root zone based on documented yields, harvest frequency, and spatial needs to optimize per-area productivity. Below is a practical species list with typical yields and spacing. Use local extension data for region-specific yield adjustments (state extension services and published trials provide regional baselines).
Which shallow-root perennial vegetables work best and what yields can I expect?
Shallow-root perennials include salad herbs, chives, sorrel, and some perennial leafy greens that produce frequent harvests but lower biomass per plant. Examples and approximate yields per mature clump or m2 under good fertility:
- Chives: plant 10-20 per m2; harvest .1-.3 kg per m2 per month in season (.5-2 kg/year per m2) depending on cut frequency.
- Sorrel: spacing 20-30 cm; yield .5-1.5 kg per plant per season (3-6 kg/m2/year with frequent harvest).
- Good King Henry (blite or perennial spinach): spacing 30-40 cm; yield 1-2 kg per plant/year.
- Perennial kales (e.g., tree collards): young plants give .5-1 kg per plant first year, mature bushes 3-6 kg/year.
- Salad greens like winter lettuce (perennial types): 1-3 kg/m2/year for continuous cut-and-come-again harvesting.
Which medium-root perennial vegetables should I plant and what yields are realistic?
Medium-root perennials include rhubarb, asparagus, lovage and seakale-type crops that yield substantial harvestable biomass annually after establishment. Examples and yield ranges:
- Rhubarb: spacing 75-100 cm; yield 3-8 kg per crown per year after 2-3 years (University extension data shows 4-6 kg average for mature crowns).
- Asparagus: spacing 30-45 cm in beds, standard yield .5-1 kg per plant per season once established (3-6 kg/m2 over the harvest months cumulatively for mature beds).
- Lovage: spacing 50 cm; harvest 1-3 kg leaf stalks annually per plant.
- Sea kale (Crambe maritima): spacing 60-90 cm; harvest ~2-5 kg per plant over season for blanched shoots.
Which deep-root perennial vegetables and productive perennials should I include and what yields do they provide?
Deep-root perennials include tuberous crops, rhizomes, and woody edibles such as Jerusalem artichoke, horseradish, and perennial tuber beds that produce heavy caloric yield per area. Examples and typical yields:
- Jerusalem artichoke (sunchoke): spacing 30-60 cm; tuber yields 2-6 kg per plant per season (8-20 t/ha scaled to small beds).
- Horseradish: spacing 30-60 cm; root yields 1-3 kg per plant in harvest year.
- Yacon: spacing 60-90 cm; tuber yield 3-8 kg per plant in suitable climates.
- As well, productive berry shrubs or low trees (seaberry, Goumi) in deep zones provide fruit yields from 1-6 kg per shrub annually depending on species and age.
How should I lay out beds to separate root-depth zones while maximizing yield?
Organize beds as layered strips or concentric bands, placing deep-rooted perennials at bed edges or central trenches, medium-root in core, and shallow-root perennials in surface pockets and borders. Use 1.2 m to 1.5 m bed widths for easy access; reserve deeper beds or terraces for rhizomes and shrubs.
Start layout with access paths every 1.2 to 1.5 m. Place deep-rooted belts on the downhill edge to capture and infiltrate water and reduce root competition with shallow herbs. Use edge plantings of tall perennials to double as windbreaks and summer shade for shade-tolerant perennials.
What planting densities and spacing maximize yield for perennial beds?
Use species-specific spacing: shallow herbs 10-30 cm spacing, medium perennials 30-100 cm, deep perennials 30-120 cm depending on clump size and harvest method. Plan plant counts per m2 to estimate yield: sparse shrubs may be .5 plants/m2 while dense herbs 10-25/m2.
Calculate expected yield by multiplying mature-per-plant output by planned plant count. Track real yields for 3 years to tune density; many perennial plantings benefit from thinning or interplanting annuals to boost early yields.
How can I stack annuals and perennials to increase early and total yields?
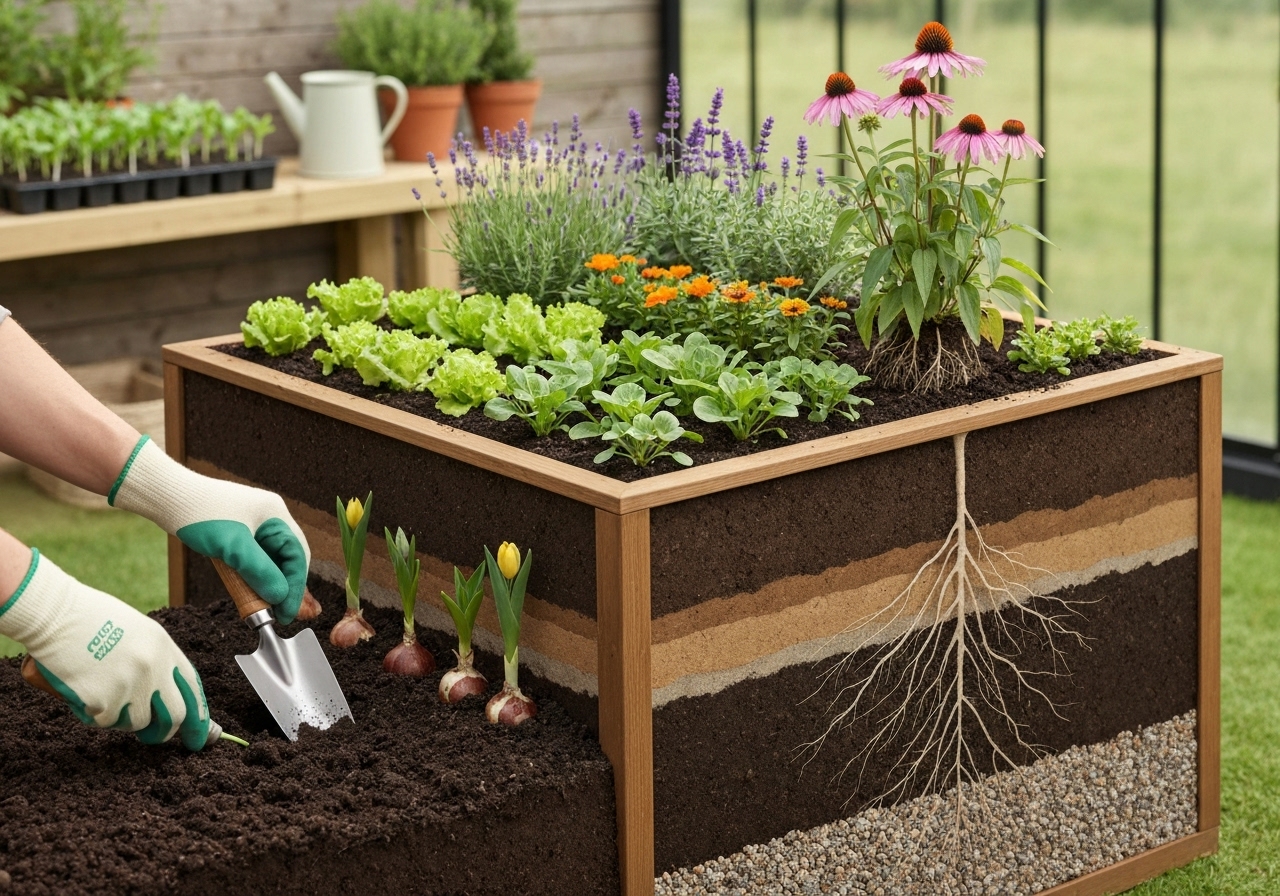
Interplant fast-growing annuals in the gaps between perennials and use vertical supports and understory crops to stack production in time and space. Plant quick salad greens, radishes, and bush beans in the first one to three years before perennials fully occupy the area. Use trellises along deep-root belts for vining annuals to add vertical yield.
Stack plantings by season: spring bulbs and greens use early light before canopy closure; summer annuals exploit mid-season; autumn crops capture residual light. This reduces bare soil periods and accelerates return on investment in bed preparation.
How do I build and maintain soil fertility for perennial vegetable beds?
Build deep, biologically active soil with layered organic matter, targeted mineral amendments, mulches and microbial inoculation to support perennials indefinitely. Start with a soil test and correct pH and major nutrients. Add 5-15 cm of compost and high-carbon mulch to feed microbes and retain moisture.
Design on-farm microbial consortia to enrich soil by incorporating compost teas, microbial inoculants, and crop residues that support target plant symbionts (see guidance on designing on-farm microbial consortia for soil health).
How should irrigation and water management be handled in perennial beds?
Use deep, infrequent irrigation for deep-rooted perennials and surface drip or micro-sprinklers for shallow-rooted zones; design swales, permeable berms or mulch to retain rainfall. Group species by water needs and install separate irrigation zones controlled by timers or sensors to avoid overwatering shallow perennials while meeting deep-root needs.
Implement regenerative micro-irrigation techniques to conserve water and deliver targeted moisture to root zones; maintain mulch to reduce evaporation and prevent surface crusting.
How do I prevent and manage competition from weeds and invasive perennials?
Prevent weeds with initial sheet mulching, surface mulch, and dense planting; manage established invasives with targeted removal and physical barriers for aggressive spreads like mint and horseradish. Hand-weed around seedlings until canopy closure. Use root barriers at edges for aggressive clonal species. Retain a 10 to 20 cm buffer with mulch to inhibit weed germination.
How should I integrate crop rotation principles in a perennial bed system?
Use rotational planning around perennial beds for adjacent annual plots, move annual families between surrounding beds, and adjust intercrops annually to disrupt pests and balance nutrient flows. Although perennials remain in place, rotate annual companions and cover crop sequences to reduce disease and feed the perennials with varied residues. Consult low-input adaptive rotation plans to coordinate perennials and annuals on the homestead (see adaptive low-input rotation plans for small farms).
How do I estimate yields and monitor productivity in perennial beds?
Track per-plant harvest weight, harvest frequency, and area yield annually; record changes in soil organic matter and plant vigor to assess long-term productivity. Create a simple spreadsheet logging harvest date, weight per bed and per species. Compare to your baseline expected yields and adjust spacing, fertility and species mix after the first three full production years.
How do I design for resilience and low input maintenance?
Choose adapted perennials, build deep fertility, diversify species, and design water-holding features to reduce ongoing inputs and increase resilience to drought and pests. Favor local proven varieties, increase genetic diversity for disease buffering, and use multi-species groundcovers to suppress weeds and maintain soil moisture. Combine perennial beds with hedgerows and pollinator plantings to enhance ecosystem services.
What are practical bed-building techniques for perennial vegetables?
Construct 15-30 cm raised beds in heavy soils; build sunken beds or swales in arid slopes; use hugelkultur beds for deep-root crops when woody materials are available. Shape beds to provide 30-50 cm of friable topsoil where possible. For heavy clays, add compost and sand or use deep deep-root furrows for deep perennials to access loosened subsoil.
How do I manage pests and diseases in perennial beds?
Monitor regularly and prioritize cultural controls: sanitation, resistant varieties, mixed planting, and beneficial insect habitat before resorting to targeted organic treatments. Remove infected material promptly. Use trap crops and biological controls for common pests. Promote soil health; healthy plants resist pathogens better. Where needed, use labeled organic sprays sparingly and strategically.
How long before perennial beds reach full production?
Expect 2-5 years for many perennials to reach full yield; shallow herbs may yield in year one, medium perennials in 2-3 years, and deep tuberous crops in 2-4 years depending on species and site. Plan early intercropping with annuals to generate food while perennials establish. Track yield ramp-up to plan household food budgets.
What design checklist should I follow before planting perennial vegetable beds?
Use a checklist: microclimate map, soil test, bed geometry, root-depth zoning, species selection, irrigation plan, soil building plan, pest strategy, and yield tracking setup. Confirm access paths, harvest logistics and storage proximity. Index beds with labels and keep a planting map for future rotation and expansion decisions.
Which simple sample layout works for a 10 x 10 m homestead perennial plot?
Use three parallel beds: deep-root belt on the downhill edge (3 m wide), two central medium beds (each 3 m wide), and shallow-root pocket strips along the sunny edge; 1 m access paths between beds. Plant Jerusalem artichoke and berry shrubs in the deep belt. Plant asparagus and rhubarb in the central beds. Fill edges and between crowns with chives, sorrel, perennial kales and annual salad intercrops until the perennials fill space.
Which records and metrics should I track for continual improvement?
Record planting dates, species and varieties, plant counts, harvest weights, inputs, pest events, and soil test results annually. Use those metrics to calculate yield per m2, input per kg of food, and time to payback of bed establishment. Adjust species mix and densities after year three based on performance.
Where can I find additional resources and examples for implementing this design?
Consult regional extension publications, perennial vegetable specialists, and on-farm case studies for species-specific advice; use microclimate and rotation planning resources to integrate perennials with annual cropping systems. For mapping microclimates and selecting crop maps, review microclimate crop resources to place beds optimally. For integrating perennials into broader farm plans, consult adaptive rotation guides to coordinate annual and perennial systems. For building soil life, review practices for microbial consortia to enrich long-term fertility.
What mistakes should I avoid when designing perennial vegetable beds?
Avoid placing shallow herbs under deep-rooting trees, underestimating access needs, overcrowding, and failing to plan for weeds and aggressive spreaders. Do not plant invasive perennial species without barriers. Avoid homogenous single-species blocks; diversify species to reduce pest and disease risk.
How do I scale perennial beds from home garden to small homestead market production?
Scale by modular bed units, measure per-module yield, and replicate successful modules; size irrigation, harvest logistics and storage to match increased yield and market timing. Use consistent bed widths for mechanized or semi-mechanized tasks and centralize packing and wash areas. Record yields per module to calculate marketable supply and labor costs per kilogram.
Designing perennial vegetable beds by rooting depth and yield converts space into reliable, layered food production. Use mapping, soil biology, irrigation zoning, and staged planting to balance early returns with long-term biomass. Track yields and tweak densities to evolve a resilient homestead food system that needs lower inputs over time.
Relevant further reading: microclimate crop maps for diversified small farms, adaptive low-input rotation plans for coordinating perennials and annuals, and designing on-farm microbial consortia for building the biological foundation of perennial beds.
Practical Microclimate-Based Spacing Tips for Organic Farms
Practical Microclimate-Based Spacing Tips for Organic Farms provides actionable guidelines to set plant spacing and planting density based on within-field microclimate zones. This guide explains how to measure microclimates, adjust spacing for light, wind, humidity, and soil moisture, and apply crop-specific density ranges for organic systems. Follow testing steps, management rules, and examples to raise yield, reduce disease pressure, and improve resource efficiency.
What is microclimate-based spacing and why does it matter?
Microclimate-based spacing means setting plant spacing and density to match local variations in temperature, humidity, light, wind, and soil moisture within a field. The practice matters because microclimates cause crops to respond differently across short distances; optimizing spacing increases yield per area and lowers pest, disease, and water stress risks.
How do I map microclimates on my organic farm?
Map microclimates by combining simple observations, low-cost sensors, and seasonal records to produce zones for spacing decisions. Walk fields at different times of day for one week in each season to note frost pockets, wind corridors, shaded benches, and wet depressions.
Use inexpensive sensor loggers for air temperature, soil temperature, and volumetric soil moisture at 5-10 sample points per hectare to capture variability. Deploy sensors at canopy height and at root-zone depth when possible.
Integrate historical yield maps, soil maps, and drainage maps. Combine with tools like infrared thermometers or smartphone thermal apps for quick scans.
Refer to microclimate mapping methods for small farms for implementation details and zone creation in planning documents like crop maps; see how to overlay planting schedules in diversified small-farm crop maps by microclimates.
What are the microclimate variables that should change spacing?
Adjust spacing based on light availability, wind exposure, humidity, soil moisture, and temperature extremes at the planting site. Each variable alters canopy architecture, evapotranspiration, and disease spread.
- Light: Reduce spacing in low-light zones to maximize light capture per plant; widen spacing in high-light zones to avoid leaf scorch and overheating.
- Wind: Increase windward spacing to reduce mechanical damage and airflow restriction; use windbreaks to allow denser plantings downwind.
- Humidity and leaf wetness: Increase spacing where humidity and leaf wetness are high to reduce foliar disease incidence.
- Soil moisture: Increase spacing in wet depressions to reduce root disease; decrease spacing on well-drained sites to improve water-use efficiency.
- Temperature: Increase spacing where heat accumulates to lower canopy temperature, or use denser plantings in cool pockets to boost micro-warmth.
How do plant functional groups change spacing decisions?
Change spacing rules for broadleaf greens, brassicas, solanaceae, legumes, roots, and vining crops because growth habit and canopy architecture differ. Use group-specific ranges to start field trials.
Recommended starting density ranges per square meter for guidance only:
- Leafy greens (lettuce, spinach): 16-36 plants/m2 for baby and cut-and-come-again; 4-9 plants/m2 for full-head lettuce.
- Brassicas (broccoli, cabbage): 1-3 plants/m2 for large heads; 9-16 seedlings/m2 for staggered tray production.
- Solanaceae (tomato, pepper, eggplant): 1.-2.5 plants/m2 for indeterminate tomato in trellised systems; .5-1.2 plants/m2 for open bushes.
- Legumes (bush beans): 10-25 plants/m2; vining beans on supports: 3-8 plants/m2.
- Root crops (carrot, beet): 50-150 plants/m2 depending on harvest size; thin to target diameter.
- Vining cucurbits (cucumber, squash): .5-1.5 plants/m2 on ground; 1.5-3.5 plants/m2 when trellised vertically.
How should I adjust spacing by light microclimates?
Increase spacing where sun exposure is intense to prevent heat stress and reduce spacing where light is limited to improve light interception. In shaded alleys or under partial shade, reduce spacing by 10-30% depending on percent shade.
Set planting grids: for a zone receiving 70-100% full sun, use recommended baseline spacing. For 30-70% light, tighten spacing 10-20%. For <30% light, choose shade-tolerant cultivars and increase density up to 30% if plants remain vegetative.
How should I adjust spacing by wind and exposure?
Widen spacing in wind-exposed areas and orient rows perpendicular to prevailing wind only when needed to reduce soil erosion and plant lodging. Plant windbreaks or hedgerows and then increase planting density downwind where shelter reduces stress.
Where wind dries foliage quickly, a wider footprint reduces transpiration demand and mechanical rubbing. Increase plant-to-plant spacing by 10-25% on windward edges.
How should I change spacing in wet vs dry soil microclimates?

Widen spacing on persistently wet or poorly drained patches to reduce root disease risk; tighten spacing on well-drained soils to maximize yield per area. Avoid dense plantings in anaerobic soils.
Tight spacing in dry zones can improve canopy shading and soil moisture retention but raises competition; balance with deeper-rooted companion species to manage drought stress.
How does crop rotation and spacing interact on small organic farms?
Integrate spacing choices into rotation planning so that dense plantings do not repeatedly follow susceptible crops in the same microclimate, reducing disease carryover. Use rotations that alternate root, leaf, and fruit crops and allow cover crops to break pest cycles.
Link rotation maps to microclimate zones to avoid repeating high-density plantings in disease-prone pockets. For adaptive rotation templates and low-input plans, consult resources such as adaptive low-input crop rotation plans for small farms.
When should I use block planting vs row planting?
Use block planting to optimize light capture and pollination for compact crops; use rows for mechanization, airflow, and ease of access. The choice depends on crop type, microclimate, and labor or tool constraints.
Block planting increases edge density and can improve microclimate buffering. Narrow rows with wider between-row spacing balance microclimate control and operator access on small organic farms.
How do companion planting and polyculture affect spacing?
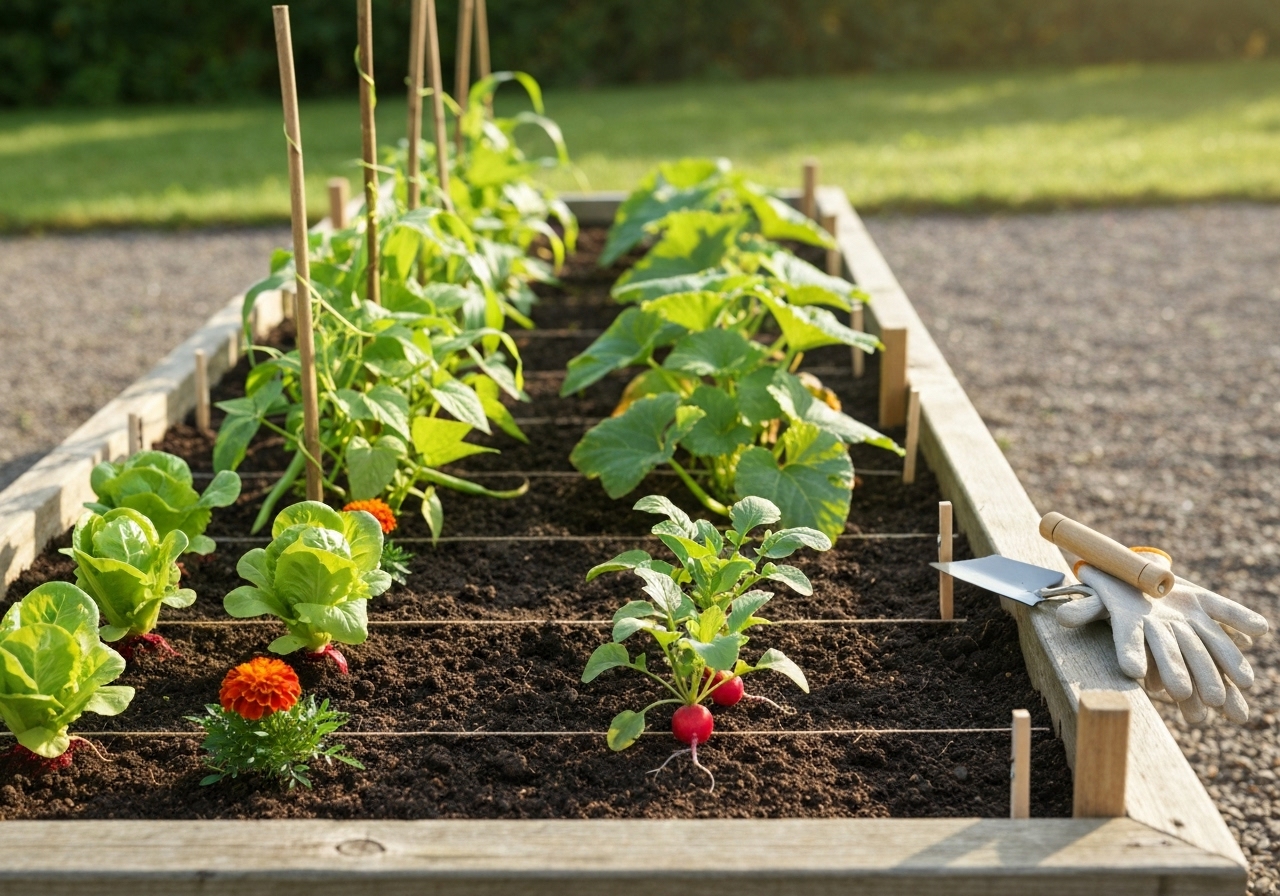
Adjust spacing to allow complementary species to share vertical and temporal niches; place taller, sparser species with shorter, denser ones to maximize total productivity. Companion plants reduce pests and help microclimate buffering when placed intentionally.
Examples: Plant maize at wider spacing with dense understory of beans and squash (three sisters) or intersperse nitrogen-fixing legumes at 10-20% of population density with heavy feeders to improve soil and reduce needed spacing in later crops.
What are practical spacing rules for transplants versus direct-seeded crops?
Transplants can be placed at slightly wider spacing than direct-seeded crops because they start larger; thin direct-seeded beds early to target final density. Use nursery-grown transplants to control spacing precisely and stagger planting to match microclimate windows.
When direct seeding, sow 20-40% more seeds in low-germination or high-attrition zones; thin soon to avoid late competition that reduces quality.
How should irrigation and fertility change spacing decisions?
Increase spacing when irrigation or nutrient supply is limited to reduce competition; tighten spacing where reliable water and fertility inputs support higher per-area yields. In organic systems, where fertility is often managed biologically, spacing must account for slower nutrient release.
Design plant populations to match delivered water: drip-irrigated beds support higher densities than flood-irrigated or rain-dependent zones.
How can spacing reduce pest and disease pressure?
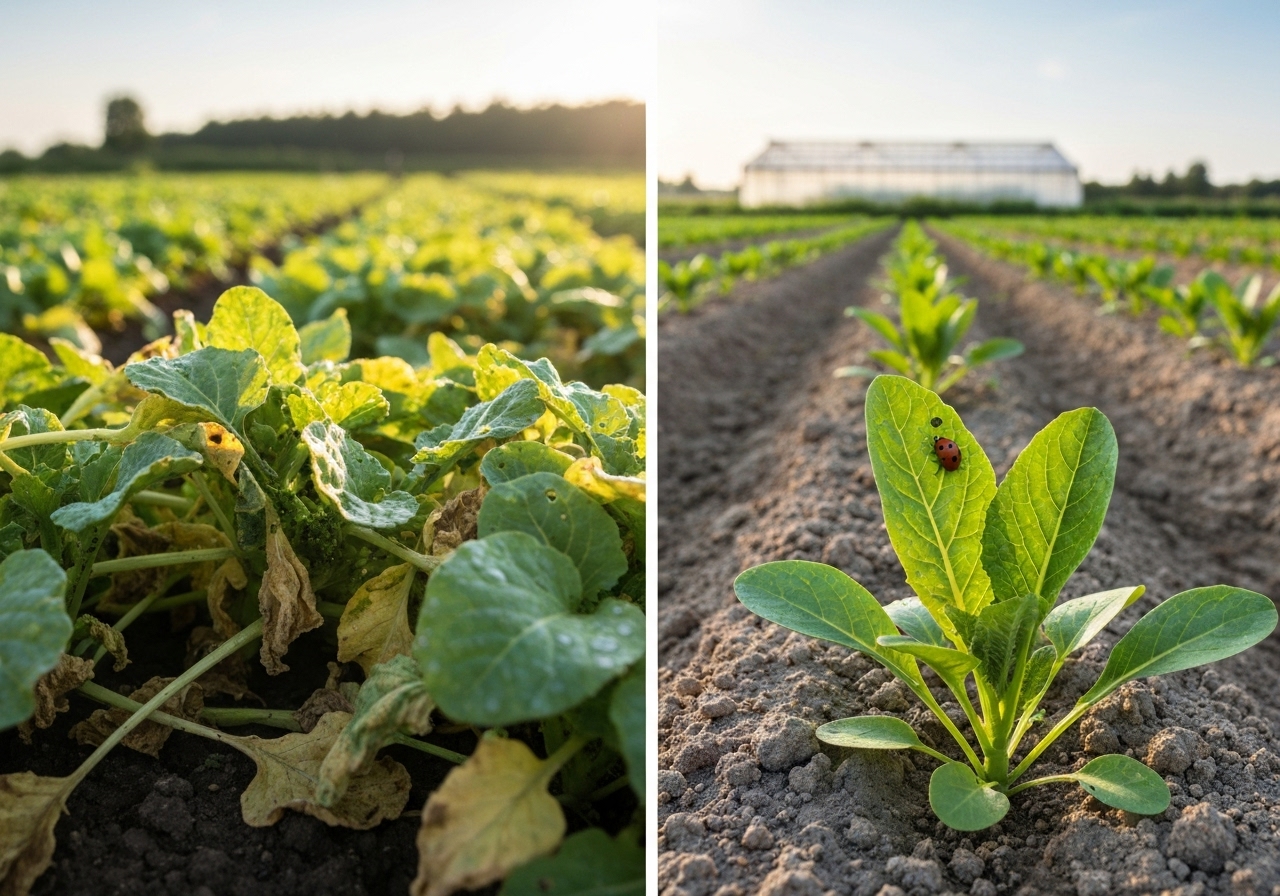
Use wider spacing to improve airflow and reduce humidity within the canopy, lowering foliar disease risk; use mixed-species plantings to interrupt pest host-finding. Rotate spacing across seasons to avoid creating persistent refuges for pests in the same microclimate pockets.
Thin during wet seasons and in low-lying humid zones to reduce leaf wetness. Plant trap crops at field edges at wider spacing to divert pests from main stands.
How to run field trials to find the best spacing for my microclimates?
Design replicated small plots across mapped microclimate zones testing 2-4 spacing levels with consistent management and measure yield, disease incidence, and quality. Use randomized blocks and record soil moisture, canopy temperature, and harvest data for statistical insight.
Start with 1-3 m2 replicated plots: A (baseline spacing), B (20% tighter), C (20% wider). Run trials for at least two seasons and in contrasting weather years to capture variability.
What simple tools and sensors help manage spacing decisions?
Use soil moisture probes, low-cost air temperature loggers, light meters, and handheld canopy thermometers to collect microclimate data that inform spacing choices. GPS-enabled yield mapping or harvest weight per bed provides feedback for future density adjustments.
Sensor guidance integrates well with microclimate zoning and precision approaches; for sensor-led mapping and planting overlays see microclimate mapping resources like microclimate zoning: boost yields on small farms.
How do microbial amendments interact with plant density?
Use microbial consortia to improve nutrient availability and root health which can support increased density in appropriate microclimates; avoid high-density plantings in pathogen-prone wet zones even with inoculants. Healthy soil biology improves resilience to competition and stress.
Design microbial seed coatings and consortia for specific crop families to increase establishment and reduce thinning losses; for field-scale soil microbe mapping and application strategies consult resources like designing on-farm microbial consortia to enrich soil.
How should spacing change through the season with dynamic microclimates?
Adjust spacing by staggering plantings, pruning, or selective thinning through the season as canopy structure and microclimate evolve. Early-season tight plantings can be thinned to single plants later, or interplanted cover crops removed after establishment to free space.
Use staggered planting to avoid peak competition windows and to smooth labor needs for thinning and harvest.
What are common mistakes and how to avoid them?
Common mistakes include using blanket spacing across diverse microclimates, ignoring airflow needs, and not testing local adjustments. Avoid these by mapping microclimates, running small trials, and recording outcomes.
Do not over-densify in wet, shaded, or compacted patches. Do not underuse high-productivity microclimate niches where denser spacing could increase per-acre yield.
How do scaling and labor affect spacing choices on small organic farms?
Align spacing to available labor, bed width, and tools to ensure sustainable management; denser plantings often require more thinning and precise harvest techniques. Choose spacing that balances per-area yield with labor input and post-harvest handling capacity.
Use mechanized planters or transplanters when dense, uniform spacing is required at scale to reduce labor costs without sacrificing plant health.
Which quick checklist helps implement microclimate-based spacing?
Follow a simple checklist: map microclimates, classify zones, choose baseline spacing per crop, run small trials, record results, and update maps annually. Re-evaluate after major landscape changes like tree planting or irrigation upgrades.
- Step 1: Walk and map microclimate zones.
- Step 2: Select baseline crop spacing by functional group.
- Step 3: Adjust spacing for each zone (+/- 10-30%).
- Step 4: Run replicated plots and collect data.
- Step 5: Standardize successful spacing into the farm calendar and rotation plan.
What resources and next steps should farmers use?
Use farm-specific microclimate maps, rotation plans, and soil health practices to operationalize spacing decisions and improve over time. Integrate spacing adjustments into your seasonal planning and use the farm calendar to schedule trials and implementation.
Combine spacing rules with rotation and soil management plans to sustain productivity; adaptive rotation templates and microclimate calendars help synchronize crop placement with site potential.
Implement these principles gradually. Document results. Treat microclimate-based spacing as a precision, low-cost lever to increase organic system resilience and profitability.
Start an On-Farm Compost Tea Brewer Using Waste Streams
Start an On-Farm Compost Tea Brewer Using Waste Streams offers a practical, step-by-step guide to build, operate, and integrate a compost tea system on small and medium farms. This guide uses farm waste streams, minimizes inputs, and links tea production to soil health, crop rotations, and regenerative practices.
What is an on-farm compost tea brewer and why start one?
An on-farm compost tea brewer produces a microbe-rich liquid made by extracting and multiplying beneficial microorganisms and soluble nutrients from compost and other organic wastes. Use compost tea to inoculate soil, seedling trays, and plant foliage with bacteria, fungi, and protozoa that improve nutrient cycling, disease suppression, and plant vigor. Agriculture extension services and research (USDA and Rodale Institute summaries) report consistent improvements in soil microbial activity and plant health when compost teas are used as part of integrated management.
What are the advantages of using farm waste streams for brewing?
Using farm waste streams reduces disposal costs, closes nutrient loops, and lowers purchased input needs. Collecting manure, spent mushroom substrate, vegetable culls, and crop residues supplies carbon and microbial inoculum. On-farm sourcing reduces transport emissions and strengthens circularity. Farmers report 1) lower synthetic fertilizer use, 2) improved soil structure, and 3) additional revenue streams when compost tea is included in regenerative service bundles (examples summarized in field reports and case studies).
What raw materials and waste streams work best for compost tea?
Raw materials suitable for compost tea include mature aerobic compost, well-aged manure, vermicompost, spent mushroom substrate, kelp or seaweed (if available), plant-based food waste, and fermentates from grain or brewery waste. Avoid raw animal carcasses, fresh biosolids, or unaged poultry manure without treatment. Use materials that meet your farm’s pathogen risk protocol and regional regulations (state extension guidance and Cornell composting resources provide risk criteria).
How do I choose a brewing design for my farm?

Choose a brewer design by answering the questions: how much tea per week do I need, how much waste is available, and do I want batch or continuous production? Small farms often start with a 200-500 liter batch brewer. Medium farms scale to 1,000-5,000 liters with recirculating pumps and aeration. Commercial operations may build modular tanks for parallel batches.
What are the basic components of a brewer?
The basic brewer includes: 1) a watertight tank, 2) an aeration system (air blowers or diffusers), 3) a recirculating pump and tubing, 4) a coarse pre-filter for feedstocks, 5) mixing or agitation, and 6) thermometers and measurement tools. Choose food-grade or chemically resistant tanks (polyethylene, stainless steel). Use inline strainers or spray bars to avoid clogging when applying tea.
How do aeration and oxygenation affect brewing?
Aeration controls whether the tea cultivates aerobic populations (positive for beneficial bacteria and fungi) or shifts toward anaerobic communities (risk of phytotoxic compounds). Maintain dissolved oxygen (DO) above 6 mg/L for aerobic brews. Use a high-capacity air pump sized at 1–2 L/min per liter of brew volume as a starting point, then monitor DO and adjust. Research in applied soil microbiology shows higher DO correlates with larger beneficial bacterial growth.
How to size tanks and equipment?

Size tanks based on application rate and cropping area. For foliar sprays: plan 300–500 liters per hectare per application as an initial guideline. For soil drenches: plan higher volumes (1,000+ liters/ha). Calculate weekly demand by multiplying number of crop hectares by target application frequency. Add 20% buffer for production variability.
How do I prepare and balance feedstocks using farm waste streams?
Prepare feedstocks by sorting, shredding, and aging materials. Use a feedstock recipe that balances carbon and nitrogen and supplies microbial inoculum. A common on-farm recipe: 10% mature compost or vermicompost, 5% aged manure or green crop material, 2% kelp or seaweed extract, plus a small sugar source (molasses at .5% by volume) to stimulate microbial growth. Mix solid inputs into a porous mesh bag to avoid large particulates in the final tea.
How to calculate C:N considerations?
Maintain a compost-like C:N starting ratio in feedstocks of roughly 20:1 to 30:1. Compost teas are extraction/propagation systems — feedstock C:N influences which microbes proliferate. If your feedstocks are very high-carbon (woody residues), pre-compost or co-compost with manure to add nitrogen and microbes before brewing. Extension publications from university composting programs provide feedstock C:N tables for common on-farm materials.
How to brew compost tea step-by-step (standard aerobic batch method)?

Use this step-by-step aerobic batch protocol suitable for most small farms:
- 1. Fill the tank with clean non-chlorinated water to target volume. Let sit 12–24 hours to off-gas if using municipal water that may contain chlorine.
- 2. Place 5–10% by volume of mature compost or vermicompost into a porous bag, plus any supplemental matters (kelp, minerals) in separate bags to control release.
- 3. Add sugar source (molasses .25–.5% by volume) to feed heterotrophic bacteria that help multiply beneficial populations.
- 4. Start aeration and recirculation. Maintain DO >6 mg/L, temperature 18–25 C (65–77 F), and neutral to slightly acidic pH (6.–7.).
- 5. Run the brew for 12–36 hours for bacterial-dominant tea, and up to 48–72 hours if promoting fungal growth (cooler temps favor fungi).
- 6. After brewing, strain through a fine mesh (200–500 micron) into application tanks to prevent sprayer clogging.
- 7. Apply within 4–12 hours of brew completion for highest microbial viability.
What variables change brewing time and microbial outcomes?
Variables include temperature, feedstock maturity, aeration rate, and sugar additions. Higher temperatures and sugar accelerate bacterial growth and shorten brewing time. Cooler temperatures and fungal-rich feedstocks shift composition toward fungi but require longer brew times. Trials reported in Applied Soil Ecology show that adjusting these variables produces predictable shifts in bacterial-to-fungal ratios.
How to test and monitor tea quality on the farm?
Monitor simple indicators and perform occasional lab checks. Use on-farm tools: a dissolved oxygen (DO) meter, pH meter, thermometer, and optical turbidity check. Good aerobic tea: DO >6 mg/L, pH 6.–7.5, slight cloudiness but no foul odor. For periodic verification, send samples to labs for colony forming units (CFU), presence of key plant-beneficial microbes, and absence of human pathogens. University extension protocols provide sampling and lab submission methods.
When should I test for pathogens?
Test when using manures, if teas are applied to edible foliage close to harvest, or if state regulations require pathogen testing. Use lab tests for E. coli, Salmonella, and other relevant indicators. If tests show contamination, stop foliar applications to edible crops until corrected. Guidance from food safety audits and university extension helps set acceptable limits.
How should I apply compost tea to crops?
Apply compost tea via foliar spray, soil drench, or drip injection depending on objective. For foliar disease suppression, apply during cool parts of day (early morning or evening) when stomata are open and UV exposure is lower. For soil microbiome enrichment, apply as root-zone drenches or through irrigation (ensure filters protect emitters).
What are recommended application rates and timing?
Recommended starting rates: foliar sprays 200–500 liters per hectare per pass; soil drenches 500–2,000 liters per hectare. Apply at seeding/transplant, early vegetative stages, and at stress points (drought, transplant shock, pre-flowering) as a preventive strategy. Repeat every 2–4 weeks during active growth for sustained benefit.
Can compost tea be mixed with other inputs?
Do not mix compost tea with copper or sulfur sprays and many synthetic pesticides without compatibility testing — those products can kill beneficial microbes. Mix simple compatible foliar nutrients (seaweed extracts or soluble calcium) if tested. Always perform a jar test and small trial on a sample plot to check for phytotoxicity or microbial loss.
What safety, recordkeeping, and regulatory practices are required?
Follow safety practices: keep detailed batch records (feedstocks, dates, temperatures, DO, who operated system). Maintain traceability for food-safety audits if teas are applied to produce. Follow regional guidelines for manure handling and compost use. If selling compost tea or services, confirm local regulations regarding microbial inoculants and labeling. University extension and agricultural departments provide recommended record templates and regulatory checklists.
How much does a basic brewer cost and what are operating economics?
Estimate start-up costs: small DIY 500 L system (tank, aeration, pump, filters, meters) typically costs $1,500–$4,000. Larger modular 2,000–5,000 L systems often range $8,000–$25,000 depending on automation. Operating costs include electricity for aeration pumps (low), feedstock handling labor, and occasional lab testing. Consider savings from reduced fertilizer use, improved yields, and avoided waste disposal. Economic analyses in agroecology case studies show payback periods often under 2–4 years for diversified small farms when integrated with crop rotations and regenerative practices.
How to integrate compost tea into broader farm systems?
Integrate the tea program into crop rotation, cover cropping, and soil-building plans. Use tea after cover crop termination to accelerate residue breakdown and nutrient cycling. Coordinate tea applications with your farm’s planting calendar and microclimate zones to maximize benefits. For planning rotation timing and crop placement, consult adaptive rotation frameworks like the ones used in low-input operations and crop mapping by microclimate to align microbial applications with crop needs. See adaptive low-input crop rotation plans for scheduling ideas and designing on-farm microbial consortia to align teas with targeted soil functions.
Can compost tea contribute to soil carbon and farm revenue?
Yes. Regular compost tea use can enhance soil organic matter retention by supporting microbial-driven aggregation and nutrient cycling, indirectly contributing to soil carbon accrual. When combined with cover cropping and reduced tillage, microbial inputs strengthen carbon sequestration pathways. Farmers tracking carbon gains may integrate microbial amendments into soil carbon credit programs. See case discussions on how soil carbon programs create revenue opportunities for small farms in materials about soil carbon credits.
What are common problems and troubleshooting steps?
Common problems include foul odors, low DO, low microbial counts, and sprayer clogging. Troubleshoot as follows:
- Foul odor: stop batch, aerate vigorously; examine feedstock for anaerobic pockets or contamination and avoid overly fresh manures.
- Low DO: increase aeration capacity, reduce organic load, shorten brew time.
- Low microbial counts: check water source (chlorine kills microbes), use higher-quality compost inoculum, add molasses carefully.
- Clogging: run tea through fine strainer, use inline filter bags at pump intake, or dilute before spraying.
What is a sample maintenance and annual plan for a small farm brewer?
Sample schedule for a 500 L weekly batch operation:
- Daily: inspect aeration lines, check DO and temperature during brewing, record batch data.
- Weekly: clean strainers, sanitize nozzles, test one batch for microbial viability monthly for first 6 months, then quarterly.
- Seasonal: service pumps and replace tubing, calibrate meters, review feedstock supply and quality before peak season.
- Annual: conduct one comprehensive lab analysis for pathogen screening and microbial profile; update standard operating procedures based on results.
What resources and further reading should farmers consult?
Consult university extension guides on composting and compost tea, peer-reviewed studies on soil microbiology, and safety guidance for manure use. Practical field guides from USDA, state extension services, and nonprofit regenerative agriculture organizations provide tested protocols. For crop planning coordination, consult microclimate-based crop mapping and diversified farm calendars to align tea production with planting windows: diversified small-farm calendar and crop maps. For details on integrating microbial cocktails with field-scale plans, see resources on microbial consortia mapping and soil microbial cocktails for regenerative farms.
Starting an on-farm compost tea brewer using waste streams requires an initial investment in equipment, attention to feedstock quality, and routine monitoring. Follow tested aerated brewing protocols, keep good records for food safety, and integrate tea into your rotation and soil-building strategies for best results.
Native bloom strips that supercharge farm pollinators
Native bloom strips that supercharge farm pollinators
Native bloom strips around farms provide continuous nectar and pollen sources, increase pollinator diversity, and raise crop pollination services when designed and managed correctly. This guide explains which native flowers to plant, how to design and seed effective strips, seasonal management, monitoring methods, and examples for different farm types. Citations and practical seed-mix recipes follow to help farmers implement high-impact pollinator habitat.
What are native bloom strips and why do they supercharge farm pollinators?
What are native bloom strips and why do they supercharge farm pollinators? Native bloom strips are intentionally planted linear habitats composed of local native wildflowers, grasses, and shrubs placed near or within agricultural fields to provide season-long nectar and pollen for native bees, butterflies, hoverflies, and other pollinators. Native bloom strips supercharge farm pollinators by supplying diverse floral resources, nesting materials, and shelter that increase pollinator abundance and visitation rates to adjacent crops, as demonstrated by multiple studies and conservation organizations such as the Xerces Society and Pollinator Partnership.
Which native flowers are best for bloom strips on farms?
Which native flowers are best for bloom strips on farms? Choose a mix of native early-, mid-, and late-season bloomers including perennials, biennials, annuals, shrubs, and a few native grasses to create a continuous bloom sequence and varied structure that supports the widest range of pollinators.
Which early-season natives attract emerging pollinators?
Which early-season natives attract emerging pollinators? Plant early-flowering shrubs and herbs to feed overwintered bumblebee queens, mason bees, and syrphid flies from March to May:
- Willow (Salix spp.) – supplies nectar and pollen in very early spring; critical for bumblebee queens (USDA and multiple ecological surveys).
- Willowherb/Fireweed (Chamerion angustifolium) – early nectar source in disturbed sites.
- Willowleaf or early-season willowy shrubs like Salal in Pacific regions.
- Oregon grape (Mahonia spp.) or native currants (Ribes spp.) where regionally appropriate.
Which mid-season natives provide peak nectar and pollen?
Which mid-season natives provide peak nectar and pollen? Include prolific mid-season bloomers from late spring to mid-summer to sustain social bees and solitary species:
- Penstemon spp. – tubular flowers for long-tongued bees and some hummingbirds.
- Monarda (bee balm) – attracts bumblebees, honey bees, and butterflies.
- Asclepias (milkweeds) – essential for monarchs and important nectar for many bees.
- Phacelia tanacetifolia (in regions where native alternative is limited) or native equivalents – great nectar producer for many bee species.
Which late-season natives extend forage into autumn?
Which late-season natives extend forage into autumn? Plant fall-blooming species to maintain pollinator energy reserves before winter:
- Solidago (goldenrod) – high nectar and pollen late in the season; supports diverse insects.
- Aster spp. – diverse genera offering late-season nectar to bees and butterflies.
- Helianthus (native sunflowers) – provides nectar and seeds for birds and insects.
Which native grasses and structural plants are useful?
Which native grasses and structural plants are useful? Add native bunchgrasses and shrubs for nesting and overwintering habitat:
- Little bluestem (Schizachyrium scoparium) – stem structure for nesting and winter cover.
- Native bunchgrasses (e.g., Festuca spp., Poa spp.) – provide nesting microsites for ground-nesting bees.
- Native shrubs such as Ceanothus, Cephalanthus, and Vaccinium where climate allows.
How should a farm choose native species for local climate and soil?
How should a farm choose native species for local climate and soil? Match species to your ecoregion, soil texture, moisture regime, and elevation by selecting locally adapted ecotypes and consulting regional native-plant guides, university extension recommendations, and seed suppliers that indicate provenance.
How should a farm prioritize local ecotypes? Prioritize seed collected within the same EPA ecoregion or within 50 miles when possible; local ecotypes tend to establish faster, resist pests, and fit local phenology, according to state extension services and conservation organizations.
How to design effective native bloom strips on farms?
How to design effective native bloom strips on farms? Design bloom strips to maximize crop adjacency, season-long bloom, habitat heterogeneity, and connectivity while minimizing competition with crops and operations interference.
How wide and where should strips be placed? Place strips at field margins, between crops as headlands, or as cross-field corridors. Use widths of 3 to 6 m for narrow margins or 6 to 20 m for high-impact corridors; studies show that wider strips increase pollinator diversity and spillover into crops.
How to sequence plantings for continuous bloom? Sequence early shrubs, spring bulbs, spring herbs, mid-season perennials, and late-season asters and goldenrods. Use 40% perennial for long-term structure, 40% annual/biennial for early quick cover and mid-season boosts, and 20% grasses/shrubs for nesting and structure.
How to connect habitat across the farm? Link strips to hedgerows, remnant natural patches, and field-edge woody vegetation to form corridors that facilitate pollinator movement. Consider technology-based planning using AI or mapping tools; AI-guided pollinator corridor tools can optimize placement by microclimate and crop layout.
How should farms prepare soil and seedbeds for native bloom strips?
How should farms prepare soil and seedbeds for native bloom strips? Prepare a firm, weed-reduced seedbed through light tillage or herbicide fallow, firming, and timing seeding for species’ dormancy cues to maximize germination and reduce weed competition.
How to reduce weeds before seeding? Use a 6-12 month fallow with repeated shallow cultivation or a solarization/cover-crop sequence to exhaust annual weed seed banks. The USDA NRCS recommends reducing perennial weeds before establishing native seed mixes.
How and when to seed native mixes? Use drill seeding where possible at recommended seed depths (often surface-sown or shallow) in late fall to allow cold stratification for many native perennials. Use higher seed rates for annual nurse species to suppress weeds, followed by perennial establishment the following year.
How to use inoculants or soil amendments? Use minimal fertility amendments; native species often prefer low-fertility soils. Inoculate legumes with appropriate Rhizobium strains when including native nitrogen-fixing species, per extension guidance. For soil health strategies tied to microbial enhancement, consult on-farm microbial design principles such as in Designing On-Farm Microbial Consortia.
What are effective seed mixes and planting rates for bloom strips?
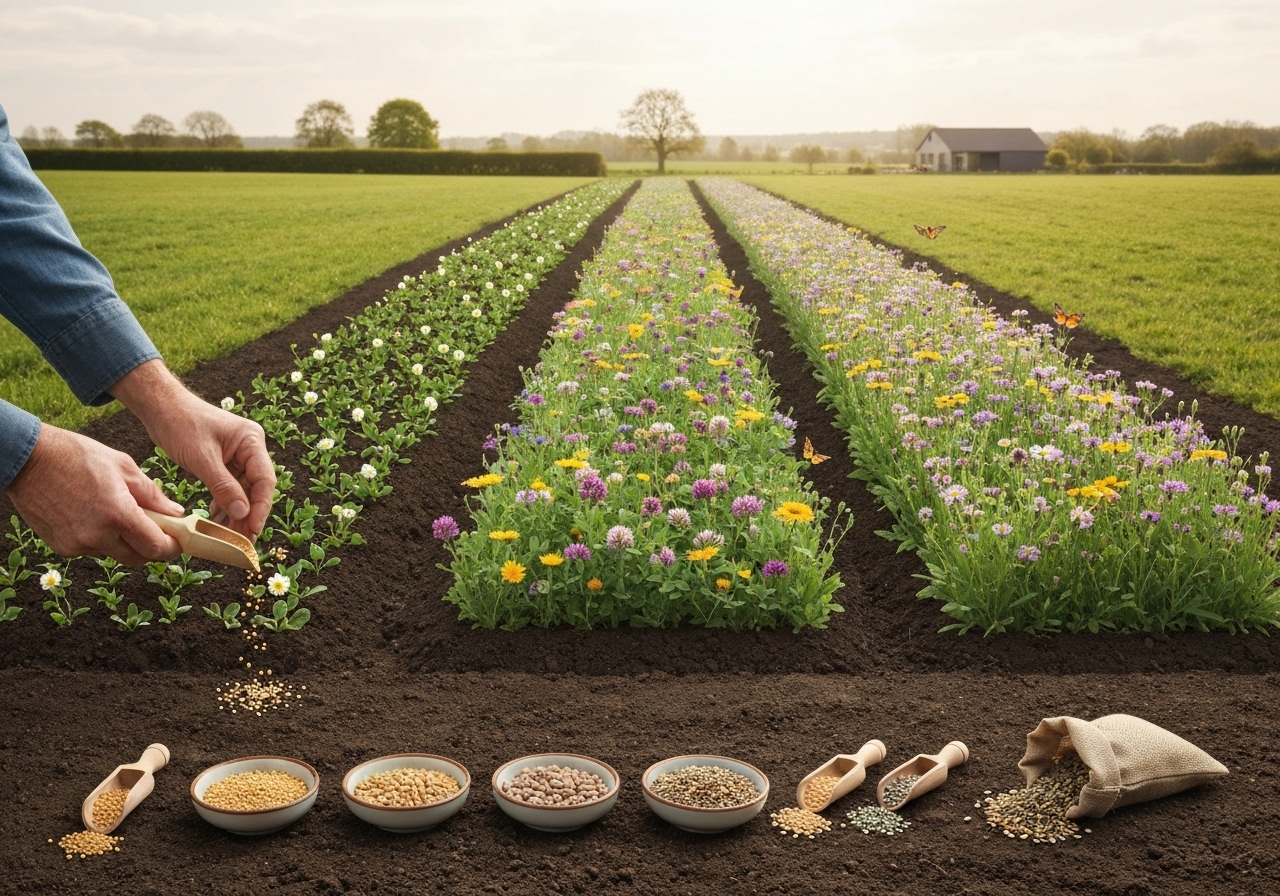
What are effective seed mixes and planting rates for bloom strips? Use seed mixes balanced by bloom season and functional group; follow region-specific rates and adjust for pure live seed (PLS).
What is a quick-start nurse mix for year one? Use a nurse mix with 30% annuals, 40% fast-establishing biennials, and 30% low-growing perennials by PLS. Example per acre (PLS-adjusted) for temperate regions:
- Phacelia or native annual buckwheat equivalent – .5-1 lb
- Biennial/buckthorn replacements (e.g., native poppies) – .5-1 lb
- Fast perennial wildflowers (e.g., Coreopsis, Monarda, Penstemon) – 2-3 lb
- Native bunchgrasses – 3-5 lb
What is a long-term perennial mix? Aim for 60-80% perennials by PLS including 20-30% grasses and 40-60% broadleaf forbs. Adjust total PLS rates to 8-15 lb/acre for low-density strips and 15-25 lb/acre for full meadow conversions depending on seed size and regional recommendations.
How to manage native bloom strips through the seasons?
How to manage native bloom strips through the seasons? Use a year-round management calendar: fall seeding, spring monitoring, conservative mowing, targeted spot weeding, and pesticide avoidance to maintain floral diversity and nesting habitats.
How should mowing be scheduled? Mow late (after seed set) once every 1-3 years in conservation strips to allow reseeding and structural habitat retention. For annual maintenance, use a single early-spring cut to control coarse grasses while retaining wildflower crowns; avoid mowing during peak nesting periods (April-August for many bees).
How to minimize pesticide impacts? Eliminate or reduce insecticide and systemic neonicotinoid use near bloom strips. Coordinate applications by time-of-day and floral phenology; apply pesticides when flowers are not in bloom and pollinators are less active.
What measurable benefits do native bloom strips provide to farms?
What measurable benefits do native bloom strips provide to farms? Native bloom strips deliver measurable increases in pollinator abundance, pollinator species richness, crop pollination rates, and some studies report yield increases and reduced pest pressure.
How much do pollinator visits increase? Studies summarized by the Xerces Society and academic meta-analyses indicate 20-40% increases in wild pollinator visitation to adjacent crops in well-designed habitat scenarios; a 2014 synthesis showed positive pollinator spillover up to 100 m into fields depending on strip size and landscape context.
How do strips affect yields and pest control? Research by Garibaldi et al. and others found that increased pollinator richness improves crop fruit set and value. Additional studies show enhanced biological control when strips host predators and parasitoids, reducing reliance on insecticides and delivering ecosystem services valued at hundreds to thousands of dollars per hectare in some cropping systems.
How to monitor pollinator response and habitat success?

How to monitor pollinator response and habitat success? Implement periodic monitoring using transect counts, pan trapping, and floral resource surveys to quantify pollinator visits, species diversity, and bloom cover; track crop pollination outcomes to correlate with habitat metrics.
How to set up a simple monitoring program? Use 10-15 minute timed walk transects during peak bloom weekly or biweekly to count bee visits per flower species. Use colored pan traps for baseline species lists. Record bloom percentage by species and changes year-to-year to adapt mixes.
How can technology help monitoring? Use drone imagery and sensor mapping to quantify floral cover and microclimates; integrate mapping with planning tools such as microclimate crop maps to refine placement and timing for maximum pollinator benefit.
What common mistakes should farmers avoid when establishing bloom strips?
What common mistakes should farmers avoid when establishing bloom strips? Avoid planting non-native ornamental mixes, installing strips too narrow to support diverse communities, failing to address weeds before seeding, and applying insecticides to flowering habitat.
How to prevent establishment failures? Prevent failures by preparing seedbeds properly, choosing regionally adapted ecotypes, including nurse species for initial weed suppression, and committing to at least 3-5 years of adaptive management so perennials can establish.
How to integrate bloom strips into crop rotations and low-input systems?
How to integrate bloom strips into crop rotations and low-input systems? Integrate bloom strips by placing them in rotation plans where they provide cover in fallow years, act as refuge areas during intensive cropping, and synchronize with adaptive low-input rotations to conserve pollinators and soil health.
How to align strips with crop rotations? Reserve edges and set-aside strips in rotation maps; use strips as low-input cover in years when fields rest. Consult adaptive rotation frameworks for small farms to harmonize strip placement with irrigation and harvest logistics (see adaptive rotation case studies in adaptive low-input crop rotation plans).
Where should farms source native seed and what procurement practices matter?
Where should farms source native seed and what procurement practices matter? Source seed from reputable native-seed suppliers that provide provenance information and PLS percentages; prefer regionally collected seed and avoid cultivars selected only for appearance with reduced nectar production.
How to verify seed quality? Request analysis certificates, verify germination rates, and check for weed seed content. Purchase seed early and verify storage conditions; large orders may need stratification protocols and staggered seeding across blocks to maintain genetic diversity.
What monitoring metrics indicate long-term success?
What monitoring metrics indicate long-term success? Track increases in pollinator species richness, sustained floral cover of target species, reduced pesticide application near strips, increased crop visit rates, and improved crop yields per unit area adjacent to strips.
What time frame shows measurable change? Expect measurable pollinator response within 1-3 years and optimized community composition and stable domination by perennials by year 3-5. Document trends annually and adjust seed mixes when species fail to persist.
Which native bloom strip designs work best for specific farm types?
Which native bloom strip designs work best for specific farm types? Tailor design by farm type: orchards benefit from wide hedgerow strips and shrubs; vegetable farms gain from dense nectar mixes along beds and headlands; field crop farms benefit from wider corridors and restored hedgerows.
How to design for orchards? Plant multi-layered strips perpendicular to wind and adjacent to orchard blocks to enhance pollinator movement and shelter. Include early-flowering shrubs for early-season pollinators and mid-season perennials overlapping tree bloom.
How to design for vegetable farms? Use narrow but frequent strips along rows and between beds with high floral density mixes to ensure easy movement for short-distance foragers like sweat bees and small bumblebees.
How to design for field crops and dryland farms? Use wide corridors combined with native grasses and forbs tolerant of drought. Pair strips with regenerative micro-irrigation if establishing in marginally dry conditions; see guidance on micro-irrigation for smallholder farms for integration options.
How can farmers scale bloom-strip benefits across landscapes?

How can farmers scale bloom-strip benefits across landscapes? Scale by coordinating with neighboring farms to create networks of connected habitat, targeting corridors that reduce distances between floral patches and increase landscape-level resilience for pollinators.
How to coordinate at landscape scale? Form farmer cooperatives or conservation partnerships to plan corridors, share seed contracts, and align management calendars. Use regional programs and incentives such as conservation cost-share programs and explore carbon or ecosystem-service markets to fund establishment costs.
What role do bloom strips play alongside technology-driven pollination tools?
What role do bloom strips play alongside technology-driven pollination tools? Use bloom strips as the ecological foundation that supports biological pollinators while complementary technologies such as robotic pollinators, sensors, and drones can fill gaps during shortages and help monitor habitat performance.
How to integrate with robotic or sensor tools? Combine habitat creation with sensor-guided monitoring and targeted interventions; research and pilot projects highlight effective integration between habitat restoration and technologies like drones for mapping and robotic pollinators for supplemental coverage when natural pollinator abundance is low (see technology case studies on drones and robotic pollinators for farms).
What are quick action steps for farmers starting native bloom strips this season?
What are quick action steps for farmers starting native bloom strips this season? Follow these 6 steps: 1) Map margins and high-impact adjacency areas; 2) Select local native species lists; 3) Prepare seedbeds with weed control; 4) Order certified regional seed and calculate PLS rates; 5) Seed in late fall or early spring as species require; 6) Adopt monitoring and a 3-5 year adaptive plan.
How to fund and scale initial costs? Explore cost-share and conservation incentive programs, cooperative seed purchasing, and phased establishment across fields. Track ecosystem-service returns including potential yield increases and pest reduction to justify investment.
What resources and references support best practices?
What resources and references support best practices? Rely on regional extension services, Xerces Society guidance on pollinator habitat, USDA NRCS technical guides, and peer-reviewed studies in journals such as Journal of Applied Ecology and Agriculture, Ecosystems & Environment for evidence-based decisions.
What additional reading is useful? Read technical planting guides from Pollinator Partnership and regional native-plant societies. Combine ecological guidance with farm planning resources such as microclimate crop-mapping tools to place strips where they will have maximum impact; refer to calendar-based microclimate planning for placement and timing.
What internal farm resources can help? Integrate bloom strips with existing regenerative practices on the farm including soil microbial design and crop rotations. For example, combine strip placement with microbial enrichment efforts and adaptive rotations to enhance both soil and pollinator health.
What are final implementation reminders? Start with pilot strips, monitor impacts, and scale iteratively. Keep chemical use minimal, favor local ecotypes, and design for year-round structure and bloom continuity to sustain pollinators and realize measurable farm benefits.
Suggested seed mix examples (temperate region)
Suggested seed mix examples (temperate region) Use these as starting templates and adapt species to local ecoregion and PLS rates.
Quick-start one-year nurse mix (per acre PLS)
- Annual nectar plants (e.g., native buckwheat equivalent) – 1 lb
- Biennials/fast perennials (e.g., Coreopsis, poppy relatives) – 2 lb
- Perennial wildflowers (Penstemon, Monarda) – 3 lb
- Native bunchgrasses – 4 lb
Long-term perennial-rich mix (per acre PLS)
- Perennial forbs (Echinacea, Rudbeckia, Aster) – 6-8 lb
- Shrubs and woody species (where space allows) – 1-2 lb equivalents
- Bunchgrasses – 5 lb
Where can farmers find local technical support?
Where can farmers find local technical support? Contact your state or provincial extension service, local native-plant societies, conservation districts, and experienced regional seed suppliers for site-specific recommendations and installation assistance.
How to use on-farm trials and partnerships? Run small-scale trials and document outcomes to build local expertise. Partner with universities or conservation NGOs for monitoring assistance and to access funding streams for habitat restoration.
How do native bloom strips complement other regenerative practices?
How do native bloom strips complement other regenerative practices? Use bloom strips to enhance pollinator services, which supports higher yields and diversity in regenerative polycultures; pair habitat creation with soil health measures to multiply benefits across production and ecosystem outcomes.
How to integrate with microbial and soil strategies? Integrate habitat planting with microbial seed coating or soil-consortia practices to improve establishment and plant performance; consult research on microbial seed coatings and on-farm microbial consortia for guidance on combined strategies.
How to align with climate-resilient farm planning? Align strip placement with microclimate maps and rotational planning to reduce drought risk and boost resilience; use landscape-level planning to prioritize corridors based on microclimate and farm layout.
Start small, plan for continuity, monitor outcomes, and iterate. Native bloom strips are a cost-effective, high-return investment that increases pollinator populations, strengthens crop pollination, and contributes to farm biodiversity and resilience.
AI-Driven IPM: Drone & Biocontrol Integration for Crops
AI-driven integrated pest management (IPM) combines automated sensing, drone-based surveillance and application, and biological control agents to reduce pest damage, lower chemical inputs, and increase resilience on crop farms. This article explains components, workflows, biocontrol selection, drone operations, AI decision systems, regulatory and safety considerations, and a practical implementation checklist for farms of varying scale.
What is AI-driven integrated pest management for crop farms?
AI-driven IPM uses machine learning, remote sensing, and autonomous platforms to detect pest and disease threats, forecast outbreaks, and guide targeted interventions that prioritize biocontrols and minimal pesticide use.
Follow IPM decision cycles: monitor, identify, set thresholds, choose control tactics, implement, and evaluate. International agencies such as FAO promote IPM principles as the standard for sustainable crop protection.
What are the core components of drone and biocontrol integration?
The core components are sensors and data, AI analytics, drone platforms for monitoring and delivery, and a portfolio of biological control agents.
Sensors and data
Sensors collect multispectral imagery, thermal maps, high-resolution RGB photos, and on-ground trap or sensor readings. Use soil moisture and microclimate sensors to contextualize pest risk.
AI analytics and decision support
AI models perform pest detection, species identification, severity scoring, spread forecasting, and treatment optimization. Combine image classification, time-series forecasting, and agent-based simulations.
Drones for surveillance and interventions
Drones perform two tasks: (1) repeated, automated scouting flights to map pest hotspots; (2) targeted delivery of biocontrol agents or micro-dose pesticides at specific coordinates.
Biocontrol agent options
Biocontrols include predatory or parasitic insects, entomopathogenic fungi and bacteria, viral biopesticides, pheromone-based mating disruption, and botanical extracts with low non-target impacts.
How do drones improve surveillance and early detection?
Drones enable frequent, low-cost, high-resolution surveys that reveal pest hotspots before they cross economic thresholds. Use fixed flight plans and repeat imaging to detect changes over time.
Implement automated change detection: AI flags new lesions, defoliation, yellowing patterns, or vector hotspots. Ground-truth with trap checks to validate model outputs on a schedule.
What sensors and flight parameters are recommended?
Use 1) multispectral cameras for vegetation indices (NDVI, GNDVI), 2) high-res RGB for visual diagnosis, and 3) thermal sensors for canopy stress detection. Fly at 20-60 meters depending on resolution needs.
Schedule flights: 1) weekly for high-value crops, 2) biweekly for vegetables, 3) monthly for field crops outside critical windows. Increase cadence during growth stages vulnerable to specific pests.
Which biocontrol strategies work best with drone deployment?
Biocontrol strategies that require spatial targeting or timed releases scale well with drones: augmentative releases of beneficial insects, aerial dispersal of entomopathogenic fungal spores, and distributed pheromone dispensers.
How to deploy predatory insects and parasitoids from drones

Deploy predatory mites, lacewings, and Trichogramma wasps using small-release canisters adapted for drone payloads. Program release points based on AI-identified hotspots to concentrate agents where impact is highest.
How to apply microbial biopesticides by drone
Apply liquid formulations of Bacillus thuringiensis or Beauveria bassiana in micro-droplets using low-pressure nozzles to maximize spore viability. Maintain formulation temperatures and avoid UV exposure during midday flights when possible.
How to use pheromones and mating disruption with drones
Install or drop slow-release pheromone dispensers across the orchard or field at mapped densities. Use drones to place dispensers in canopy strata inaccessible by ground teams.
How does AI guide intervention decisions and timing?
AI predicts outbreaks by integrating current surveillance, weather forecasts, crop phenology, and historical pressure. Models recommend interventions only when pest density and crop stage exceed economic thresholds to reduce unnecessary treatments.
Train models on labeled images and trap counts. Use ensemble methods: convolutional networks for imagery, gradient-boosted trees for tabular data, and probabilistic models for uncertainty quantification.
Which data inputs improve forecasts?
Include 1) high-frequency imagery, 2) trap counts and parasitoid release logs, 3) microclimate readings (temperature, humidity), 4) landscape context (adjacent crops, non-crop habitat), and 5) historical outbreak records.
How to convert AI output into actionable tasks
Translate probability maps into target polygons with recommended control types and timings. Integrate into farm management software to auto-schedule drone missions or dispatch field crews with GPS-guided waypoints.
What are practical workflows for integrating drones and biocontrol on the farm?
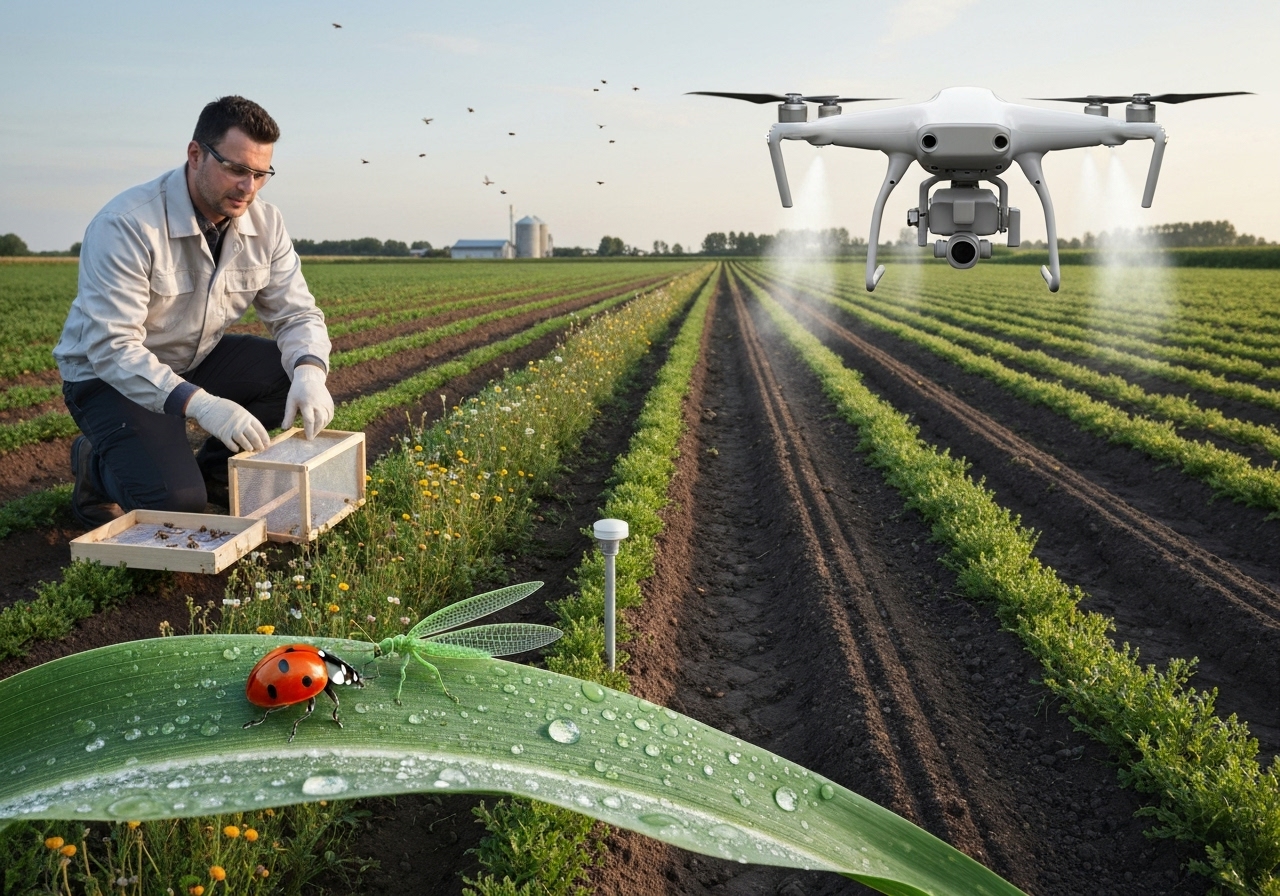
Implement four workflows: monitoring, targeted augmentation, precision application, and adaptive evaluation.
Monitoring workflow
Set automated flight plans; capture multispectral/RGB imagery; run AI detection; flag hotspots and suggest ground checks. Maintain trap networks for validation.
Targeted augmentation workflow
Map hotspot polygons; select appropriate biocontrol agent; schedule drone release at dusk or dawn to reduce predation; follow up with monitoring at 3, 7, and 14 days.
Precision application workflow

Use drone sprayers for microdoses of microbial or botanical treatments in 2-10 meter swaths over hotspots. Adjust droplet size and nozzle type to preserve agent viability.
Adaptive evaluation workflow
Compare pre- and post-intervention imagery, trap counts, and yield metrics. Retrain AI models with new labels to reduce false positives and improve ROI estimates.
What farm design and cultural controls support AI-driven IPM?
Design farm ecosystems to reduce pest establishment: crop rotations, diversified plantings, habitat for natural enemies, and microclimate zoning. Combine these measures with sensor-guided spatial planning.
Use crop rotation plans to break pest cycles and lower baseline pressure. See adaptive rotation guidance for small farms in the farm planning literature for structured rotations and staging.
Integrate cover crops and refugia to sustain predators year-round; use drone-assisted establishment of cover crops for rapid ground cover restoration.
Link to related content on soil and rotation: adaptive rotation plans and microbial consortia for soil health for integrated resilience.
How should farmers select and reared biocontrol agents?
Select agents that attack the target pest, adapt to local climate, and pose low non-target risk. Source organisms from certified suppliers, local rearing programs, or on-farm augmentation when feasible.
Rear agents using simple rearing cages, banker plants for parasitoids, or commercial formulations for microbial agents. Maintain rearing logs to track strain performance and release timing relative to crop stage.
What quality checks are necessary?
Perform genetic barcoding or morphological checks for species ID when introducing new agents. Test pathogen-free status for mass-reared insects and measure viability rates for microbial formulations.
What safety, regulatory, and environmental considerations apply?
Follow national pesticide and biocontrol regulations for registration, release permits, and environmental risk assessments. Record all drone flights and applications to ensure traceability and compliance.
Avoid releasing agents that threaten beneficial native species. Conduct small-scale pilot releases and monitoring before full deployment to document non-target effects.
How to manage biosafety when applying microbial agents by drone
Use only registered strains and maintain cold chain or stabilizers to avoid degradation. Label and store formulations according to manufacturer guidance and local law.
How to measure success: monitoring and evaluation metrics?
Track pest population trends, natural enemy abundance, crop damage percentages, treatment frequency, yield, and cost per saved yield unit. Use before-after-control-impact designs to attribute effects to interventions.
Calculate economic thresholds and measure change in pesticide use over seasons. Report carbon and environmental co-benefits where applicable to support sustainability claims and potential payments (e.g., carbon credits).
What are typical costs and ROI drivers for AI-driven IPM?
Costs: drone hardware and maintenance, sensor payloads, AI software subscriptions or development, biocontrol agent purchases or rearing infrastructure, and operational labor for validation and releases.
ROI drivers: reduction in broad-spectrum pesticide use, yield protection, premium market access for low-residue produce, labor savings from targeted treatments, and ecosystem service gains such as pollination and natural pest suppression.
How to implement AI-driven IPM on small and mid-sized farms?
Start with a phased approach: pilot monitoring, validate AI on a single field, run targeted biocontrol releases, then scale. Use service providers or co-op models to share drone and analytics costs.
Leverage existing farm plans: align IPM mapping with microclimate zones, cover crop schedules, and rotation plans to reduce redundant interventions. See mapping and microclimate resources for design integration.
Reference on microclimate mapping: crop maps by microclimates and drone-enabled polyculture practices described in related posts for integration ideas.
What are practical first-year milestones?
- Month 1: Install sensors and set baseline trap networks.
- Months 2-3: Run weekly drone scouting and label 200+ images for model calibration.
- Months 4-6: Conduct first targeted biocontrol release and monitor impact at 3, 7, and 14 days.
- Months 7-12: Evaluate pesticide use reduction, yield protection, and adjust thresholds.
What challenges and limitations should users expect?
Expect data quality issues, pest ID confusion in mixed infections, weather constraints for drone flights, and logistical limits for mass releases. Budget for model retraining and routine sensor maintenance.
Address privacy and neighbor concerns by communicating flight plans and using geofencing. Plan for redundancy: ground checks and manual traps to corroborate AI output.
What are recommendations for vendors and technology choices?
Prioritize modular systems that separate sensing, analytics, and drone platforms to avoid vendor lock-in. Choose drones with payload flexibility, proven nozzle systems for micro-dosing, and secure data export options.
Prefer AI systems with retraining capability and open data APIs so farmers can export imagery for third-party analyses or regulatory reporting.
How can farms scale IPM services regionally?
Scale using cooperative service models, mobile drone teams, or subscription analytics that pool data to improve regional models. Share anonymized data to improve detection accuracy across landscape types.
Integrate IPM outputs with landscape-level habitat planning to strengthen natural enemy populations regionally, and coordinate release timing to avoid uncontrolled migrations of pests.
What are final implementation checklists and best-practice rules?
Follow this checklist:
- Install traps and baseline sensors before deploying drones.
- Create labeled image datasets for local pest species.
- Define economic thresholds for each crop and pest.
- Select biocontrol agents aligned to pest life stage and climate.
- Use drones for targeted release and keep records of time, location, and batch IDs.
- Evaluate outcomes with standardized metrics and retrain AI every season.
Adopt these best-practice rules: prioritize prevention, validate AI outputs with ground checks, stagger releases to match pest phenology, and document all applications for compliance and learning.
Where can farmers learn more and find partners?
Consult national IPM extension services, university research centers, and agricultural technology cooperatives for training and access to co-op drone fleets. Review FAO and national agriculture agency guidance for permitted biocontrol agents and registration steps.
For case studies on robots and pollination networks that complement IPM, consult insights on drone-assisted pollination and pollinator corridor design to maximize ecosystem services.
Related reading on pollination and drone roles: drone-assisted pollination and ecosystem services and drone-enabled regenerative polycultures described in regional practice notes: regenerative polyculture workflows.
What are the next technological trends to watch?
Watch for 1) edge-AI on drones enabling on-board target detection, 2) swarm release mechanisms for synchronized biocontrol deployment, 3) improved spore encapsulation for longer aerial viability, and 4) federated learning models that improve forecasting while preserving farm data privacy.
Adopt these trends as maturity grows: begin with centralized analytics, then evaluate edge deployments to reduce latency and enable instant interventions.
This guidance equips crop managers to design AI-driven IPM systems that combine drone capabilities, predictive analytics, and ecologically sound biocontrols to reduce chemical reliance, protect yields, and enhance long-term farm resilience.
Backyard Mini-Greenhouse Venting Plan for Year-Round Growth
Backyard Mini-Greenhouse Venting Plan for Year-Round Growth
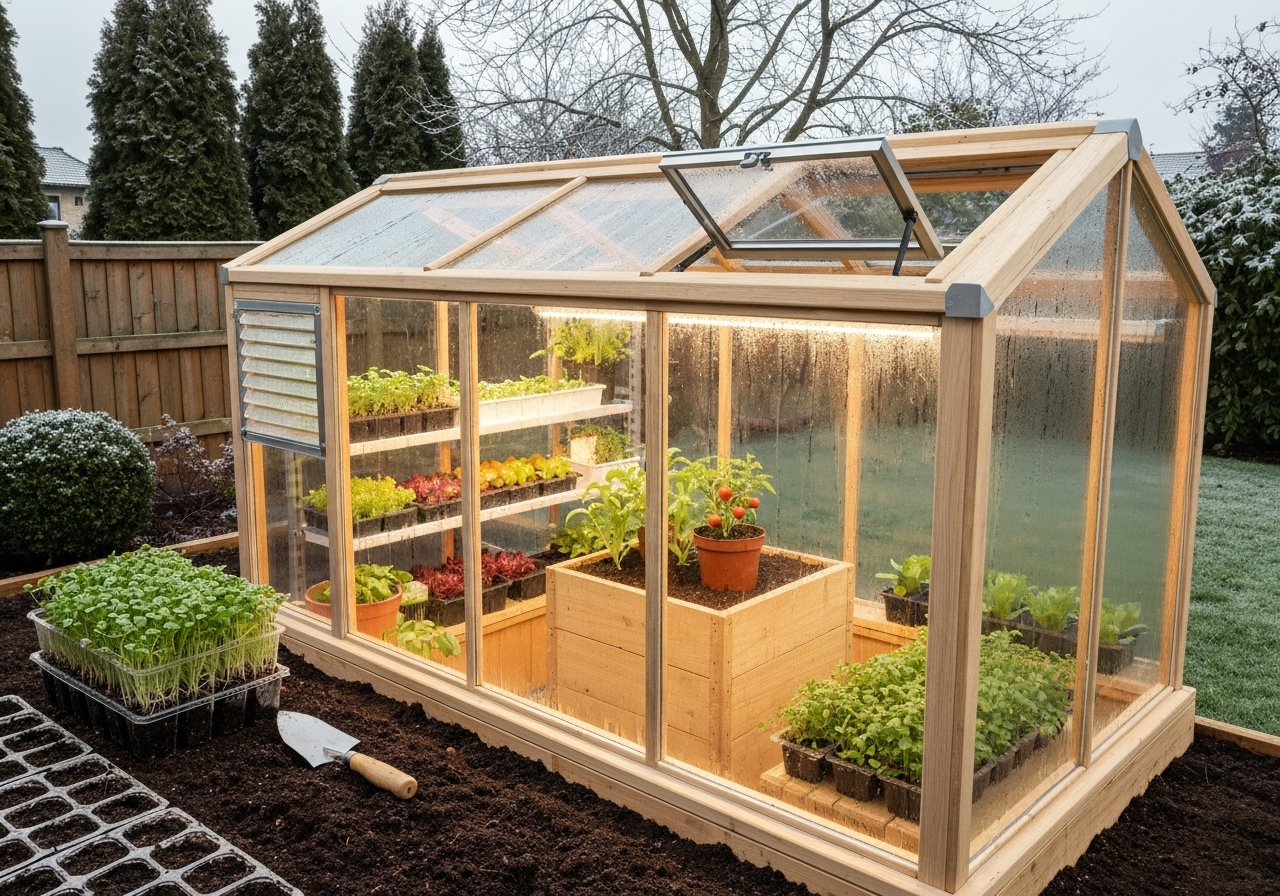
Design a reliable venting plan to keep temperatures, humidity, and airflow within optimal ranges for year-round growing in a backyard mini-greenhouse.
This guide gives step-by-step venting strategies, calculations, equipment choices, seasonal schedules, and maintenance actions to prevent heat stress, mold, and frost problems while extending your growing season.
What is a backyard mini-greenhouse venting plan?
A backyard mini-greenhouse venting plan is a layout and schedule for moving air through a small structure to control temperature, humidity, and gas exchange.
The plan includes passive vents, fan placement, control logic, seasonal settings, and maintenance steps to support plant health year-round.
Why does ventilation matter for year-round growing?
Ventilation controls four key variables: temperature, humidity, carbon dioxide level, and pathogen dispersal.
Without ventilation, heat builds quickly, humidity spikes, and diseases increase; with proper ventilation, plants grow faster and resist stress.
Extension publications and horticultural guides from university extensions and the Royal Horticultural Society emphasize ventilation as a principal factor in greenhouse productivity.
How do I choose passive versus active ventilation?
Use passive ventilation when you want low-cost, low-energy airflow through vents or roll-up sides.
Use active ventilation when you need reliable, measurable air-exchange rates, especially in hot summers or tightly sealed mini-greenhouses.
Choose a hybrid approach for most backyard units: passive vents for mild conditions and fans for extreme heat or when precise control is required.
When is passive ventilation adequate?
Passive ventilation handles mild temperature swings and moderate airflow needs when cross-ventilation is possible and wind exposure exists.
Design passive vents to provide open area equivalent to 10-20% of floor area; many extension services recommend about 15% openable area.
When do I need active ventilation?
Install fans when you need consistent air changes per hour, when the greenhouse is tight, or when internal heat loads from lights or sunny days exceed passive cooling capability.
Automated fans are essential in warm climates and for greenhouse builds with polycarbonate or double-layer plastic glazing that trap heat.
What are the basic principles for airflow in a mini-greenhouse?
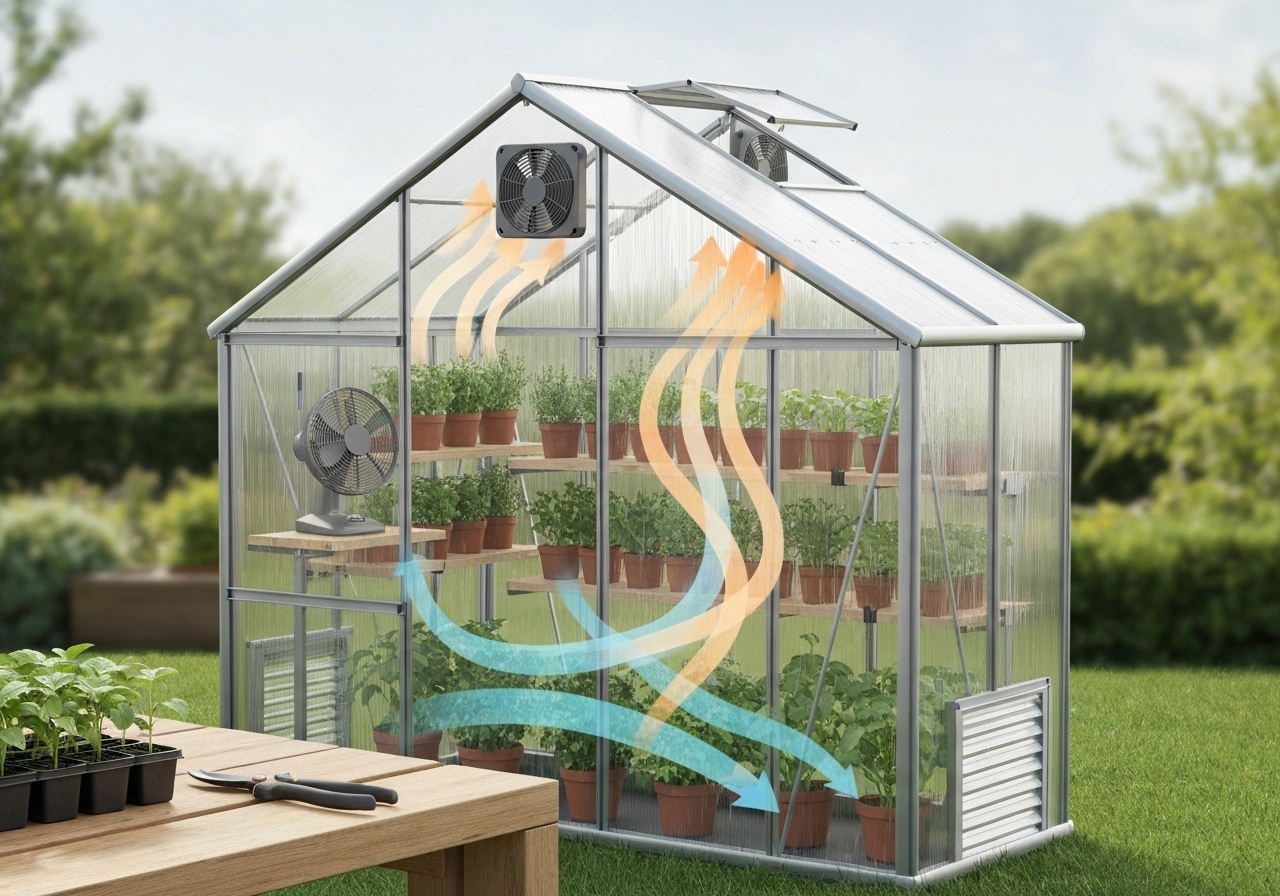
Create airflow from low intake to high exhaust to utilize natural convection and horizontal movement for uniform temperatures.
Position intake vents low (near floor) and exhaust vents high (ridge or upper wall) to remove warm air efficiently.
Include cross-ventilation by placing intake and exhaust on opposite sides when possible to maintain even horizontal air movement.
How to size vents and fans for a mini-greenhouse?
Calculate fan size using greenhouse volume and desired air changes per hour (ACH).
Use the formula: Required CFM = Volume (cu ft) x ACH / 60.
Example: An 8 ft x 10 ft x 7 ft structure has volume 560 cu ft. For 30 ACH, CFM = 560 x 30 / 60 = 280 CFM.
Aim for 15-30 ACH for typical cooling needs; use higher ACH (30-60) during extreme heat or when supplemental lights add heat.
Follow university extension guidance for local climate adjustments; many extensions provide ACH and vent-area recommendations for hobby greenhouse sizes.
How to size passive vent area
Use an openable vent area equal to 10-20% of floor area; 15% is a practical target for balanced performance.
For an 8×10 greenhouse (80 ft2), aim for 8-16 ft2 of total vent area; split between low inlets and high exhausts.
What equipment choices work best for mini-greenhouse venting?
Select a combination of vents, fans, thermostats, and controllers that match your structure and energy goals.
Passive equipment options
- Ridge vents: use on peaked roofs to exhaust hot air.
- Sidewall vents: use hinged or sliding vents for cross-ventilation.
- Roll-up sides: use in hoop-style mini-greenhouses for large open area.
- Insect screens: use fine mesh to keep pests out while allowing airflow.
Active equipment options
- Exhaust fans: choose inline or wall-mounted fans sized by CFM.
- Intake louvers: use gravity or powered louvers to balance airflow.
- Circulation fans: install small oscillating fans to eliminate dead zones.
- Thermostats and humidistats: automate fan activation based on thresholds.
- Solar-powered fans: use for off-grid, low-energy setups with modest CFM needs.
Automated vent openers
Use wax-expansion vent openers for passive automation that requires no electricity for roof vents.
Use linear actuators or 12V controllers when precise, programmable control is required and electricity is available.
How should I place vents and fans for best effect?
Place exhaust fans at the highest point or on the leeward wall for maximum heat removal.
Place intake vents on the downwind or shaded side, low on walls to draw cooler air in under plants.
Place circulation fans inside the structure to move air gently across plant canopies and prevent stratified pockets.
How to control humidity without harming temperature control?
Target relative humidity of 50-70% for most vegetables and herbs; reduce humidity during foliage-disease-prone periods.
Use timed venting, increased air exchanges, and dehumidifying fans to reduce humidity after watering or during warm, still days.
Use heating in winter combined with limited ventilation to reduce condensation while maintaining adequate CO2 exchange.
How to manage winter ventilation and frost protection?
Vent less at night when outside temperatures drop; ventilate during daytime sunny periods to use solar gain while avoiding cold drafts at night.
Install thermal curtains or removable insulation to conserve heat at night while using vents during the day to control humidity.
Place thermal mass such as water barrels to moderate nighttime temperature swings and reduce the need for extended ventilation during cold spells.
When should I vent in freezing conditions?
Vent briefly on bright days to reduce humidity but close vents rapidly if outside temperatures drop near freezing to protect tender plants.
Monitor leaf temperature and use frost cloth when outside air threatens plant tissue even if internal air seems acceptable.
How to integrate shading with venting?
Install internal or external shade cloth to lower peak solar heat and reduce fan runtime during hot days.
Use reflective whitewash or retractable shade to change shading level seasonally and respond to ventilation capacity.
How to automate and schedule ventilation?
Use thermostats to trigger exhaust fans at set temperatures and humidistats for humidity-driven activation.
Use timers for periodic air exchanges and to run circulation fans continuously at low speed to stabilize microclimate.
Combine sensors to create rules: run fans when temperature exceeds X, or humidity exceeds Y and it is daytime.
Recommended sensor settings
- Temperature setpoint: 68-78 F for cool-season crops, 75-85 F for warm-season crops.
- Humidity setpoint: 50-70% during active growth; reduce to 40-60% when disease pressure is high.
- Vent hysteresis: set 1-3 F or 5% RH hysteresis to prevent rapid cycling.
How to calculate an example venting system for a backyard mini-greenhouse?
Step 1: Measure interior volume (length x width x height).
Step 2: Choose target ACH. Use 15-30 ACH as a general target; use 30+ for high-light, high-heat scenarios.
Step 3: Calculate required CFM: CFM = Volume x ACH / 60.
Step 4: Size passive vents to provide ~15% openable area of floor space; split low and high openings.
Example: 6 ft x 8 ft x 6 ft volume = 288 cu ft. Target ACH = 30. Required CFM = 288 x 30 / 60 = 144 CFM. Choose a fan rated slightly higher (160-200 CFM) to allow filter resistance and degradation over time.
What are common pitfalls and how to avoid them?
Failing to provide matching intake area causes fans to pull from gaps and create negative pressure and drafts.
Over-venting in winter wastes heat; under-venting in summer causes heat stress. Use sensors and hysteresis to stabilize control.
Using too-fine insect screens without compensating for the reduced airflow increases fan load; choose appropriate mesh and size fans accordingly.
How do I prevent disease while maintaining ventilation?
Vent regularly to reduce leaf wetness hours and lower pathogen prevalence.
Space plants and use circulation fans to dry foliage rapidly after watering or rain events.
Sanitize vents, fans, and surfaces seasonally to remove spores and biofilms that spread disease.
How to include pest and pollinator considerations in venting?
Use fine mesh screens for pest exclusion but design removable or hinged sections for manual pollinator access during crop flowering.
Integrate timed openings or place small port-access panels for bees or mechanical pollinators if natural pollination is needed.
What low-energy options exist for sustainable venting?
Install solar-powered ventilation fans for remote or grid-limited sites to run exhaust fans during peak sun when ventilation need is greatest.
Use passive solar chimney designs to enhance natural convection through a darkened duct that heats and rises with sun exposure.
Use thermal mass to reduce both heating and cooling energy use and to smooth diurnal temperature swings.
How should I maintain ventilation components?
Inspect and clean fan blades, housings, and louvers at least twice per season.
Lubricate fan bearings, tighten mounts, and check electrical connections for wear annually.
Replace insect screens or repair tears to prevent clogging and ensure proper airflow.
What seasonal checklist will keep venting reliable year-round?
Spring: Clean vents and fans; test controllers; remove winter insulation; check for spring pests.
Summer: Monitor fan runtime and increase shading if fans are maxing out; check for concentrated heat zones.
Autumn: Service heaters and thermal curtains; verify vents close fully for cool nights.
Winter: Check thermal mass and insulation; run ventilation only when humidity control is required during daytime warming.
How does microclimate mapping inform venting choices?

Use microclimate mapping around your site to locate sun, wind, and thermal pockets that affect vent placement and sizing.
Map sunflecks and wind corridors to orient intake vents for cool air and exhaust vents where heat collects.
Reference site microclimate strategies like those used in microclimate mapping guides to optimize greenhouse orientation and vent layout; see resources on microclimate mapping for implementation ideas.
How do crop rotation and plant choice affect ventilation?
Rotate crops to seasons and choose varieties adapted to the controlled greenhouse microclimate to reduce extreme ventilation requirements.
Plan warm-season crops during months when ventilation capacity meets heat loads and cool-season crops when limited venting conserves warmth.
Use crop rotation planning ideas from small-farm rotation strategies to sequence greenhouse beds for disease break and humidity management; see adaptive rotation plans for small-scale examples you can adapt to greenhouse beds.
How does irrigation strategy interact with ventilation?
Use drip and sub-irrigation to lower canopy wetness and reduce humidity spikes after watering.
Time irrigation to early morning so plants can dry during the day with ventilation active.
Incorporate regenerative micro-irrigation techniques to match water delivery to plant demand and minimize unnecessary humidity increases; learn low-water strategies at regenerative micro-irrigation.
How to troubleshoot common ventilation problems?
If hotspots persist, add circulation fans and adjust louver placement to move air to dead zones.
If humidity stays high despite fans, increase air changes or reduce irrigation timing; check for condensation sources such as leaks or cold surfaces.
If fans fail to move air, inspect for clogged screens, blocked intakes, or insufficient intake area.
How to test and validate your venting plan?
Install temperature and humidity dataloggers at plant canopy height and near exhaust vents.
Run test cycles at high solar input and measure maximum temperatures, minimum humidity, and recovery times after vent activation.
Adjust fan CFM, vent area, and control setpoints until maximum temperature, RH excursions, and CO2 drops are within acceptable ranges for your crops.
What final design checklist should I follow before planting?
- Confirm fan CFM using volume x ACH / 60 calculations.
- Verify intake area equals or exceeds fan manufacturer recommendations; ensure low and high vent separation.
- Install sensors at canopy level and test control hysteresis settings.
- Fit insect screens and consider removable sections for pollination.
- Install thermal curtains and place thermal mass for winter buffering.
- Create a seasonal venting schedule and perform a dry-run automation test.
Which local resources and references are helpful?
Consult your regional university extension for specific ACH and vent-area guidance for local climate conditions.
Use Royal Horticultural Society and extension publications for crop-specific humidity and temperature ranges.
Rely on manufacturer specifications for fan CFM and static pressure when selecting equipment.
How to start with a simple, low-cost backyard venting setup?
Start with two passive vents—one low inlet and one high ridge exhaust—and add an inexpensive thermostat-controlled fan rated for your calculated CFM.
Install a circulation fan and insect screens, test with dataloggers, and upgrade shading or add thermal mass as you monitor performance.
Gradually automate with a fan controller and solar power if grid power is a concern.
What ongoing practices ensure year-round success?
Monitor microclimate data weekly, adjust setpoints seasonally, and maintain equipment seasonally to extend the life of components.
Rotate crops, use targeted irrigation, and apply sanitary practices to reduce the need for aggressive ventilation due to disease outbreaks.
Integrate venting choices with broader on-farm practices such as crop mapping and microbial soil health strategies to support resilient production systems; explore mapping and soil enrichment methods in related resources on microclimate farming and microbial consortia design.
Implement venting plans iteratively: measure, adjust, and record outcomes to refine settings for your specific backyard microclimate.
Further reading and practical references
Review university extension greenhouse ventilation guides and the Royal Horticultural Society for crop-specific setpoints and safety margins.
Consult small-farm design resources for integrating vents with rotation and soil health programs, including microclimate farming and microbial consortia design resources.
Plan, test, and adapt your backyard mini-greenhouse venting plan to achieve stable year-round production with minimal energy and maximum plant health.
Soil-to-Cellar Method: Harvest Root Vegetables Year-Round
Soil-to-Cellar Method: Harvest Root Vegetables Year-Round
Soil-to-Cellar method provides step-by-step guidance to harvest and store root vegetables so they supply fresh produce year-round.
What is the Soil-to-Cellar Method?

Soil-to-Cellar method means harvest, cure, and store root vegetables using field and cellar practices that extend freshness for months.
Soil-to-Cellar method focuses on gentle lifting, appropriate curing, controlled storage temperature, and humidity to slow respiration and decay.
Why harvest root vegetables correctly?
Harvest root vegetables correctly to maximize shelf life, maintain flavor, and prevent postharvest loss.
Harvest root vegetables correctly reduces mechanical damage, which is the primary cause of storage rot (USDA postharvest guidance).
Harvest root vegetables correctly preserves nutritional quality and marketable yield, saving labor and input costs.
When should you harvest common root crops?
When to harvest varies by species, maturity indicators, and intended storage method.
When to harvest carrots
When to harvest carrots: harvest when roots reach the expected diameter on the seed packet and before heavy frost if not frost-hardy varieties.
When to harvest carrots: check crown shoulders; firm shoulders and 1/2 to 1 inch diameter indicate edible maturity for most varieties.
When to harvest beets
When to harvest beets: harvest at 1.5 to 3 inches diameter for best texture and storeability.
When to harvest beets: allow some delayed harvest to increase sugar content, but avoid woody roots from overmaturity.
When to harvest parsnips
When to harvest parsnips: harvest after one frost for improved sweetness or leave in ground with mulch for winter harvesting.
When to harvest parsnips: dig when roots reach 1 inch or more at shoulder; avoid leaving in waterlogged soils.
When to harvest turnips and rutabagas
When to harvest turnips: harvest at 2 to 3 inches diameter for best texture; harvest rutabagas at 3 to 5 inches for storage quality.
When to harvest turnips and rutabagas: avoid spring warmth that triggers bolting or pithy texture.
When to harvest onions and garlic
When to harvest onions: harvest when tops fall over and begin to dry; cure before storage.
When to harvest garlic: harvest when lower leaves brown but 3 to 4 green leaves remain to avoid bulb abortion.
When to harvest potatoes and sweet potatoes
When to harvest potatoes: harvest maincrop potatoes after foliage dies back; cure in the dark for skin set before long storage.
When to harvest sweet potatoes: harvest before frost and cure at warm, humid conditions to develop protective skins.
How to harvest root vegetables: tools and technique

How to harvest root vegetables: use hand tools and gentle techniques to avoid cuts, bruises, and skin rupture.
Tools to prepare
- Tools to prepare: spading fork or broadfork to lift soil under roots without slicing them.
- Tools to prepare: digging spade for larger roots and flat trowels for precision work around small roots.
- Tools to prepare: clean boxes, bins, and soft brushes for field handling.
Field lifting technique
Field lifting technique: loosen soil 6 to 12 inches away from plants to avoid direct contact with cutting edges.
Field lifting technique: lever fork tines under the root and lift vertically to pop root out with minimal damage.
Field lifting technique: remove excess soil by hand; do not scrub or beat roots in the field.
Sorting and immediate field handling
Sorting and immediate field handling: sort into sound, slightly damaged, and damaged categories immediately after harvest.
Sorting and immediate field handling: place sound roots in clean bins with padding and keep them shaded to avoid sunscald and dehydration.
How to clean and cure before storage
How to clean and cure before storage: clean lightly and cure roots to toughen skins and heal wounds before long storage.
Cleaning guidelines
Cleaning guidelines: remove loose soil by gentle brushing or low-pressure water spray; avoid pressure washing that damages skins.
Cleaning guidelines: remove tops to 1/2 inch on carrots and beets to reduce moisture loss while avoiding cuts into the crown.
Curing temperatures and time
Curing temperatures and time: cure sweet potatoes at 85 F and 85-90% RH for 5 to 10 days to develop skin and heal harvest wounds (University research consensus).
Curing temperatures and time: cure onions and garlic at 75-80 F and 60-70% RH for 7 to 14 days until necks seal and outer skins dry.
Curing temperatures and time: do not cure carrots, beets, or parsnips at warm temperatures; allow a short field-dry period then cool promptly.
How to store root vegetables in cellar and other systems
How to store root vegetables in cellar: store at species-specific temperature and humidity ranges to minimize respiration and sprouting.
Cellar, root cellar, and cool storage
Cellar, root cellar, and cool storage: maintain 32 to 40 F for most root crops, and 90-95% relative humidity to prevent desiccation.
Cellar, root cellar, and cool storage: keep apples separate from vegetables because apples emit ethylene that accelerates sprouting and decay (USDA guidance).
Storage by crop: carrots, beets, and parsnips
Storage by crop: carrots store at 32-34 F and 95% RH for 6 to 12 months when packed in damp sand or peat.
Storage by crop: beets store at 32-34 F and 95% RH for 4 to 6 months when kept with tops removed and packed in sand or sawdust.
Storage by crop: parsnips store at 32 F and 95% RH and can be left in ground with insulating mulch for winter harvest, reducing cellar needs.
Storage by crop: turnips, rutabagas, radishes
Storage by crop: turnips and rutabagas store at 32-34 F and 95% RH for 3 to 6 months in sand or crate bins.
Storage by crop: radishes do not store long; keep at 32 F, 95% RH, and consume within 1-2 months.
Storage by crop: onions, garlic, potatoes, sweet potatoes
Storage by crop: onions store at 32-40 F and 65-70% RH after full curing for 4 to 6 months.
Storage by crop: garlic stores best at 32-40 F and 60-65% RH for 6 to 9 months after curing.
Storage by crop: potatoes store at 38-40 F and 90-95% RH in dark conditions to prevent greening and sprouting; sweet potatoes store at 55-60 F and 85-90% RH after curing.
Packing methods for cellars
Packing methods for cellars: pack roots in damp sand, peat, or sawdust in wooden boxes with drainage and ventilation.
Packing methods for cellars: layer sand and roots, leaving 1 to 2 inches between roots to reduce contact and spread of rot.
Packing methods for cellars: use perforated plastic crates for airflow when humidity can be controlled by cellar wetting or humidifiers.
How to build and maintain proper storage environment
How to build and maintain proper storage environment: control temperature, humidity, ventilation, and light exposure to reduce losses.
Temperature control
Temperature control: install calibrated thermometers in several cellar locations and keep readings stable within the crop’s range.
Temperature control: avoid freezing; insulate cellar walls and use passive heat sources to prevent sudden drops.
Humidity control
Humidity control: maintain 90-95% RH for most roots by wetting burlap, using wet sand, or adding a small water source to increase humidity.
Humidity control: reduce humidity to 60-70% for onions and garlic to avoid mold; provide airflow to dry necks.
Ventilation and ethylene management
Ventilation and ethylene management: provide gentle airflow to remove carbon dioxide and ethylene without drying roots.
Ventilation and ethylene management: separate ethylene-producing crops like apples from roots to delay sprouting and senescence.
How to monitor stored crops and manage losses
How to monitor stored crops: inspect stored roots weekly during the first month and monthly afterward, removing defective units immediately.
How to monitor stored crops: remove any rotting or soft roots to prevent spread through contact and spores.
How to monitor stored crops: record temperatures, humidity, and loss rates to improve next season’s practices.
How to handle common storage disorders and pests
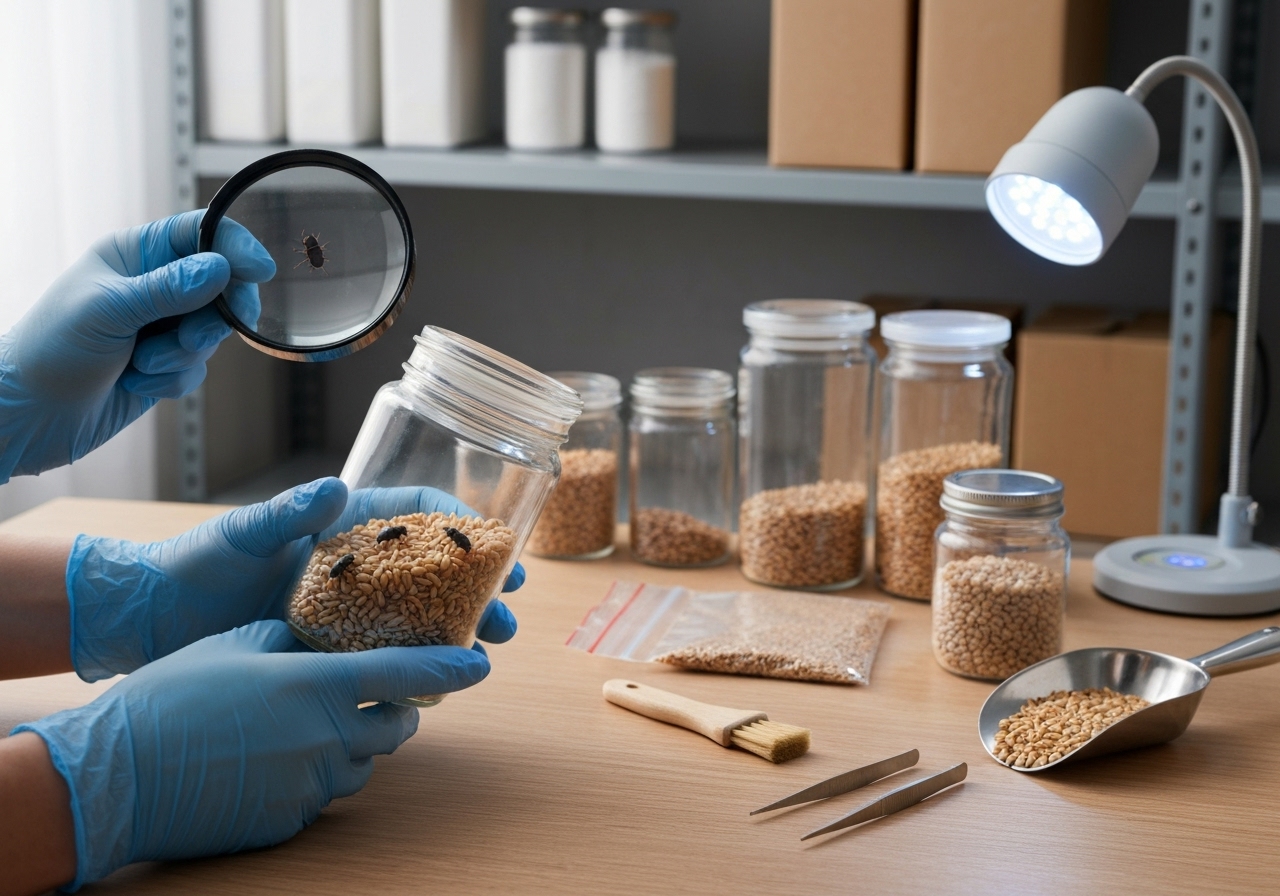
How to handle storage disorders: treat physiological disorders by adjusting temperature and humidity and removing affected roots.
Common disorders
- Common disorders: chilling injury in sweet potatoes occurs below 50 F causing pitting; avoid low temperatures for sweet potatoes.
- Common disorders: internal breakdown in carrots from irregular watering; manage by consistent field moisture and rapid cooling postharvest.
- Common disorders: sprouting in potatoes at warmer cellar temps; store cool and in dark conditions.
Storage pests
Storage pests: rodents and insects cause significant losses; seal cellars, use metal bins, and set traps outside the produce area.
Storage pests: inspect for storage insect signs like frass, holes, or webbing and use integrated methods to remove infestations.
How to plan plantings and rotations for year-round root supply
How to plan plantings: stagger plantings, choose long-storage varieties, and use succession sowings to smooth supply.
How to plan plantings: schedule early, mid, and late plantings to match harvest windows and curing capacity.
How to plan plantings: consult a local microclimate crop calendar to align planting dates with local frost dates and soil temps.
How to plan plantings: use diversified small-farm crop maps to match varieties and planting dates to microclimates and extend harvest windows.
Crop rotation and soil health
Crop rotation and soil health: rotate root crops with legumes and green manures to reduce soil-borne disease and improve fertility.
Crop rotation and soil health: adopt low-input rotation plans that limit repeated root crop planting on the same site to reduce nematode and pathogen pressure.
Crop rotation and soil health: learn from adaptive rotation frameworks to limit buildup of pests and enhance yield stability with fewer inputs.
Crop rotation and soil health: consider adaptive low-input rotation plans for small fields and successive root crop cycles.
Soil biology and pre-harvest conditioning
Soil biology and pre-harvest conditioning: build soil structure and microbial balance to produce firm, less damaged roots at harvest.
Soil biology and pre-harvest conditioning: integrate organic amendments and microbial consortia to improve root health and reduce postharvest disorders.
Soil biology and pre-harvest conditioning: reference practical soil microbiology guides to optimize soil life before planting and harvest, such as those on designing on-farm microbial consortia.
Soil biology and pre-harvest conditioning: see principles in designing on-farm microbial consortia for improved root development and storage resilience.
How to adapt soil-to-cellar on small farms and homesteads
How to adapt soil-to-cellar on small farms: scale methods to match harvest volumes and available cellar space.
How to adapt soil-to-cellar on small farms: use a mix of in-ground overwintering, insulated crates, and small root cellar bins to spread risk.
How to adapt soil-to-cellar on small farms: prioritize proper curing and gentle handling over expensive facilities to get the best storage outcomes.
How to troubleshoot short storage life
How to troubleshoot short storage life: audit harvest timing, damage rates, curing conditions, and cellar RH and temperature logs.
How to troubleshoot short storage life: adjust one factor at a time, such as improving curing or reducing handling damage, and track improvements.
How to use stored roots through the year
How to use stored roots: plan monthly consumption and rotate older bins to the front to use them first and avoid waste.
How to use stored roots: preserve excess by fermenting, pickling, or freezing to capture peak yields and extend supply beyond cellar life.
Which varieties store best?
Which varieties store best: choose varieties labeled for storage and long-keeping in seed catalogs and extension trials.
Which varieties store best: prefer heavy-skinned potatoes, firm-fleshed carrots, and storage-type onions for multi-month cellaring.
What research supports these practices?
What research supports these practices: USDA postharvest guides provide crop-specific storage parameters and curing recommendations.
What research supports these practices: university extension trials (e.g., University of Minnesota, Cornell) report best storage ranges and handling protocols for root crops.
What research supports these practices: practical on-farm trials and regenerative farm case studies confirm that soil health and gentle handling reduce storage losses.
How to document and improve your soil-to-cellar system
How to document and improve your soil-to-cellar system: keep harvest logs recording date, field, variety, yield, damage rate, and storage conditions.
How to document and improve your soil-to-cellar system: review logs annually and modify variety choices, planting dates, and curing protocols to reduce losses.
How to document and improve your soil-to-cellar system: integrate learnings with farm planning tools and microclimate mapping to refine long-term supply; consider microclimate mapping resources to refine timing.
How to document and improve your soil-to-cellar system: use microclimate zoning and mapping methods to place crops for optimal maturation and storage (see microclimate mapping resources).
How to combine cellaring with modern tools
How to combine cellaring with modern tools: use simple sensors and data loggers to track temperature and humidity and maintain conditions automatically.
How to combine cellaring with modern tools: add humidity controllers or small scale HVAC to stabilize conditions during seasonal shifts.
How to get started this season
How to get started this season: choose one root crop, test harvest, curing, and storage at small scale and document results.
How to get started this season: refine a single protocol for harvest and storage and scale up after two successful rotations.
How to get started this season: prioritize farm planning that integrates rotation, soil health practices, and staggered plantings to support year-round supply.
References and practical resources
References and practical resources: USDA postharvest handling publications provide species-specific storage ranges and curing protocols.
References and practical resources: university extension publications (University of Minnesota, Cornell, Washington State) supply practical trials and variety recommendations.
References and practical resources: small-farm guides on crop mapping, rotation planning, and microbial soil health offer implementation pathways for producers.
References and practical resources: explore adaptive rotation and microbial consortia approaches in the linked farm resources above for integrated soil-to-cellar success.
References and practical resources: consult local extension agents to adapt the soil-to-cellar method to regional conditions and microclimates.
Thank you for reading this soil-to-cellar guide to harvest root vegetables properly and build a reliable year-round supply.


